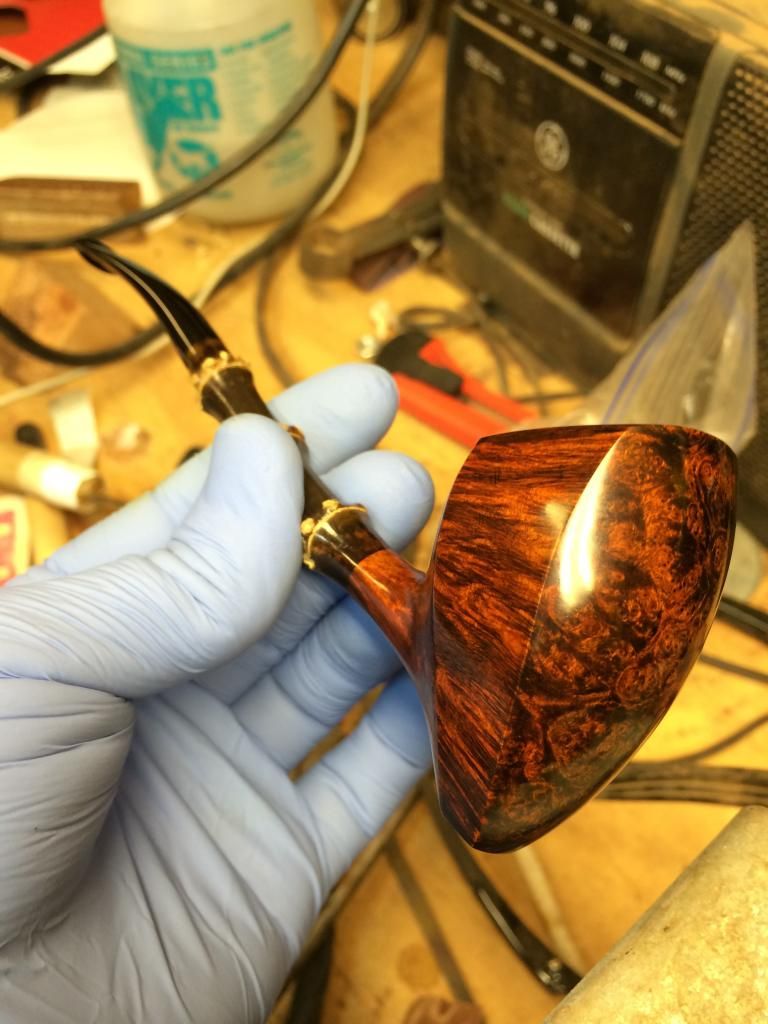
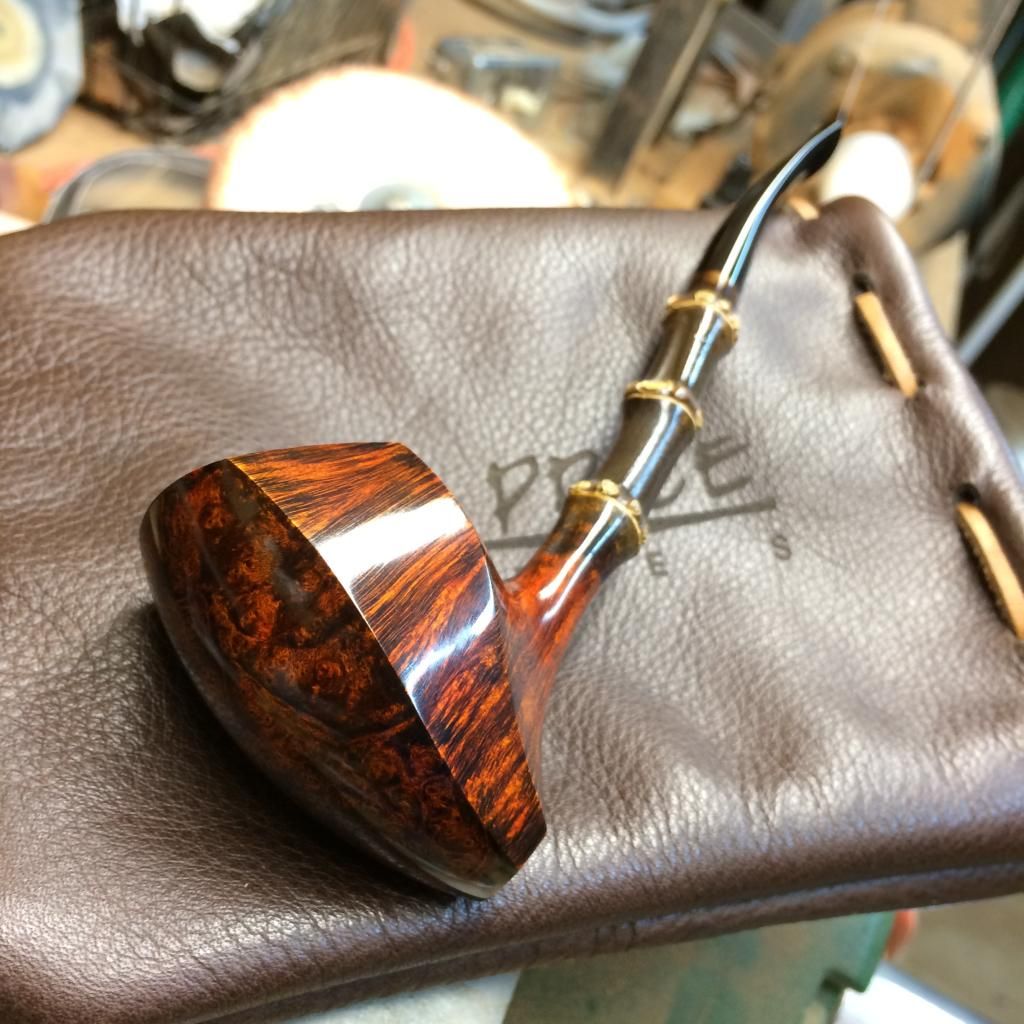
Pipe #11 - Elephant's Foot ~ Updated pics

Want to show you work to the world? Want a place to post photos of your work and solicit the opinions of those that have gone before you? Post your work here.
fiddlestix
Posts: 101
Joined: Sat Nov 23, 2013 11:14 pm

Pipe #11 - Elephant's Foot ~ Updated pics

Post by fiddlestix »

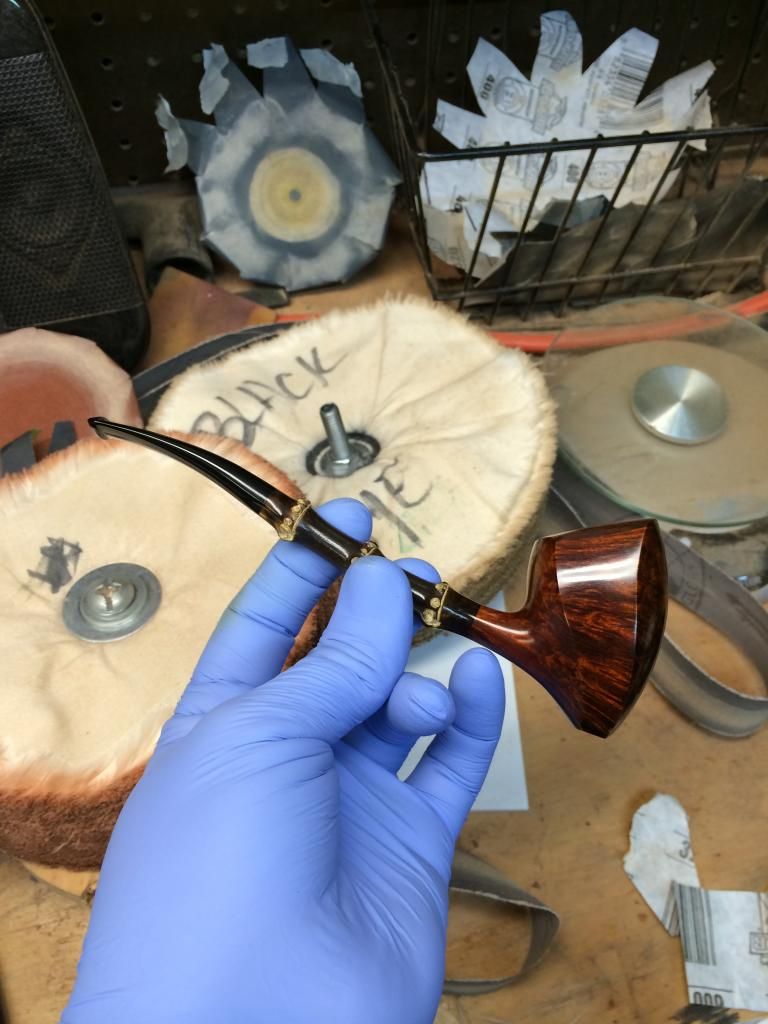
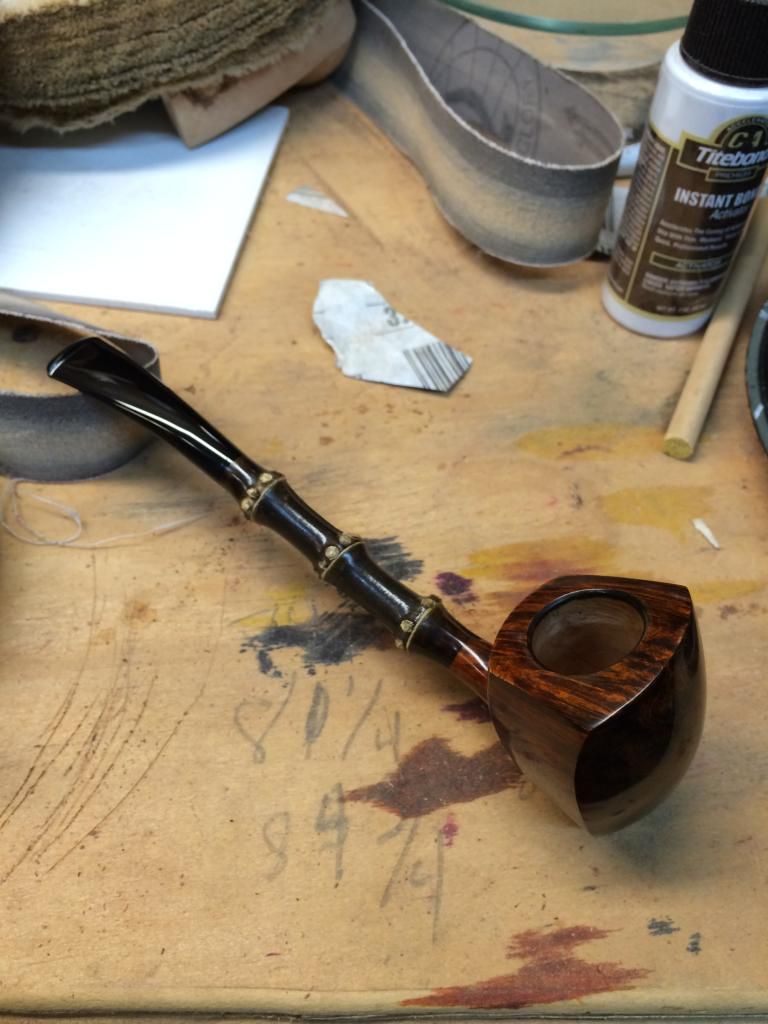
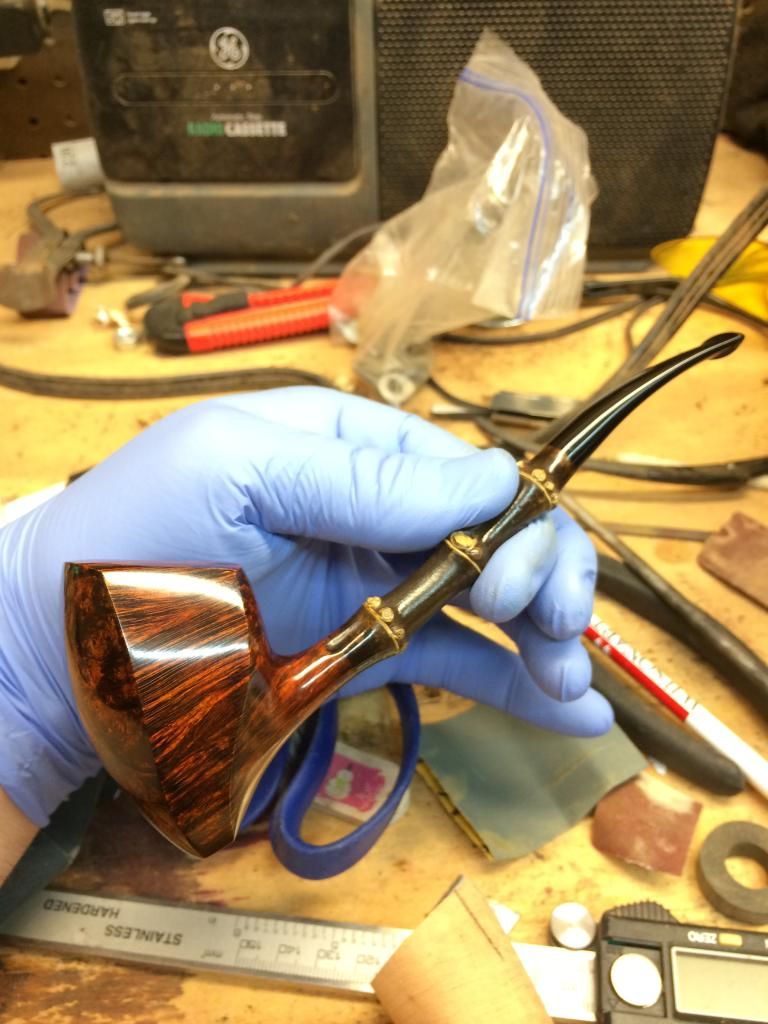
This is my most recent pipe. I think it is my best execution to date, but I know there are a lot of things that can be improved upon. I have a couple of pics missing that I thought I had on my phone, but don't. I'll try to add them tonight. (Top view, stem/shank face, and my front view was taken at a bit of an angle which is making the symmetry look off).

Any critique would be greatly appreciated.

-Mark
Image

Image

Image

Image

Image

Image

Image
Last edited by fiddlestix on Mon Sep 22, 2014 10:56 pm, edited 1 time in total.
User avatar
seamonster
Posts: 380
Joined: Fri Feb 21, 2014 12:43 am
Location: Portland, OR

Re: Pipe #11 - Elephant's Foot

Post by seamonster »

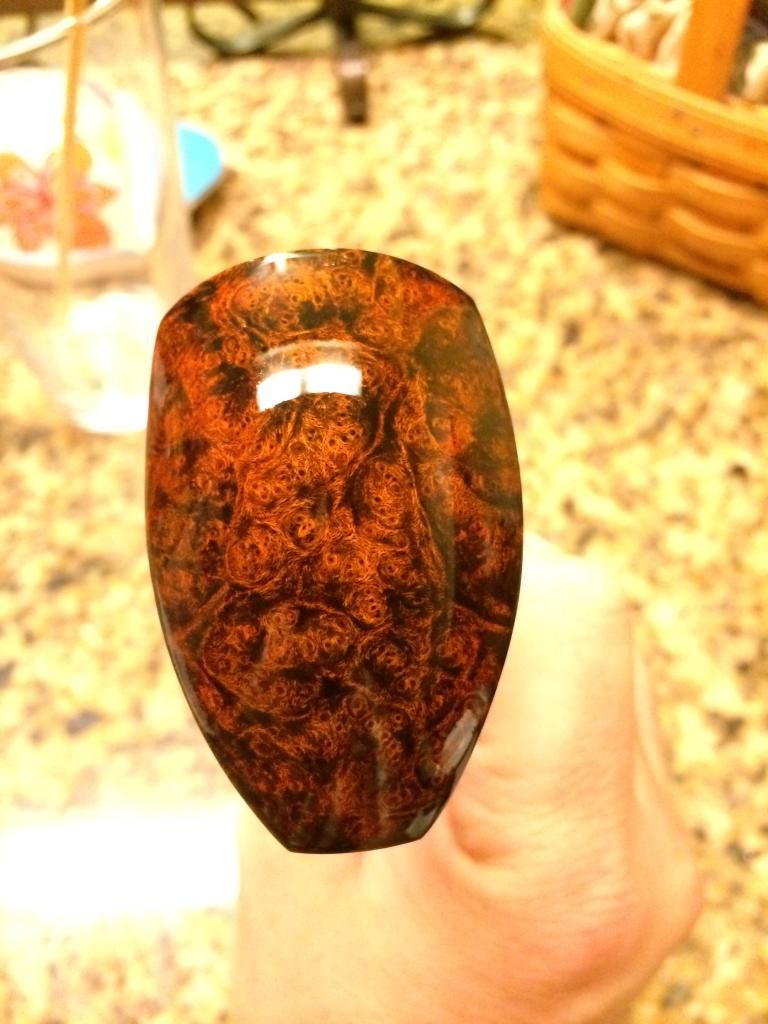
finish and grain orientation look spot on to me, superb!
proportions look good, though in my eye, maybe the bowl needs to be a touch smaller, or the shank/bamboo a touch fatter?
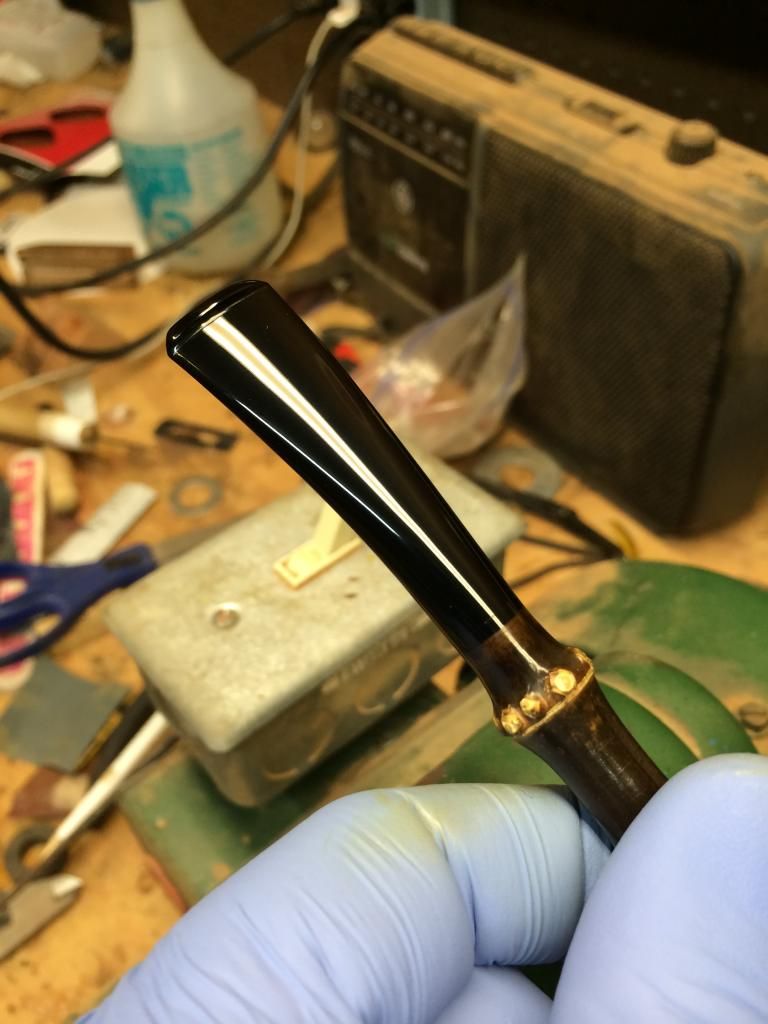
In the stem photo, is there a sharp crease behind the button, or a scratch, or a light trick?

Overall: damn!

cheers,
Jeremy.
instagram.com/seamonster_workshop/
fiddlestix
Posts: 101
Joined: Sat Nov 23, 2013 11:14 pm

Re: Pipe #11 - Elephant's Foot

Post by fiddlestix »

Yep. The front of the buttons are giving me fits. I think your right on the proportions as well. Thanks for the input!
User avatar
sandahlpipe
Posts: 2106
Joined: Mon Feb 04, 2013 8:49 pm
Location: Zimmerman, MN
Contact:

Re: Pipe #11 - Elephant's Foot

Post by sandahlpipe »

Great work, Mark. I really need to get on your list before your prices skyrocket.
---
Fail early, fail often. Your success depends on it.

Jeremiah Sandahl
http://sandahlpipe.com
User avatar
d.huber
Posts: 2691
Joined: Mon Dec 12, 2011 9:28 pm
Location: Durham, NC
Contact:

Re: Pipe #11 - Elephant's Foot

Post by d.huber »

Your adjustments improved the pipe dramatically, but the bowl still feels like it's leaning too far back, like it's being pulled towards the shank with a taught string. If you try this shape again, cant the bowl forward to let the pipe relax.

To run with the string idea: on every pipe you make, imagine a string between the back of the rim (facing the smoker) and the button. Your goal should be to find a balancing point in the angles so that this string hangs with little tension. Maybe that makes no sense, but it helps me to visualize the relationship between bowl and shank. Let them balance each other instead of pull at each other.

Only other thing I see is these:

Image

Scratches on a smooth are unacceptable and you should hold yourself to a higher standard than that. You are too good already to let shit like this slide.

I look forward to seeing more pictures. I wanna see your slot, your tenon, and your mortise.

Great work, Mark.
http://www.dshpipes.com

"Strive for excellence, not for what someone else accepts."
-Tyler Beard
fiddlestix
Posts: 101
Joined: Sat Nov 23, 2013 11:14 pm

Re: Pipe #11 - Elephant's Foot

Post by fiddlestix »

Thanks, Jeramiah!
fiddlestix
Posts: 101
Joined: Sat Nov 23, 2013 11:14 pm

Re: Pipe #11 - Elephant's Foot

Post by fiddlestix »

d.huber wrote:Your adjustments improved the pipe dramatically, but the bowl still feels like it's leaning too far back, like it's being pulled towards the shank with a taught string. If you try this shape again, cant the bowl forward to let the pipe relax.

To run with the string idea: on every pipe you make, imagine a string between the back of the rim (facing the smoker) and the button. Your goal should be to find a balancing point in the angles so that this string hangs with little tension. Maybe that makes no sense, but it helps me to visualize the relationship between bowl and shank. Let them balance each other instead of pull at each other.

Only other thing I see is these:

Image

Scratches on a smooth are unacceptable and you should hold yourself to a higher standard than that. You are too good already to let shit like this slide.

I look forward to seeing more pictures. I wanna see your slot, your tenon, and your mortise.

Great work, Mark.

Thanks, David.

I think I understand what your saying about the string. The cant of the bowl has been one of the things I've been the most unsure of on this pipe since I got it shaped and drilled. I will definitely keep the string concept in mind from now on.

As for the scratches... Holy crap! I don't know how I missed that. I have looked this pipe over and over and I honestly haven't noticed those somehow. I totally agree that scratches aren't acceptable. Now I have to drive home at lunch so I can take another look.

Thanks for the critique! Very helpful.
User avatar
maxmil
Posts: 833
Joined: Sun Dec 12, 2010 5:46 pm
Location: La Coruña - Galicia - Spain
Contact:

Re: Pipe #11 - Elephant's Foot

Post by maxmil »

Very nice, and very well executed.
Best regards.
Félix
fiddlestix
Posts: 101
Joined: Sat Nov 23, 2013 11:14 pm

Re: Pipe #11 - Elephant's Foot

Post by fiddlestix »

The additional pics, as promised. Trying to work on a makeshift photo setup. Don't have it figured out yet, but it's somewhat better, at least. Need to remember to iron the sheet next time. :)


Image

Image

Image

Image

Image
User avatar
Red
Posts: 69
Joined: Thu Nov 23, 2006 8:00 pm
Location: Arlington, Tx.

Re: Pipe #11 - Elephant's Foot ~ Updated pics

Post by Red »

Great job, Mark!
fiddlestix
Posts: 101
Joined: Sat Nov 23, 2013 11:14 pm

Re: Pipe #11 - Elephant's Foot ~ Updated pics

Post by fiddlestix »

Red wrote:Great job, Mark!
Thanks, Red!
wdteipen
Posts: 2817
Joined: Sat Mar 29, 2008 1:05 pm

Re: Pipe #11 - Elephant's Foot ~ Updated pics

Post by wdteipen »

Looks good.
Wayne Teipen
Teipen Handmade Briar Pipes
http://www.teipenpipes.com
User avatar
d.huber
Posts: 2691
Joined: Mon Dec 12, 2011 9:28 pm
Location: Durham, NC
Contact:

Re: Pipe #11 - Elephant's Foot ~ Updated pics

Post by d.huber »

Sand the inside of your slot to 400 and buff with a loaded pipe cleaner. The bevel on the rim should have the same finish as the rest of the pipe on a smooth. These little extras make a difference and will help to elevate your work if you do them.

Overall excellent work. This level of quality on your workmanship should be your do-not-drop-below line.

I'm excited to see your work progress.
http://www.dshpipes.com

"Strive for excellence, not for what someone else accepts."
-Tyler Beard
fiddlestix
Posts: 101
Joined: Sat Nov 23, 2013 11:14 pm

Re: Pipe #11 - Elephant's Foot ~ Updated pics

Post by fiddlestix »

d.huber wrote:Sand the inside of your slot to 400 and buff with a loaded pipe cleaner. The bevel on the rim should have the same finish as the rest of the pipe on a smooth. These little extras make a difference and will help to elevate your work if you do them.

Overall excellent work. This level of quality on your workmanship should be your do-not-drop-below line.

I'm excited to see your work progress.
Thanks David. I'll put more time in on the slot. I'm having trouble buffing the rim in general, with out wearing away the other edges... You've given me some good goals to strive for on the next. Thanks.
User avatar
d.huber
Posts: 2691
Joined: Mon Dec 12, 2011 9:28 pm
Location: Durham, NC
Contact:

Re: Pipe #11 - Elephant's Foot ~ Updated pics

Post by d.huber »

fiddlestix wrote:
d.huber wrote:Sand the inside of your slot to 400 and buff with a loaded pipe cleaner. The bevel on the rim should have the same finish as the rest of the pipe on a smooth. These little extras make a difference and will help to elevate your work if you do them.

Overall excellent work. This level of quality on your workmanship should be your do-not-drop-below line.

I'm excited to see your work progress.
Thanks David. I'll put more time in on the slot. I'm having trouble buffing the rim in general, with out wearing away the other edges... You've given me some good goals to strive for on the next. Thanks.
You're welcome!

Try this: sand the bevel to 600 then stain. After that, remove the stain with 800 then 1000 until the finish matches the rest of the pipe then buff the bevel by hand. There are other similar methods to get a good matching finish. Try some stuff out.
http://www.dshpipes.com

"Strive for excellence, not for what someone else accepts."
-Tyler Beard
Charl
Posts: 1901
Joined: Mon Jan 07, 2008 3:03 pm
Location: South Africa

Re: Pipe #11 - Elephant's Foot ~ Updated pics

Post by Charl »

Looking grand! Well done
The Smoking Yeti
Posts: 1346
Joined: Tue Jan 10, 2012 4:55 pm
Contact:

Re: Pipe #11 - Elephant's Foot ~ Updated pics

Post by The Smoking Yeti »

Don't use a sheet. Use a piece of white poster board- the kind with a tougher glossy finish.

As far as scratches go- SHAME ON YOU! Na, we all miss that shit, for pipe #11, I think you're doing superb.

Alternative for the rim polishing, round it out a bit more so there isn't such a steep angle. Then just buff with slower rpms on your wheel.

Having a variable speed wheel for buffing is a lifesaver.

Your stem work looks great, the slot work is easily remedied as David explained.

Keep it up man!
My pipemaking stream of conscience/ website:

http://yetipipe.tumblr.com/
fiddlestix
Posts: 101
Joined: Sat Nov 23, 2013 11:14 pm

Re: Pipe #11 - Elephant's Foot

Post by fiddlestix »

maxmil wrote:Very nice, and very well executed.
Best regards.
Félix
Thank you, Félix!
fiddlestix
Posts: 101
Joined: Sat Nov 23, 2013 11:14 pm

Re: Pipe #11 - Elephant's Foot ~ Updated pics

Post by fiddlestix »

wdteipen wrote:Looks good.
Thanks, Wayne!
fiddlestix
Posts: 101
Joined: Sat Nov 23, 2013 11:14 pm

Re: Pipe #11 - Elephant's Foot ~ Updated pics

Post by fiddlestix »

Charl wrote:Looking grand! Well done
I appreciate the kind words, Charl!
Post Reply