#2: Dublin
#2: Dublin
Well, here's my second briar pipe. I'm not happy with the finish... it's the result of a few lessons learned... but I think I did fairly well with the shape.
It lost a little bit of the crispness in the shape because I sanded the finish off 4 different times...
So here it is. I'm posting it for critique. Lay it on me guys, I want to learn as much as I can from this before I start cutting into my next block.
And Tyler, I like the bevel.
It lost a little bit of the crispness in the shape because I sanded the finish off 4 different times...
So here it is. I'm posting it for critique. Lay it on me guys, I want to learn as much as I can from this before I start cutting into my next block.
And Tyler, I like the bevel.
Joe Thieman
- sandahlpipe
- Posts: 2106
- Joined: Mon Feb 04, 2013 8:49 pm
- Location: Zimmerman, MN
- Contact:
Re: #2: Dublin
What stain are you using for the finish? And which grits did you use before and after staining? If you want contrast, use a really dark stain first, sand it off, then use a lighter one.
The shaping avoids a lot of beginner mistakes. The bowl should be canted just a few degrees forward. On the shank/bowl junction the top of the shank goes in a bit too deep into the bowl while going a bit too shallow on the sides. I recommend shaping that part carefully by hand to get a sharp crease.
For the proportions, the shank should be shorter or thinner with the height of the bowl. This one looks a bit shank-heavy.
The lighting isn't good enough for me to see the grain very well. Perhaps you could try to shine some light directly on the pipe from multiple angles next time. It's not too expensive to build yourself a lightbox, and if you sell on the internet, good pictures will help your customers get a better idea of what they're buying.
Keep making pipes, Joe! And this is pretty good for a second briar.
- mightysmurf8201
- Posts: 712
- Joined: Sat Jan 07, 2012 12:44 pm
- Location: Hudson, OH
- Contact:
Re: #2: Dublin
Some of the staining looks a bit uneven. Proper, even sanding between staining will help avoid this. With practice, you'll develop a feel for proper sanding. Not bad for a second pipe. On your next one, concentrate on making straight lines straight, particularly the bottom of the bowl and shank.
-
- Posts: 363
- Joined: Thu Feb 13, 2014 3:36 pm
- Location: Colorado Springs, Co
Re: #2: Dublin
Hey joe. I picked up a 26" light box on ebay for like $30. It folds into itself, comes with three backdrop colors, two little lamps w/ bulbs, and a little tripod. Has pockets to hold the wares and such. It made a big difference in my presentation. Of course it didn't help my pipe skills. I haven't even used my good camera. I've just been using my iphone4 camera.
Your shank to stem transition looks very tight, and I like the bevel too.
Sent from my banana phone.
Your shank to stem transition looks very tight, and I like the bevel too.
Sent from my banana phone.
-
- Posts: 363
- Joined: Thu Feb 13, 2014 3:36 pm
- Location: Colorado Springs, Co
Re: #2: Dublin
Sent from my banana phone.
Re: #2: Dublin
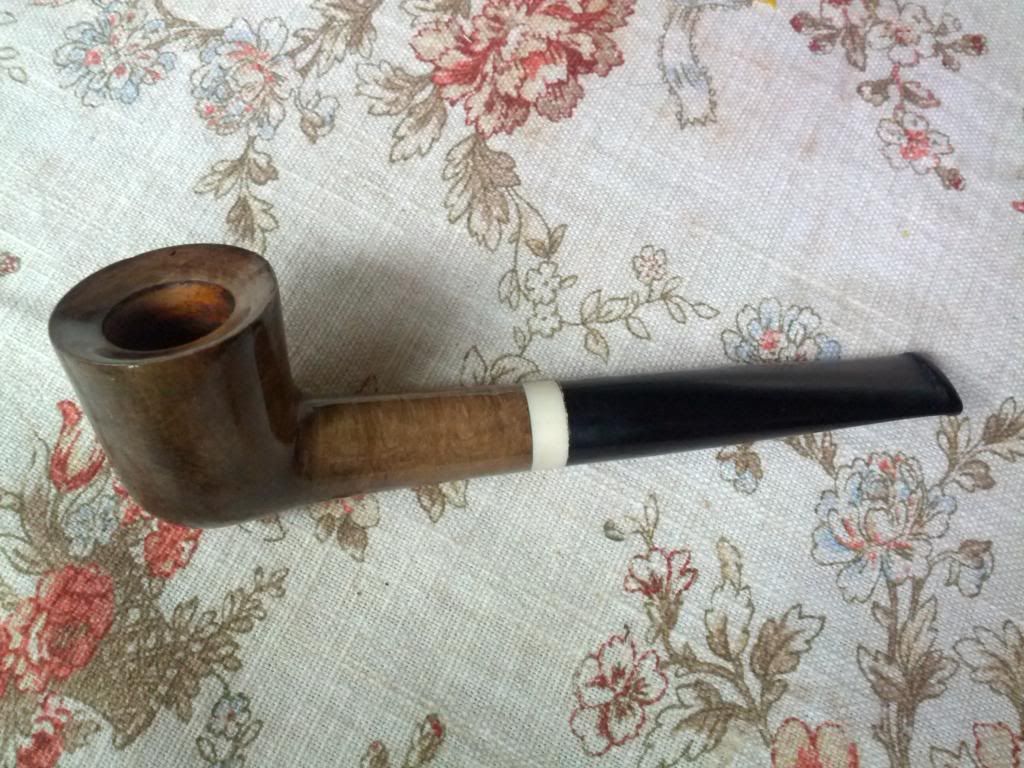
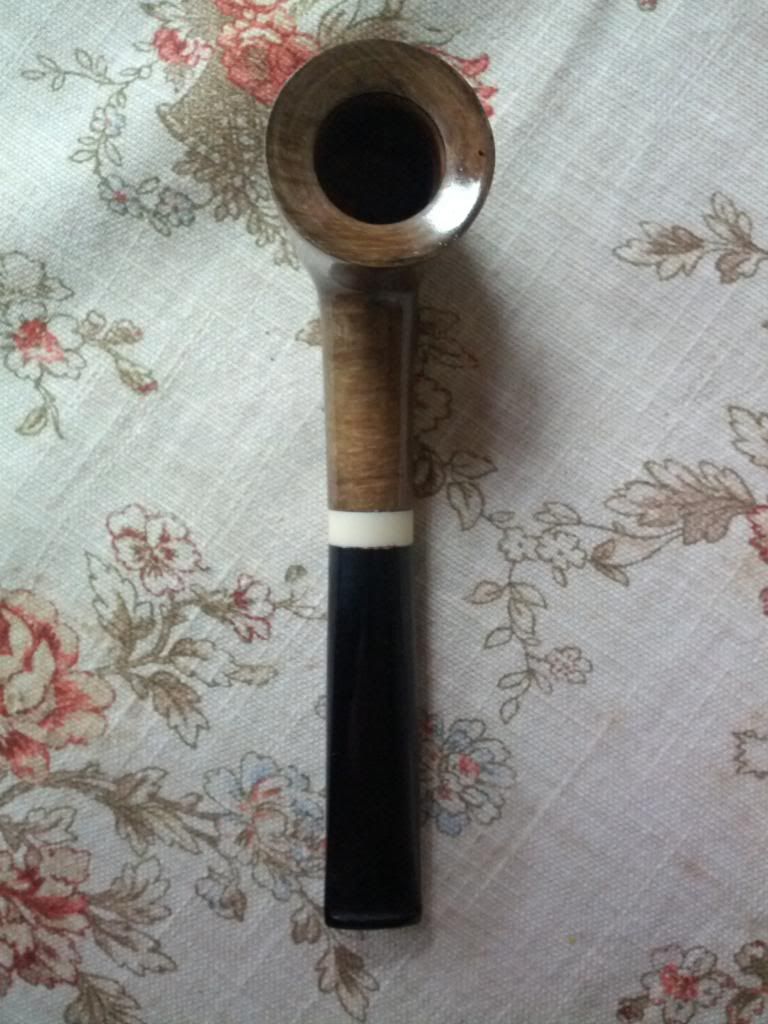
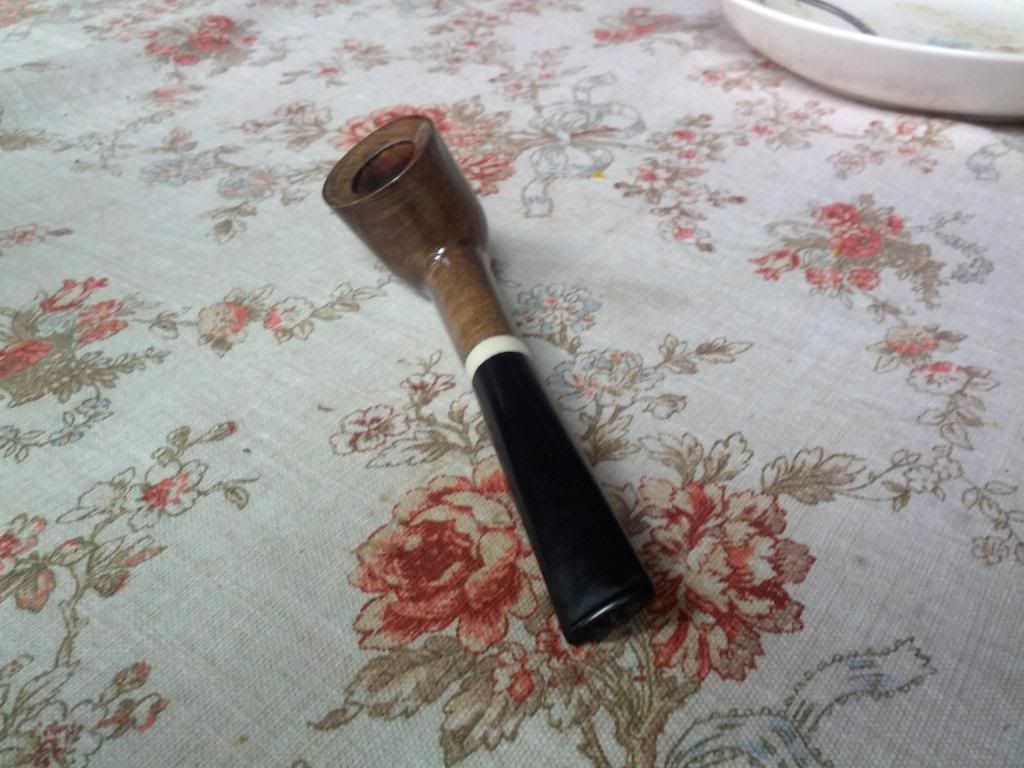
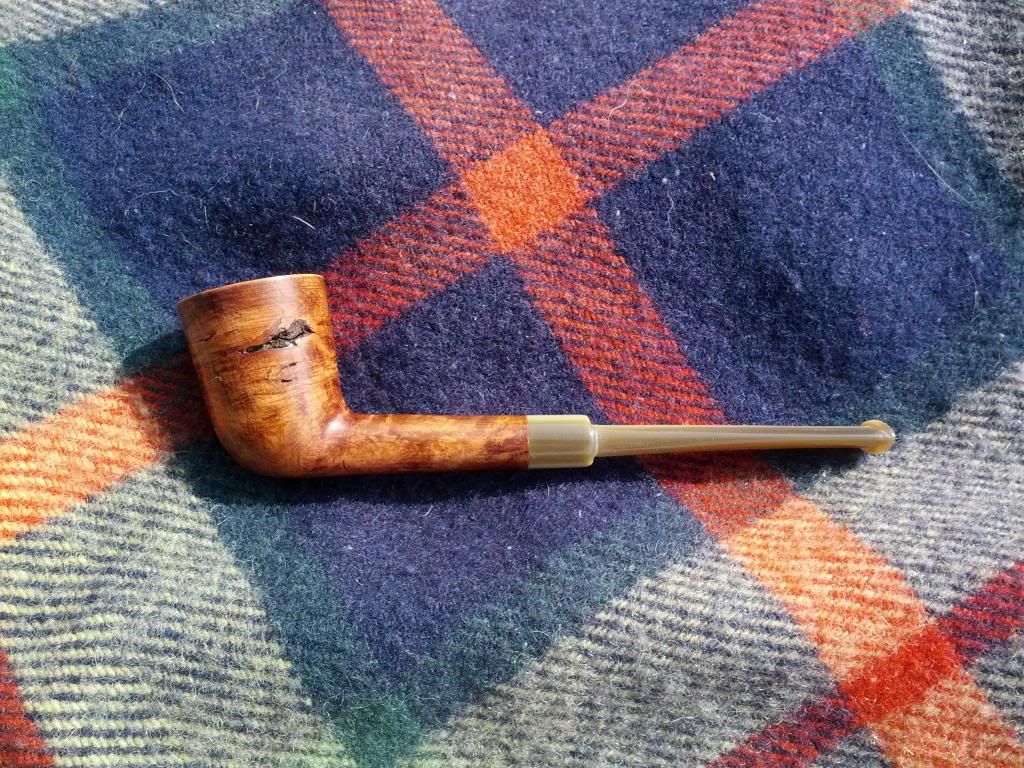
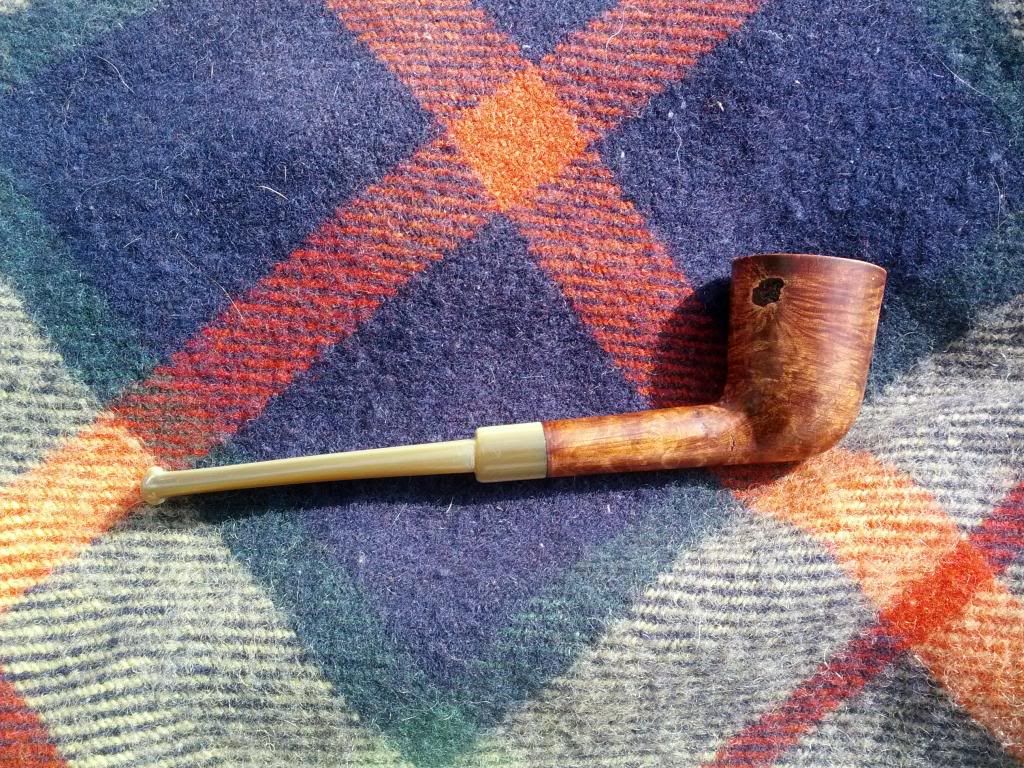
Thanks for the comments guys. Some of those things I've noticed, some I hadn't. I completely missed the notch on the top of the bowl-shank junction. I looked again in person and it's hard to see, though it's quite clear in the pictures. I might have to take pictures of my pipes before I finish them to try and bring out the flaws.
The finish is very uneven. I made the mistake of trying to use hardware store wood stain. It worked great on my first pipe, but I wanted a really light color anyway. I wanted this pipe dark, and that's where the trouble started. I sanded and refinished the pipe 4 times, by the end the thing was an ugly dirty looking mess, and there's no real grain pattern that can be distinguished through the blotches of pigment. Lesson learned, leather dye is on the way.
The button is too small as well. Not by much, but it slips out of my teeth sometimes.
I'll have to work on getting a light box of some kind, but I just bought a lathe two days ago and now my wallet could fall through a crack in the sidewalk, so I'll wait a little.
Joe Thieman
-
- Posts: 363
- Joined: Thu Feb 13, 2014 3:36 pm
- Location: Colorado Springs, Co
Re: #2: Dublin
A lathe is more fun, anyway
Sent from my banana phone.
- mightysmurf8201
- Posts: 712
- Joined: Sat Jan 07, 2012 12:44 pm
- Location: Hudson, OH
- Contact:
Re: #2: Dublin
A lathe is more fun I have that same light box set. I'm pretty happy with it. Makes up for some of my lack of skill with a camera!
-
- Posts: 363
- Joined: Thu Feb 13, 2014 3:36 pm
- Location: Colorado Springs, Co
Re: #2: Dublin
Well I've been shooting weddings on the side as the second /guys shooter for about 4years now. I know my way around manual settings. But having a good light box makes a huge difference. IMO.
Sent from my banana phone.
Re: #2: Dublin
Since you're asking, the most obvious quibble-point is that the bowl is too diminutive for the shank. The old Charatan carvers could get away with that kind of out-of-proportion architecture, but they were explicitly exploiting pretty grain to appeal to people for whom grain display was pretty much the whole point of pipemaking.
(A mentality we've inherited )
For giggles, take some scrap wood (doesn't have to even be briar). Turn a shank of it to some diameter you have a drill bit for, and a separate bowl. Drill the bowl at the juncture angle you want to accept the shank & insert it. Then study the joint that results.
(A mentality we've inherited )
For giggles, take some scrap wood (doesn't have to even be briar). Turn a shank of it to some diameter you have a drill bit for, and a separate bowl. Drill the bowl at the juncture angle you want to accept the shank & insert it. Then study the joint that results.
Re: #2: Dublin
Well, as soon as I faced off my next block of briar I found it had a huge flaw in it... so I decided to make another Dublin (this time a 'long Dublin') and experiment with a few new techniques. So here it is, I concentrated on making some of the lines straighter, the shank is skinnier, and there's more cant to the bowl. I also used the leather dye. Much better results! There are still a few sanding scratches, and a couple of nicks, but since this pipe was flawed from the start I wasn't trying very hard. ...and when I turned the shank on the lathe I got it a little crooked, so the shank now looks curved and the stem crooked...
Joe Thieman
Re: #2: Dublin
Shame about the block. Got to work on sanding properly, there are lots of scratches. But proportions are good.
- sandahlpipe
- Posts: 2106
- Joined: Mon Feb 04, 2013 8:49 pm
- Location: Zimmerman, MN
- Contact:
Re: #2: Dublin
Maybe just a little less cant on the bowl next time. Otherwise it looks decent for a shop pipe.
Sent from my iPhone using Tapatalk
Re: #2: Dublin
First more cant, now less cant... can you make up your mind?sandahlpipe wrote:Maybe just a little less cant on the bowl next time...
Joe Thieman
- sandahlpipe
- Posts: 2106
- Joined: Mon Feb 04, 2013 8:49 pm
- Location: Zimmerman, MN
- Contact:
Re: #2: Dublin
It should be between 3 and 5°. It's hard to get it just right. I think it took me about a half dozen tries to get it. And that's after I knew about the cant. And when I say 3-5, I'm talking about the drilling lines, not the back of the bowl to the top of the shank. I think you got the back of the bowl to about 5°. That means the chamber is probably around 10°.
But you're getting closer and that's great!