Want to show you work to the world? Want a place to post photos of your work and solicit the opinions of those that have gone before you? Post your work here.
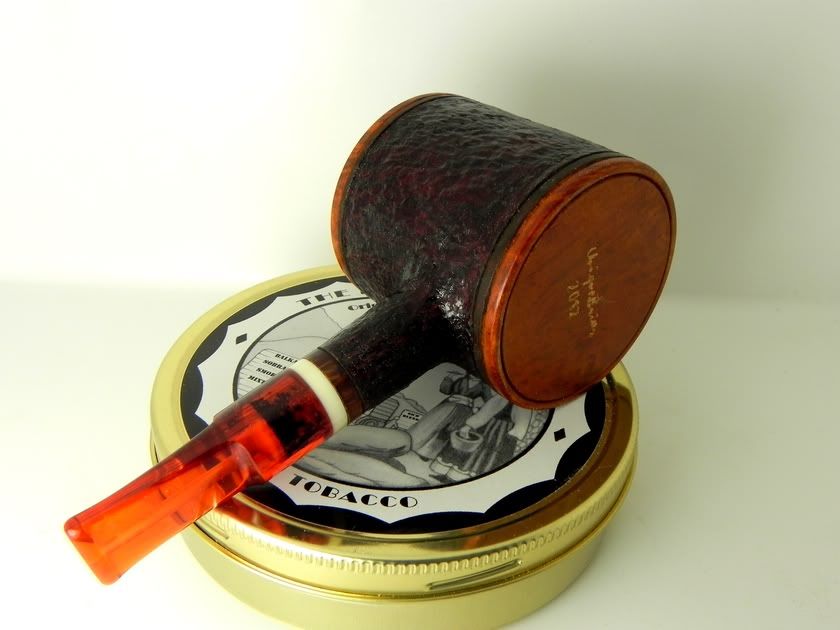
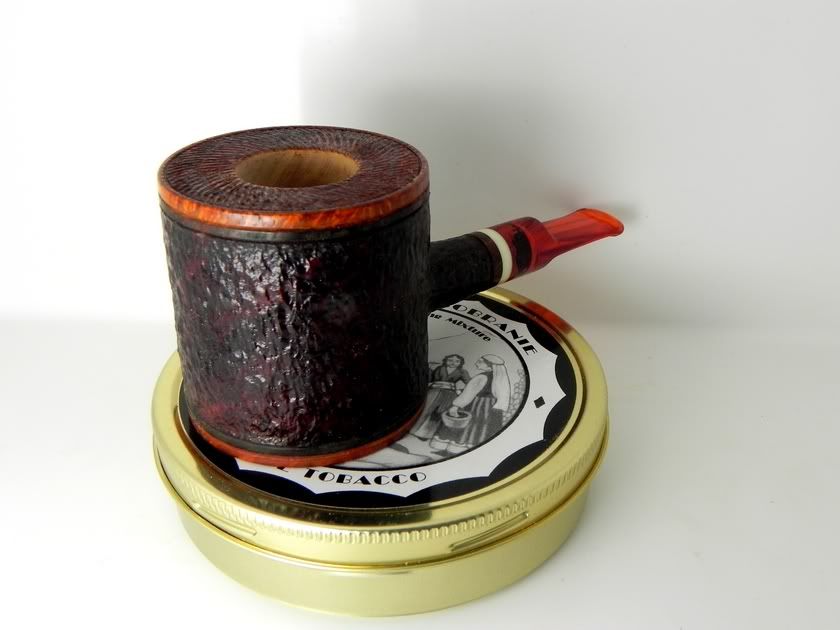
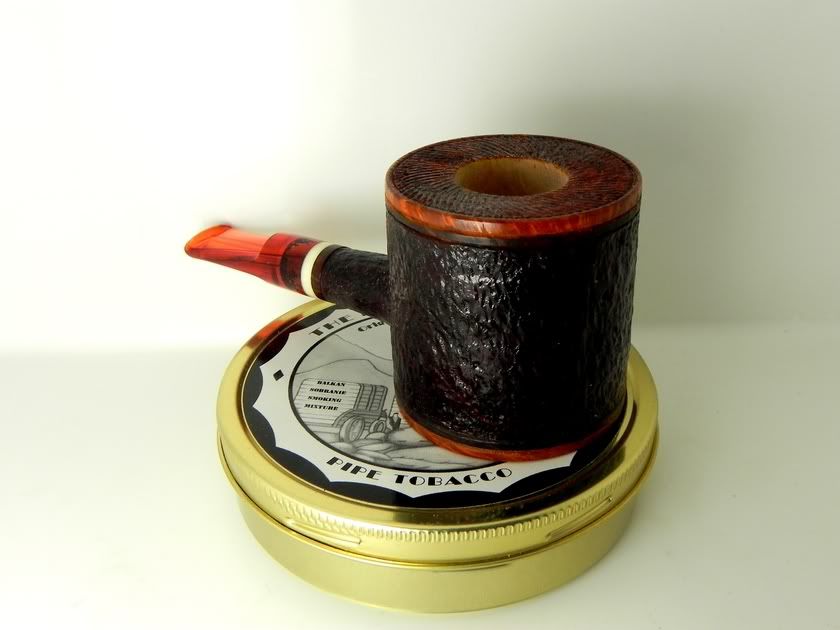
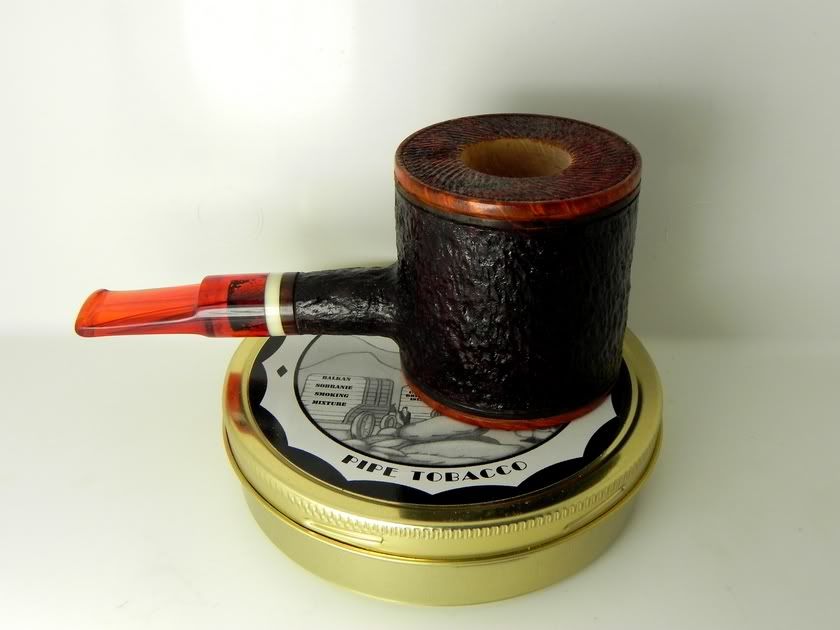
I'm not sold on the proportions honestly. I personally have a hard time smoking a pipe that doesn't mesh with me aesthetically. I feel like this one needs to lose a lot of weight, and probably get a bigger shank and stem.
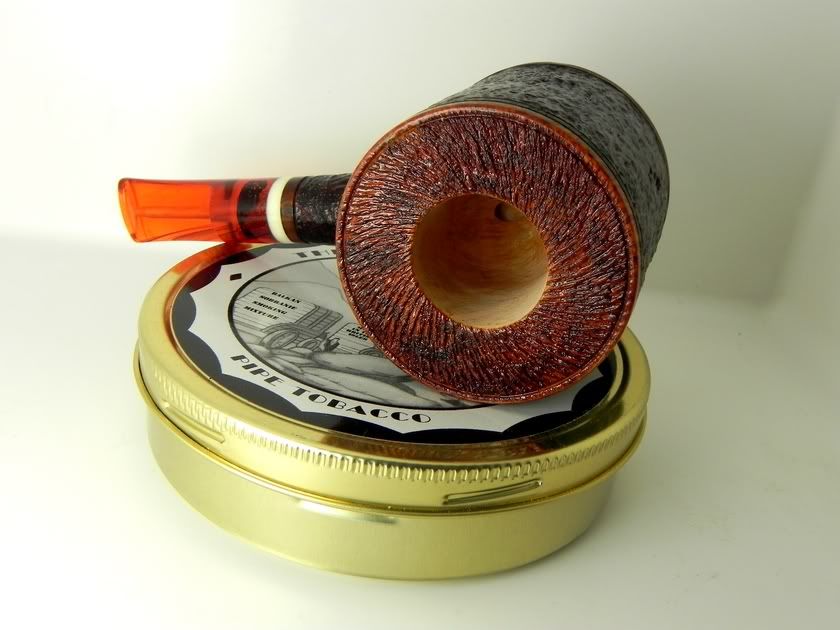
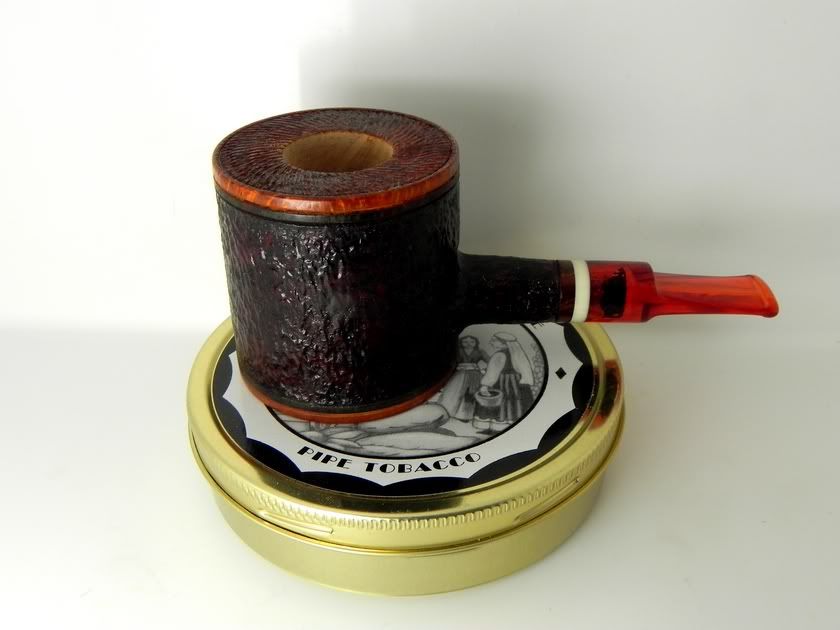
I'm curious as to how you did that pattern around the bowl- it looks pretty cool!
One other thing is I can see tooling marks from the lathe on the bottom of the pipe.
I think you are getting a good hang on getting the shapes you're looking for. This pipe isn't for me, but I can tell there was skill involved in making it.
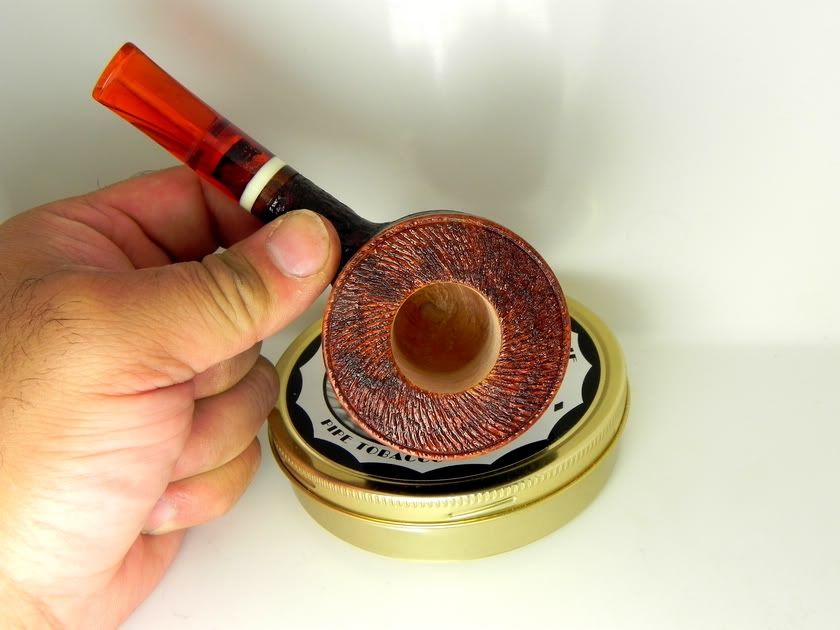
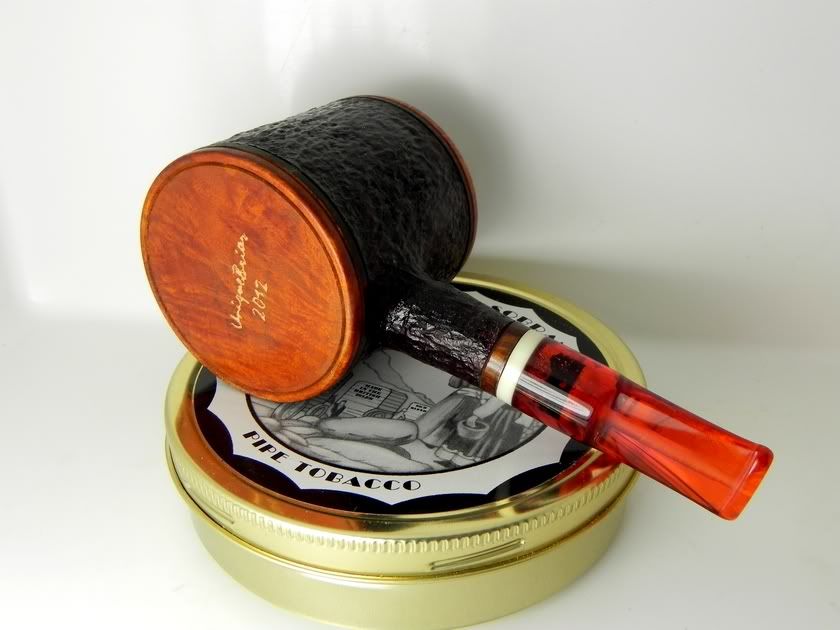
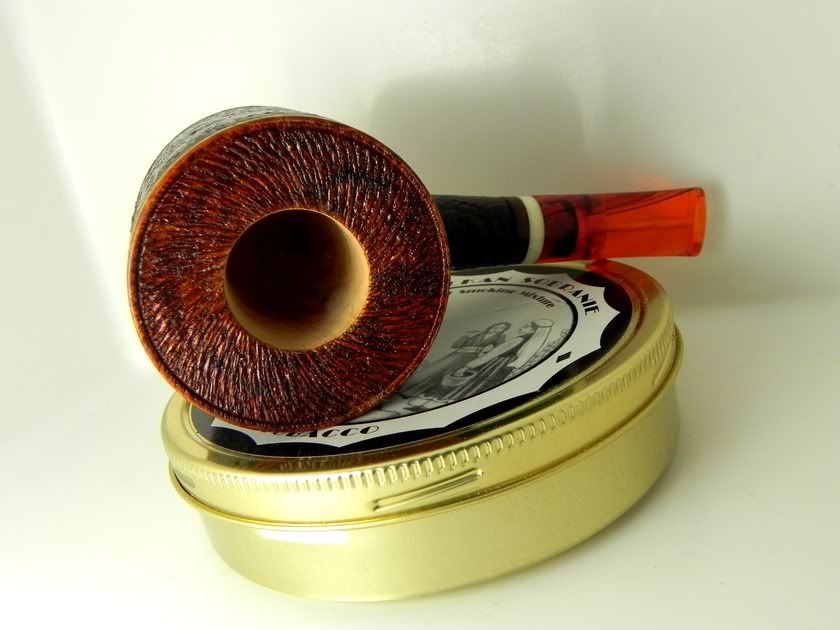
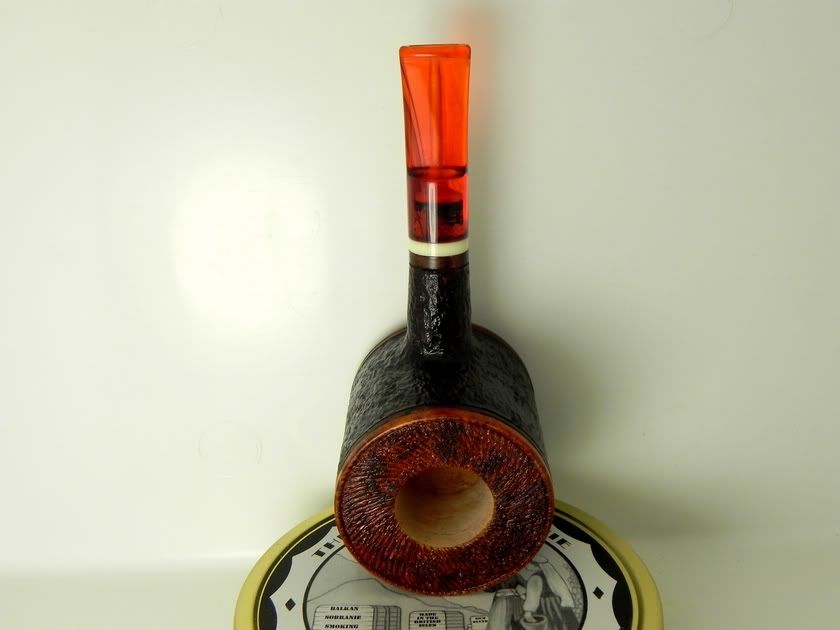
I have one major critique that will really make your pipes smoke better. In the 2nd picture you can see exactly where your 5/32nd bit stopped and your 1/16th picked up. There is a wall there. That wall is going to grab all kinds of air and collect moisture. That moisture is going to roll back into your bowl and cause gurgle.
You have drilled these two elements correctly, there's just two more steps you need to do to make it 100% better. Go back in with a 5/32nd tapered bit and take it as far as you can. From there you're going to need to go in and widen your 1/16th hole up from the button end. Kurt put a nice video tutorial together on this site. With those two extra steps your pipes are going to smoke a ton better.
Growley wrote:I think you are getting a good hang on getting the shapes you're looking for. This pipe isn't for me, but I can tell there was skill involved in making it.
I have one major critique that will really make your pipes smoke better. In the 2nd picture you can see exactly where your 5/32nd bit stopped and your 1/16th picked up. There is a wall there. That wall is going to grab all kinds of air and collect moisture. That moisture is going to roll back into your bowl and cause gurgle.
You have drilled these two elements correctly, there's just two more steps you need to do to make it 100% better. Go back in with a 5/32nd tapered bit and take it as far as you can. From there you're going to need to go in and widen your 1/16th hole up from the button end. Kurt put a nice video tutorial together on this site. With those two extra steps your pipes are going to smoke a ton better.
I'll agree, the proportions are a little difficult to get past. I like the rustication style. The shank/stem area needs some work. The rustication tapers your shank, but the taper is not continued down the stem. It breaks up the flow a bit.
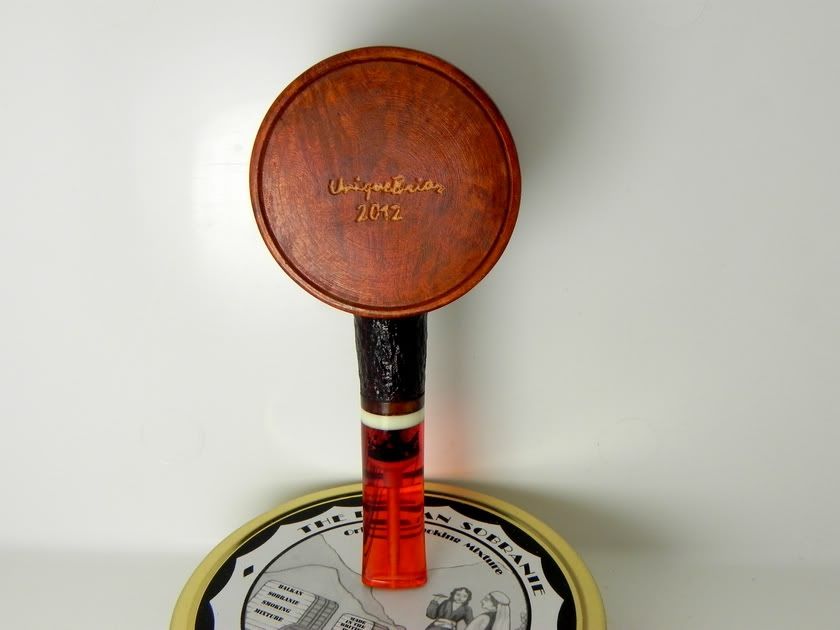
I don't know but I really like this. Sure, it could lose a little weight, but it's has its own appeal. I don't always feel like every pipe necessarily needs to be in proportion to be pleasing, visually, and to the touch. The finishing techniques have a nice visual harmony and it looks like it would feel nice in the hand. I really like the spiral rusticating on top and even the subtle rustication on the stummel is a nice change of pace from most rusticated pipes. The grooves, or whatever you call them, near the top and bottom (and on the underside), I think, would be too much on a classically proportioned pipe, but, here, they give this otherwise folksy looking pipe a little elegance. It's a nice mix. The only other critique I would say is you may want to clean up your chisel marks on the bottom of the bowl. It looks like a decent block and the tiny chisel grooves hide the grain. Nice website too, btw. Thanks for posting.
“When one man, for whatever reason, has the opportunity to lead an extraordinary life, he has no right to keep it to himself”
― Jacques-Yves Cousteau
That pattern on the top is really cool. I'll ask too. How did you do it? I like the subtle rustication as well. In some of the pictures the bowl almost looks purple. What is the actual color?
Brandon
Brandon Brooks
__________________________________
"The voices in my head won't let me have any imaginary friends"
Brandon Brooks
Since the maker has not yet volunteered any info I will dare to speculate. I posted earlier about it possibly being done with a "chattering" tool. This is the opposite of most lathe work where chatter marks are the enemy. The tool has a semi-flexible blade that chatters in a rhythmic pattern to create various designs. On second thought I now believe it was done with a tool such as the Henry Taylor Elf. This tool has different rotary ball cutters that spin with the wood and cut various patterns depending on how they are held. There are demos on the net.
Then again he could have cut every single groove with a carving tool or perhaps he has found a way to train termites. Henry Taylor also makes an extremely sharp pointed tool to add accent grooves around what the Elf has created (note the small groove at the very edge of the top and bottom). This pointy tool is also useful to say isolate a band of sand blast from the adjacent un-blasted wood rather than relying solely on a tape mask. Of course one can also make said tool from an old screwdriver rather than paying Henry Taylor's prices.
Chas.
Hello all and sorry for the late reply to do those grooves i used the Burr monster high speed carbide cutters as for the color i used tan used about 4 coats i also fixed the drilling with a 5/32nd tapered and widen with 1/16th hole up from the button end. thank you for correcting me on that part. I just want to thank all of you that takes the time to write valuable information to help others correct a small problem we all appreciate it especially me.