Shank Cap

Re: Shank Cap
So how do you go about making a teardrop shaped end cap? That one has been bugging me.
Andrew
www.andrewstaplespipes.com
www.andrewstaplespipes.com
Re: Shank Cap
That is an excellent question as well!andrew wrote:So how do you go about making a teardrop shaped end cap? That one has been bugging me.
Go hang a salami I'm a lasagna hog.

Re: Shank Cap
viewtopic.php?f=9&t=5216andrew wrote:So how do you go about making a teardrop shaped end cap? That one has been bugging me.
-
KurtHuhn

- Site Admin
- Posts: 5326
- Joined: Thu Nov 23, 2006 8:00 pm
- Location: United States/Rhode Island
Re: Shank Cap
Yep - as Todd said in that thread above, there's no secret. Just a lot of handwork.
-
Tyler

- Site Supporter
- Posts: 2376
- Joined: Thu Nov 23, 2006 8:00 pm
- Location: Farmersville, TX
- Contact:
Re: Shank Cap
There has been a lot of ways described for doing an end shank on the thread, but none are how I did it. For fear of sounding like a jerk, I think there is a lot of over-complication going on.
I had a shaped and drilled pipe. I was totally done shaping, and I decided I wanted the cap.
Here's what I did:
1. Find suitable piece of ivory and drill through it with a bit bigger than my mortise. Fwiw, this is the one and only time I ever use my drill press for making a hole while pipe making.
2. Mount ivory through hole just drilled on a mandrel of some sort.
3. Face both sides of the ivory to square and get desired thickness.
4. Turn to appropriate size and shape (this one was easy because the shank was round)
5. Bore larger countersink hole for stem.
Done with cap.
1. Take stummel and mount on a mandrel in the mortise.
2. Turn small tenon to fit the hole in the ivory.
Done.
Once all finishing is done -- stain, polish, everything -- the very last thing I do is glue the cap on. FWIW, in the OP photo, the cap is still not glued on.
Tyler Lane Pipes
http://www.tylerlanepipes.com
http://www.tylerlanepipes.com
Re: Shank Cap
wow, you *really* sound like a jerk.Tyler wrote:There has been a lot of ways described for doing an end shank on the thread, but none are how I did it. For fear of sounding like a jerk, I think there is a lot of over-complication going on.
I had a shaped and drilled pipe. I was totally done shaping, and I decided I wanted the cap.
Here's what I did:
1. Find suitable piece of ivory and drill through it with a bit bigger than my mortise. Fwiw, this is the one and only time I ever use my drill press for making a hole while pipe making.
2. Mount ivory through hole just drilled on a mandrel of some sort.
3. Face both sides of the ivory to square and get desired thickness.
4. Turn to appropriate size and shape (this one was easy because the shank was round)
5. Bore larger countersink hole for stem.
Done with cap.
1. Take stummel and mount on a mandrel in the mortise.
2. Turn small tenon to fit the hole in the ivory.
Done.
Once all finishing is done -- stain, polish, everything -- the very last thing I do is glue the cap on. FWIW, in the OP photo, the cap is still not glued on.
-
Tyler
- Site Supporter
- Posts: 2376
- Joined: Thu Nov 23, 2006 8:00 pm
- Location: Farmersville, TX
- Contact:
Re: Shank Cap
I figured you were used to it by now.e Markle wrote:wow, you *really* sound like a jerk.Tyler wrote:There has been a lot of ways described for doing an end shank on the thread, but none are how I did it. For fear of sounding like a jerk, I think there is a lot of over-complication going on.
I had a shaped and drilled pipe. I was totally done shaping, and I decided I wanted the cap.
Here's what I did:
1. Find suitable piece of ivory and drill through it with a bit bigger than my mortise. Fwiw, this is the one and only time I ever use my drill press for making a hole while pipe making.
2. Mount ivory through hole just drilled on a mandrel of some sort.
3. Face both sides of the ivory to square and get desired thickness.
4. Turn to appropriate size and shape (this one was easy because the shank was round)
5. Bore larger countersink hole for stem.
Done with cap.
1. Take stummel and mount on a mandrel in the mortise.
2. Turn small tenon to fit the hole in the ivory.
Done.
Once all finishing is done -- stain, polish, everything -- the very last thing I do is glue the cap on. FWIW, in the OP photo, the cap is still not glued on.
Tyler Lane Pipes
http://www.tylerlanepipes.com
http://www.tylerlanepipes.com
-
KurtHuhn
- Site Admin
- Posts: 5326
- Joined: Thu Nov 23, 2006 8:00 pm
- Location: United States/Rhode Island
Re: Shank Cap
What I do is similar to that, but done at the same time as I drill the mortis while the block is chucked up. I agree that it sounds complex, but it's really not. As usual, once you see it, you tend to smack your forehead.Tyler wrote:There has been a lot of ways described for doing an end shank on the thread, but none are how I did it. For fear of sounding like a jerk, I think there is a lot of over-complication going on.
-
Tyler
- Site Supporter
- Posts: 2376
- Joined: Thu Nov 23, 2006 8:00 pm
- Location: Farmersville, TX
- Contact:
Re: Shank Cap
Right, I see how your method (and Sas's) aren't complicated. I wasnt really meaning your method when I said that. I've done it both of the ways you guys outlined. You might try the way I outlined it though. I think it has a major advantage of no need to plan the cap ahead of time. I decided to do the cap because I saw when finished that the pipe was going to need to be a blast. If it was going to be a smooth, I was going to do a whole different stem configuration. Additionally I didn't have to worry about a keeping a pristine shank face or working around an already afixed cap.KurtHuhn wrote:What I do is similar to that, but done at the same time as I drill the mortis while the block is chucked up. I agree that it sounds complex, but it's really not. As usual, once you see it, you tend to smack your forehead.Tyler wrote:There has been a lot of ways described for doing an end shank on the thread, but none are how I did it. For fear of sounding like a jerk, I think there is a lot of over-complication going on.
Tyler Lane Pipes
http://www.tylerlanepipes.com
http://www.tylerlanepipes.com
-
KurtHuhn
- Site Admin
- Posts: 5326
- Joined: Thu Nov 23, 2006 8:00 pm
- Location: United States/Rhode Island
Re: Shank Cap
Yes - your way is the way it MUST be done if you decide to shift gears after the pipe is shaped. Or if you shape before drilling.
Definitely not wrong, just another way of doing things.
Definitely not wrong, just another way of doing things.
Re: Shank Cap
Just doing some digging and reading; so Kurt, if you're insetting both sides of the ring on a mandrel, what kind of tool are you using; a boring bar?KurtHuhn wrote:You got most of your answers regarding the mounting of the end cap, but in terms of the above it's actually pretty simple. Turn it on a lathe.hawky454 wrote: I understand how extensions work and all but I don't understand how these shank caps are executed and perfectly rounded. Please, if this question has already been answered than I apologize.
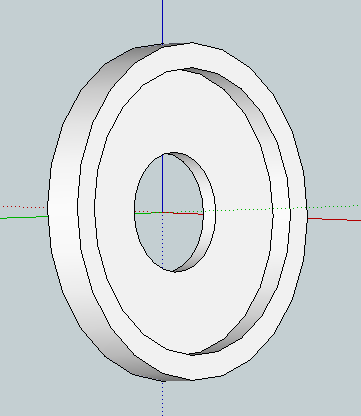
I don't know how Tyler did it, but I have a piece of ebonite that I use as a jig where I mount drilled and trimmed pieces of ivory or whatever else on a spigot/tenon with some double sided tape tape to hold it secure, then shape the entire thing, including internal steps.
All my shank caps look like this on both sides:
Then I turn/sand the radius to what it needs to be. The inset allows me to inset the shank and stem, for a seamless fit every time.
Naturally, if the shank is not round, it isn't as easy as above.
-
KurtHuhn
- Site Admin
- Posts: 5326
- Joined: Thu Nov 23, 2006 8:00 pm
- Location: United States/Rhode Island
Re: Shank Cap
My wood lathe, and a cutoff tool - mostly. Sometimes a skew.
This seems like a good candidate for a video. It's way simpler than it sounds.
This seems like a good candidate for a video. It's way simpler than it sounds.
Re: Shank Cap
I'm trying to figure out how you're insetting both sides of such a thin piece without hitting the mandrel itself; or are you just sacrificing the mandrel as you go? ThanksKurtHuhn wrote:My wood lathe, and a cutoff tool - mostly. Sometimes a skew.
This seems like a good candidate for a video. It's way simpler than it sounds.
-
UnderShade
- Posts: 256
- Joined: Wed Dec 19, 2018 9:59 am
Re: Shank Cap
I know this is old, but does anyone know of a video showing this technique being done? I get the concept of making the steps with 2 sizes of forstner bit on 1 side, but I can’t visualize how to do both sides. Kurt mentioned using a jig from ebonite and double sided tape. I guess you’d have to make the tenon on the jig and the hole on the cap an extremely tight fit to ensure the piece doesn’t get stuck on the bit?
-
KurtHuhn
- Site Admin
- Posts: 5326
- Joined: Thu Nov 23, 2006 8:00 pm
- Location: United States/Rhode Island
Re: Shank Cap
The mandrel is considered sacrificial - you just re-adjust every time you use it.
Yes - should be a tight fit. Also, I like to use small bits of double sided tape for extra hold. You have to go slow and be mindful - "feel" the tool while going.UnderShade wrote: ↑Sun Dec 29, 2019 3:00 am I know this is old, but does anyone know of a video showing this technique being done? I get the concept of making the steps with 2 sizes of forstner bit on 1 side, but I can’t visualize how to do both sides. Kurt mentioned using a jig from ebonite and double sided tape. I guess you’d have to make the tenon on the jig and the hole on the cap an extremely tight fit to ensure the piece doesn’t get stuck on the bit?
I've actually had a few requests for a video of this process. I'm going to try and get something put together here soon.
-
UnderShade
- Posts: 256
- Joined: Wed Dec 19, 2018 9:59 am
Re: Shank Cap
Thanks Kurt- would love a video on this. I just found a video Massis put out about a month ago that shows him briefly making one (though not the video’s focus). A video solely focused on this would be awesome and greatly appreciated!
https://youtu.be/kViWn3ON0Ww
https://youtu.be/kViWn3ON0Ww
-
UnderShade
- Posts: 256
- Joined: Wed Dec 19, 2018 9:59 am
Re: Shank Cap
Kurt,
I would still LOVE to see this executed in a video!
-
KurtHuhn
- Site Admin
- Posts: 5326
- Joined: Thu Nov 23, 2006 8:00 pm
- Location: United States/Rhode Island
Re: Shank Cap
Thanks for the reminder! I did capture at least one operation of this, an inset stem, in the video I took of making the PITH pipe. I'll be sure to put this on my list of videos to shoot sooner rather than later.