Shaping with files. A dowel in a vise is your best friend
Posted: Sat Feb 22, 2014 12:23 pm
The thought behind this ties into the article Sas posted the other day. This is all about learning the basics and developing your eye. Yes, there are people here who do 99 percent of their shaping and sanding on a disc, wheel, or what have you. If you are just starting out I would advise against this. You will ruin more briar (and rodstock for that matter) doing things above your pay grade, so to speak. This is the way I shape my pipes and it has helped me immensely.
I got this little trick from Quinton Wells. If you don't know who Quinton is, he runs the GKCPC carving contest and is one hell of a great pipe maker.
Be warned there are 3 different pipes I used in the pictures. The first is a billiard the second two are both apples (and are very similar). These are what I have onhand at the moment and what I grabbed.
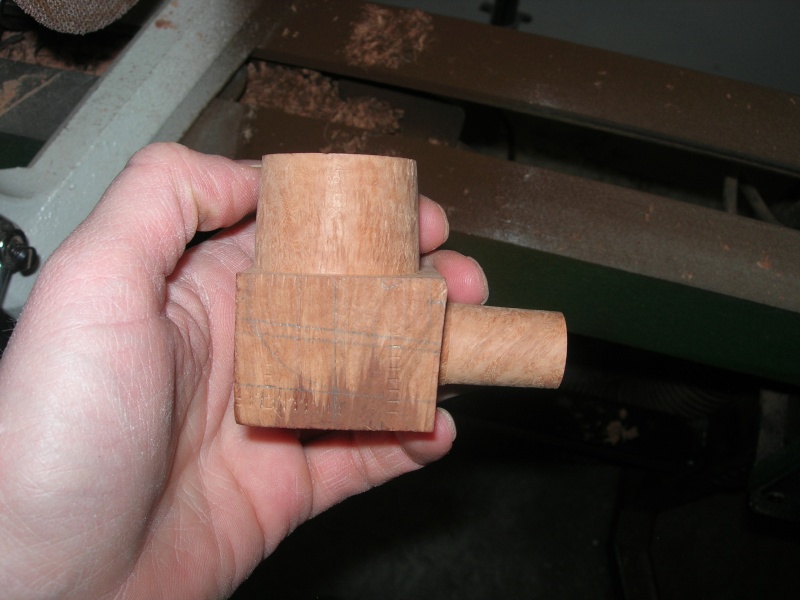
I start out with a block I have drilled and turned on the lathe.
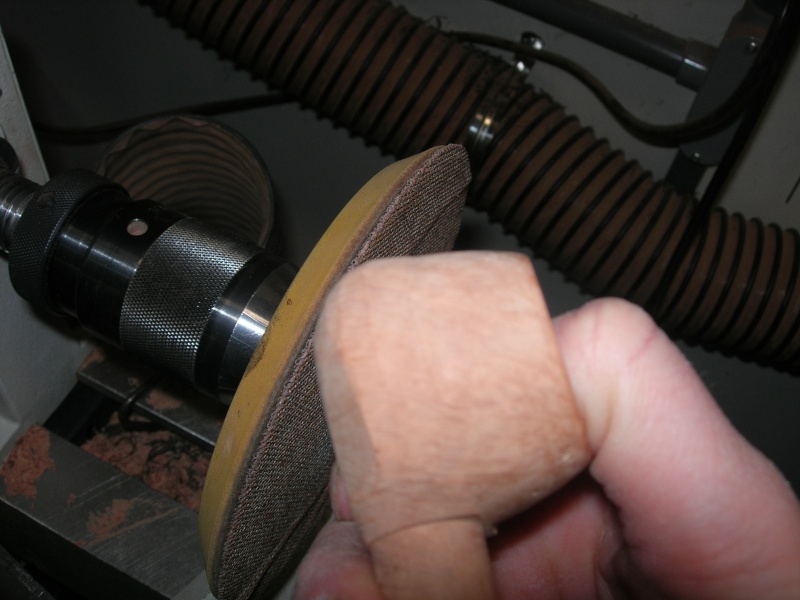
I use an 80 grit abralon sanding disc running at about 1400 rpm to remove the excess material. Yes, it takes about 10 minutes to knock off all the extra material. That's not the point, I have tons of control and room for error. I also don't have the fear of sanding one of my knuckles to the bone. If you know me, you know my tag line is the truth, not just something funny.....I really am Calamity Jane
Notice That I have not taken the bottom line of the bowl or the bowl/shank junction any where near final form.
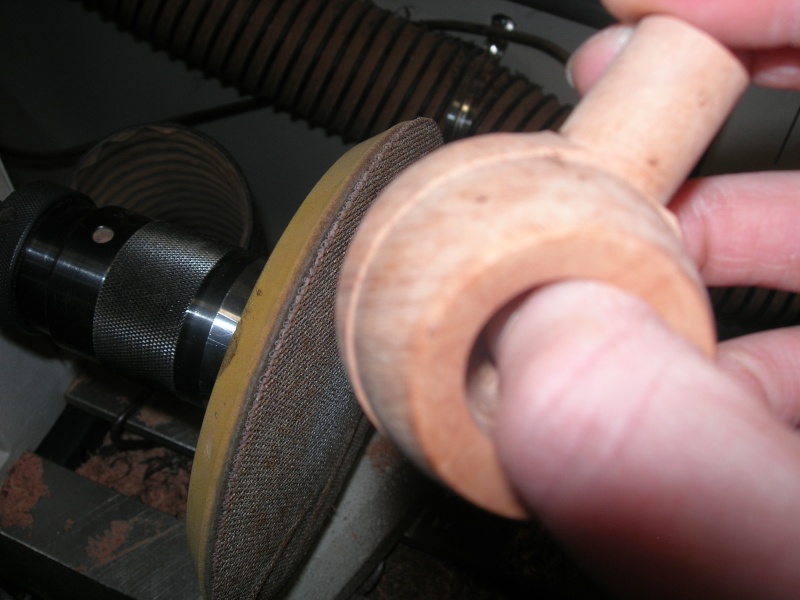
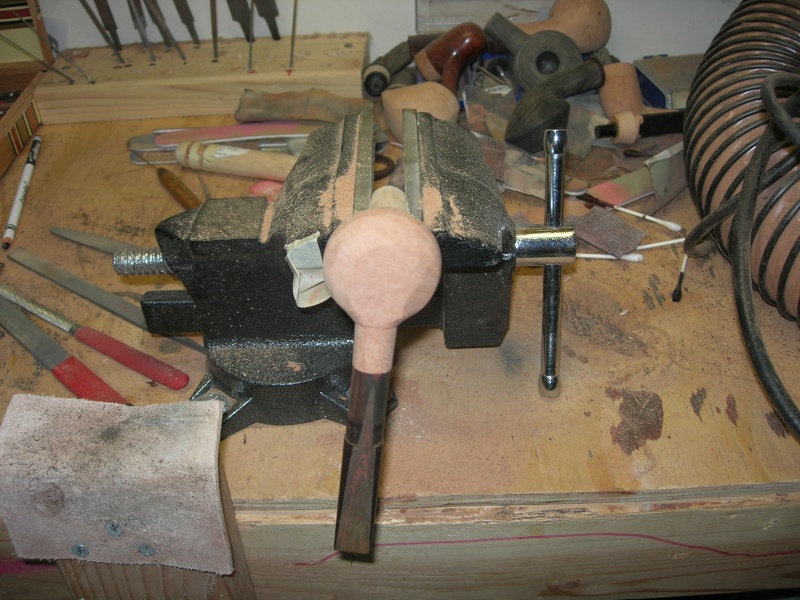
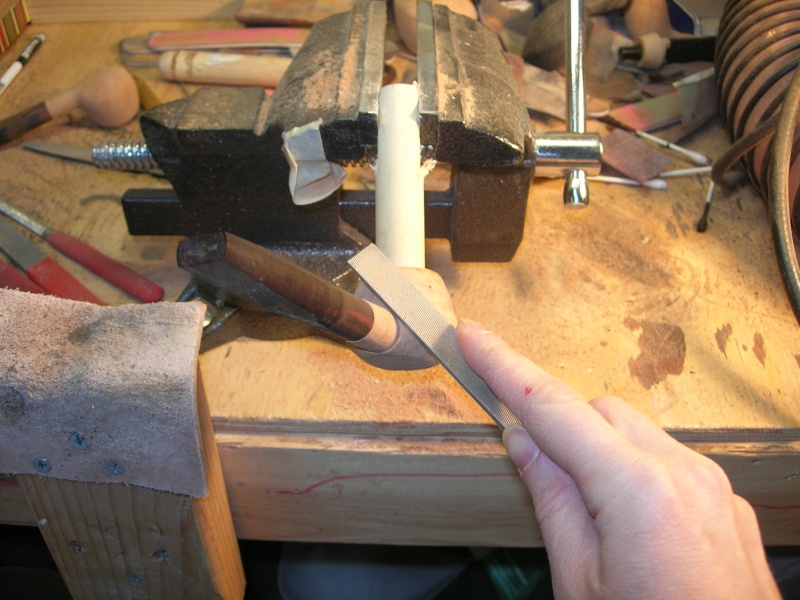
Next I take the stummel to the dowel. If your chamber is 3/4" get a 3/4" dowel (I know I shouldn't have to say that. But, I am a blonde so I assume everyone else is too)
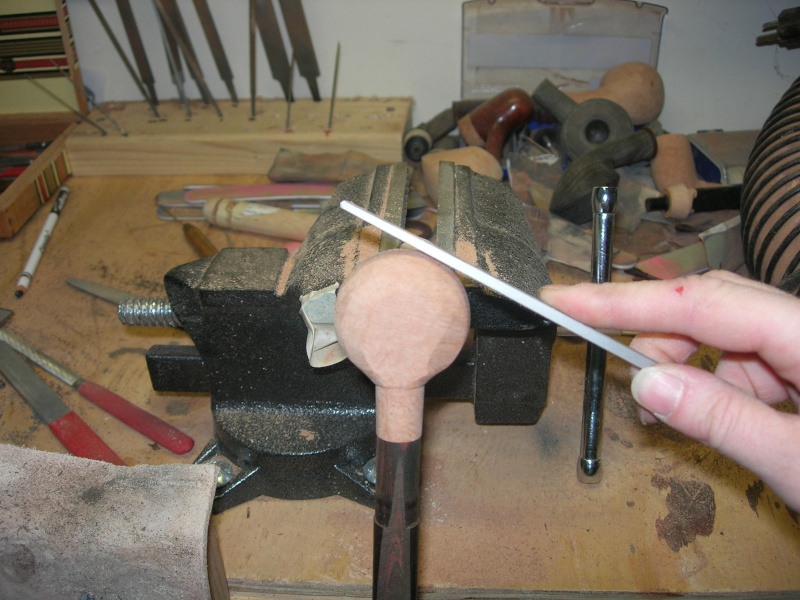
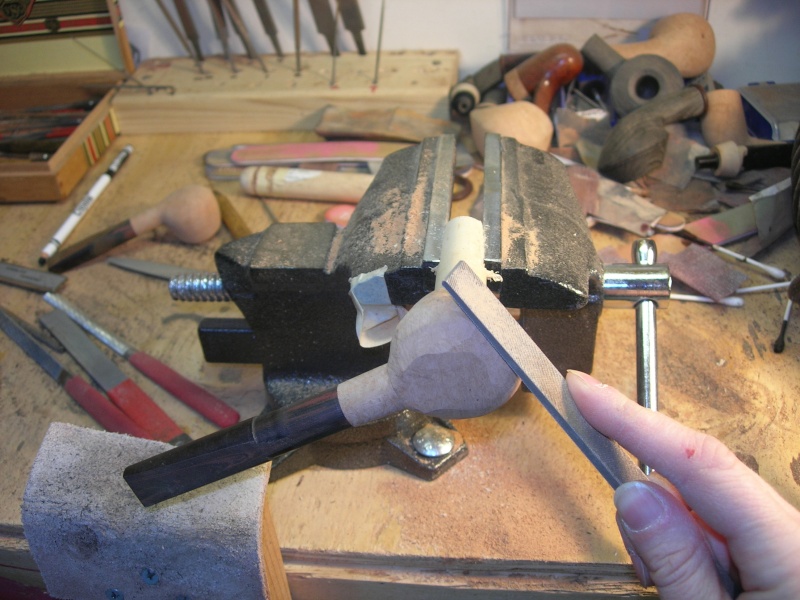
The first thing I shape is the profile of the pipe along the bottom line (the chin, if you will). I still have not touched the bowl/shank junction (it's actually one of the last things on the bowl I shape). (sorry I didn't take a picture of this, but hopefully you can follow). From there I start working my way around the bowl, on both sides, towards the shank. The easiest way to do this is to put your file to one side of the chin (right where you stopped turning if you used a lathe), grab the shank and turn the pipe on the dowel towards the shank. The file will knock off all the high spots from the disc. Slowly work your way around. Move down the bowl and repeat the process until you have reached the bottom of the bowl. Move the dowel around and you can reach every part of the bowl with ease.
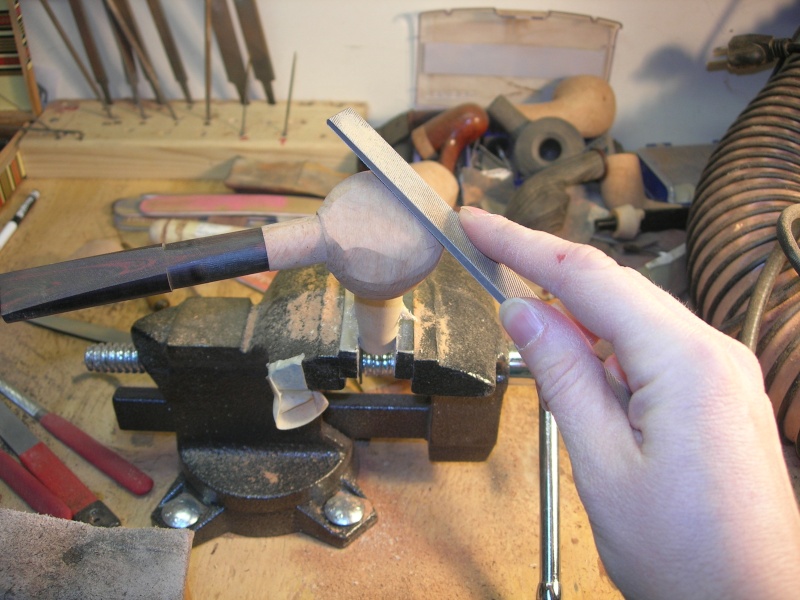
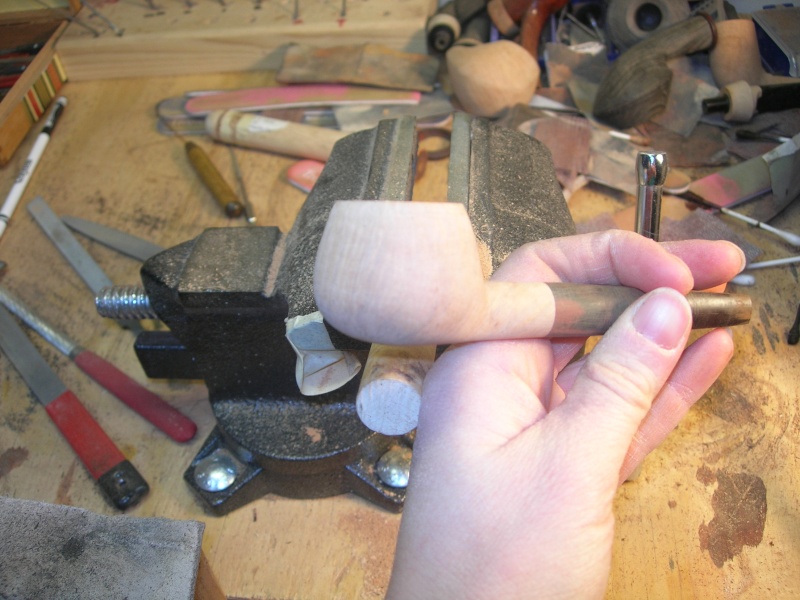
How do I check my progress? Pinch the wall of the pipe with your finger and thUmb (finger in the chamber, thumb on the outside) and SLOWLY spin the bowl around your finger. As you develop your skilz you will be able to feel the high spots, low spots, what have you.
From there I move to 80 grit sandpaper to hone the shape and then I'm ready for final sanding.
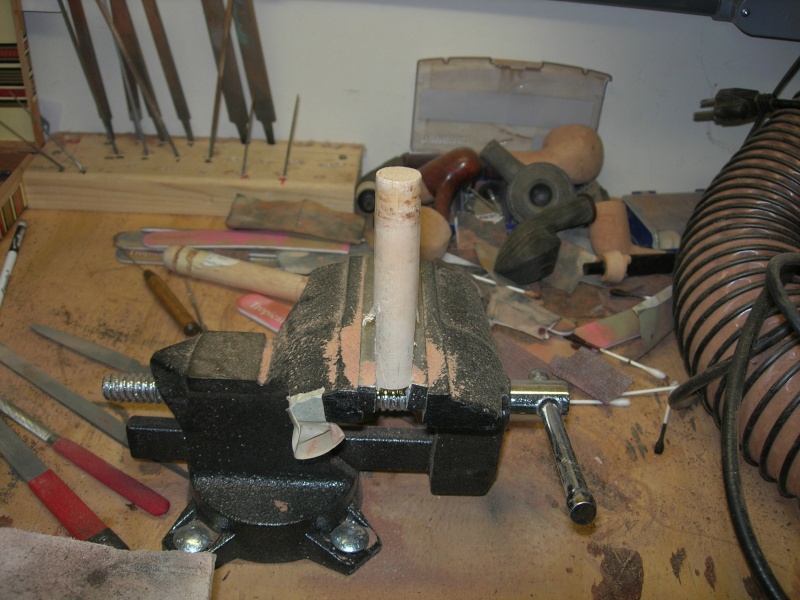
This last picture is at about the 2 1/2 hour mark. That includes turning the tenon on my wood lathe (another thread entirely) and roughing the stem on my 80 grit disc. Is that slower than some? Sure it is. But the feel I have for the lines of a pipe has improved greatly since I concentrated more on accuracy than on speed. Because let's face it.....there's only two things power tools do for us......they make pipe making faster and a little more accurate and give us the ability to make bigger mistakes faster.
Disclaimer: THIS IS THE WAY I SHAPE PIPES. WILL IT WORK FOR YOU??? WILL IT HELP YOU DEVELOP YOUR SKILZ??? TRY IT AND FIND OUT. I'M JUST SAYING THAT I LEARNED THIS FROM THE GUY WHO'S ESTATE PIPES SELL FOR $700+!! AND IT HAS BEEN VERY BENEFICIAL FOR ME.
http://www.thepiperack.com/search.php?s ... ls&x=0&y=0
If you actually read all that I will give you a hug, or headlock.......your choice, if we ever meet in person
I got this little trick from Quinton Wells. If you don't know who Quinton is, he runs the GKCPC carving contest and is one hell of a great pipe maker.
Be warned there are 3 different pipes I used in the pictures. The first is a billiard the second two are both apples (and are very similar). These are what I have onhand at the moment and what I grabbed.
I start out with a block I have drilled and turned on the lathe.
I use an 80 grit abralon sanding disc running at about 1400 rpm to remove the excess material. Yes, it takes about 10 minutes to knock off all the extra material. That's not the point, I have tons of control and room for error. I also don't have the fear of sanding one of my knuckles to the bone. If you know me, you know my tag line is the truth, not just something funny.....I really am Calamity Jane
Notice That I have not taken the bottom line of the bowl or the bowl/shank junction any where near final form.
Next I take the stummel to the dowel. If your chamber is 3/4" get a 3/4" dowel (I know I shouldn't have to say that. But, I am a blonde so I assume everyone else is too)
The first thing I shape is the profile of the pipe along the bottom line (the chin, if you will). I still have not touched the bowl/shank junction (it's actually one of the last things on the bowl I shape). (sorry I didn't take a picture of this, but hopefully you can follow). From there I start working my way around the bowl, on both sides, towards the shank. The easiest way to do this is to put your file to one side of the chin (right where you stopped turning if you used a lathe), grab the shank and turn the pipe on the dowel towards the shank. The file will knock off all the high spots from the disc. Slowly work your way around. Move down the bowl and repeat the process until you have reached the bottom of the bowl. Move the dowel around and you can reach every part of the bowl with ease.
How do I check my progress? Pinch the wall of the pipe with your finger and thUmb (finger in the chamber, thumb on the outside) and SLOWLY spin the bowl around your finger. As you develop your skilz you will be able to feel the high spots, low spots, what have you.
From there I move to 80 grit sandpaper to hone the shape and then I'm ready for final sanding.
This last picture is at about the 2 1/2 hour mark. That includes turning the tenon on my wood lathe (another thread entirely) and roughing the stem on my 80 grit disc. Is that slower than some? Sure it is. But the feel I have for the lines of a pipe has improved greatly since I concentrated more on accuracy than on speed. Because let's face it.....there's only two things power tools do for us......they make pipe making faster and a little more accurate and give us the ability to make bigger mistakes faster.
Disclaimer: THIS IS THE WAY I SHAPE PIPES. WILL IT WORK FOR YOU??? WILL IT HELP YOU DEVELOP YOUR SKILZ??? TRY IT AND FIND OUT. I'M JUST SAYING THAT I LEARNED THIS FROM THE GUY WHO'S ESTATE PIPES SELL FOR $700+!! AND IT HAS BEEN VERY BENEFICIAL FOR ME.
http://www.thepiperack.com/search.php?s ... ls&x=0&y=0
If you actually read all that I will give you a hug, or headlock.......your choice, if we ever meet in person


