Brandy
Brandy
Finished 99%. Just have to engrave the logo and makers mark.
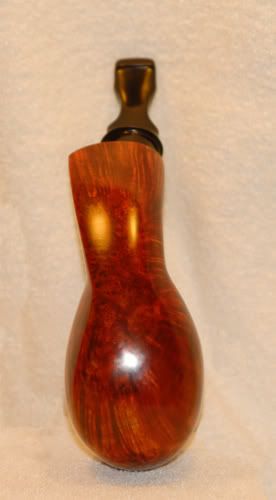
Charl wrote:Sorry, but the stem doesn't work for me on this one. And for some reason the stummel also needs to be better refined.
Why does'nt the stem work for you? And what do you mean by more refined? Maybe if you can be more specific I could understand a little more of what your talking about, and therefore put more weight to your critique.
Hey Tsunami,
The stem should be centered top to bottom in the shank. The way it is it looks like it's too thin and weak on the top of the shank. It probably isn't, but that's the impressions it gives.
The back of the bowl would look much better if you mirrored the curvature on the front just a bit rather than giving it that swoop look that it has.
The stem would look better with a gradual taper or flair from the saddle to the button. The pinched look doesn't look good to me.
Rad
- KurtHuhn
- Site Admin
- Posts: 5326
- Joined: Thu Nov 23, 2006 8:00 pm
- Location: United States/Rhode Island
Paul,
First, this is more of a blowfish shape than a brandy - at least it sits in these photos. With that in mind, I myself have not yet mastered the blowfish, and have a long way to go to reach the level where I would feel comfortable giving advice on that shape in particular - so I'm giving advice that can be applied to ALL pipe shapes you are likely to make in the coming years.
In addition to Rad's advice, would add that the bowl/shank transition should be much more refined, giving a clear delineation of where one ends, and the other begins. Now, I'm not personally a fan of razor sharp transitions in this particular area, and I prefer something slightly more organic feeling, but it should be done with purpose and authority - if you get what I mean. As it is, the transition from stem to shank is slightly amorphous, and I'm not sure where one ends and the other begins.
Also, you want to be able to establish a flow from the tip of the rim from the front of the bowl all the way back to the tip of the button on the stem. You don't want abrupt corners or sudden changes in direction along the way unless they work well into the design. In the photos, it appears that the shank takes a turn upwards in the last 1.5 inches or so, but doesn't quite follow the line established by the mortis. I'm not exactly sure how to explain it - I don't think that any shanks I've ever made get MORE of a bend as they travel along their length. If the bend changes, it pretty much lessens rather than becoming steeper.
I have a couple other suggestions, if you're game.
I am always game Kurt. I appreciate a solid critique and know their value from years in Art school / College. My goal by posting my pipes here is to learn from those who are more established and "further along" in their craftmanship than I. I look forward to any more suggestions as they will only make me a better pipe maker.
Thanks Again
Paul
Thanks Again
Paul
- KurtHuhn
- Site Admin
- Posts: 5326
- Joined: Thu Nov 23, 2006 8:00 pm
- Location: United States/Rhode Island
I think that most of the rest of what I have focuses on the stem.
In the spirit of recent discussions, I think the stem here is overbent. It could use a few degrees less bend, and it will help the overall flow of the pipe. You may have gathered that I'm not a fan of the other extreme of underbending either - but use with restraint I do find it pleasing to the eye.
The stem seems a little thick as well. I personally aim for a thickness behind the button of about .16", or 4mm. That is the thickness I find most comfortable, but keep in mind that comfort is dependent upon the overall shape of the stem, and in particular the last 1.5 inches of it. It should be slim, thin, and sleek. For masterful stems, take a good look at the offerings from high end carvers on smokingpipes.com.
As far as finishing the stem once it's got the shape you want, Todd recently gave me great advice. If he doesn't mind, I can cut and paste it here with proper attribution.
- ToddJohnson
- Posts: 1366
- Joined: Thu Nov 23, 2006 8:00 pm
- Location: Nashville, TN
- Contact:
- KurtHuhn
- Site Admin
- Posts: 5326
- Joined: Thu Nov 23, 2006 8:00 pm
- Location: United States/Rhode Island
From some advice that I recently got from Todd:
ToddJohnson wrote:I never use anything that isn't rigid to shape a stem. That means that foam backed or felt backed wheels are out. My process is a 36 grit rigid wheel, rough double-cut file, smooth single-cut file, scrape it with a stem knife, and move directly to 320 girt wet/dry.
- ToddJohnson
- Posts: 1366
- Joined: Thu Nov 23, 2006 8:00 pm
- Location: Nashville, TN
- Contact:
I've seen Rad's stems, and one certainly can't argue with the results. My comments to Kurt were addressing the fact that he had some small waves/ripples in a stem. This is really easy to do with soft-backed wheels and nearly impossible with files, etc. I'm gonna come down there and see you in Alabamastan one of these days, Rad, and learn all about these three-hour-pipes.RadDavis wrote:Everyone's methonds are different, I think.
My process is rough shape on a belt sander, file the button into shape with a nicholson file and do the rest of the shaping and finishing on soft foam backed sanding wheels from 120 thru 600 grit.
Rad
Todd--who takes a full six hours to make a pipe.
-
- Posts: 223
- Joined: Thu Jun 26, 2008 5:03 pm
- Location: pennsylvania USA
Tsunami, I'm just an amateur, so my comment should be taken as such. I believe that you and I suffer the same affliction, the overwelming desire to preserve briar. My desire to create sleek fliud minimalist form is at conflict with my appreciation for the remarkable natural beauty of briar. This causes me to sand smooth when I should be shaving aggressively. I think you've made a nice pipe. The grain and finish are very good. I agree with the previous remark about the pinch in the stem. I think the button could be a little more refined and the bowl-shank juncture leaned up slightly. Despite it's shortcomings, I still think it is an attractive pipe. Nicely done.
As another amateur it is probably is outside my place to comment, yet I will venture out and comment on what struck me about this pipe:
1) The name - I just don't see a "Brandy". I see an egg on the bowl end and I see a blowfish shank. I come up empty when I try to describe the stem.
The theme of the shape suggests fluid and flowing lines. In one picture above, the angle of the shot may accentuate something that may not actually be there.
2) The bottom curve looks to be made up of a series of straight sections instead of a single flowing line.
Then the items that most certainly ARE there:
3) The top of the shank next to the stem has a hump (seen in almost every shot)
4) Like Rad mentioned - having the teardrop shape is fine, but the stem (I think) should be centered in the thick section
5) We have all these flowing lines, then get to the stem, and see a box up against the shank - just seems really out of place (to me)
I hope I can pull off an asymmetrical / teardrop shank some day. Was this your first shot at it?
Kim Kendall
http://www.PenguinBriar.com/
Yeah this was my first attempt at this shape, The straight sections as you mention are an optical illusion.
Last edited by Tsunami on Fri Feb 20, 2009 6:56 pm, edited 1 time in total.
Well, I have to admit, sometimes it takes me 3 1/2 hours. Bamboo is taking me 2 days at the moment.ToddJohnson wrote:I've seen Rad's stems, and one certainly can't argue with the results. My comments to Kurt were addressing the fact that he had some small waves/ripples in a stem. This is really easy to do with soft-backed wheels and nearly impossible with files, etc. I'm gonna come down there and see you in Alabamastan one of these days, Rad, and learn all about these three-hour-pipes.RadDavis wrote:Everyone's methonds are different, I think.
My process is rough shape on a belt sander, file the button into shape with a nicholson file and do the rest of the shaping and finishing on soft foam backed sanding wheels from 120 thru 600 grit.
Rad
Todd--who takes a full six hours to make a pipe.
The only reason I make stems the way I do is that I had no one to show me how to do it. Tinsky doesn't make them for the most part, so I just got some rod and started trying to make stems. I drilled my first ones on my drill press, because I didn't have a lathe.
Come on down to Alawhambam, Todd, and I'll show you how it's done!
Rad
- KurtHuhn
- Site Admin
- Posts: 5326
- Joined: Thu Nov 23, 2006 8:00 pm
- Location: United States/Rhode Island
It should be noted that about 4 people in the country would have noticed these, and I sent pictures to one of them. However, Todd gave me THOROUGH advice on that pipe, and I'm taking it all to the workshop with me. And in one case, it and my debit card number, are going to the autobody store with me.ToddJohnson wrote:My comments to Kurt were addressing the fact that he had some small waves/ripples in a stem. This is really easy to do with soft-backed wheels and nearly impossible with files, etc.
These are a relic of how I do initial shaping on stems, and something I should either change or modify in my process if I want to hit the next level of my craft.
I won't lie though. It stings a little. But I checked my ego at the door, so to speak, when I asked Todd for help.
- ToddJohnson
- Posts: 1366
- Joined: Thu Nov 23, 2006 8:00 pm
- Location: Nashville, TN
- Contact: