number 2
-
pennsyscot
- Posts: 223
- Joined: Thu Jun 26, 2008 5:03 pm
- Location: pennsylvania USA
number 2
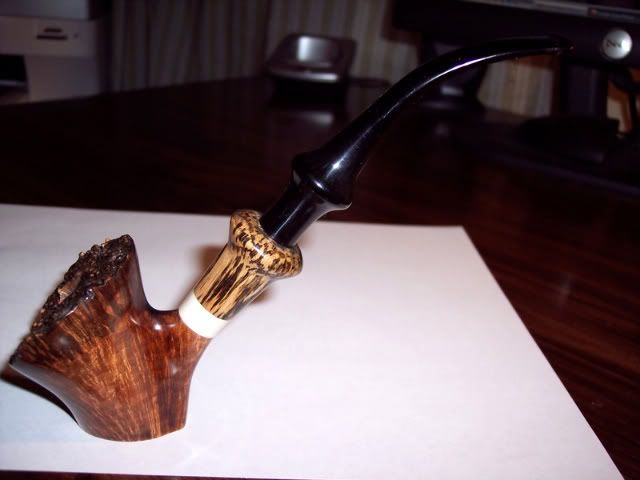
This is my second effort at pipemaking. I should call this the pipe of sorrow, because I had so many problems while making it. While in the lathe I accidently snapped off part of the shank. While shaping the stummel, The flex shaft on my rotary tool broke. While turning the stem, my lathe motor burst into flames. It's finally done and everything is fixed. I'm not pleased with the finish, though it's better than my first. I wish there were tutorials on finishing. How do you guys get such bright colors and deep contrast? I don't like the shape of the shank extension and I think the angle between the shank and bowl is to sharp. I welcome criticism and suggestions. Don't be affraid to be to harsh, I can take it. thanks, Scot[img][img]http://i10.photobucket.com/albums/a131/ ... 0_1646.jpg[/img][/img]
 [/img]
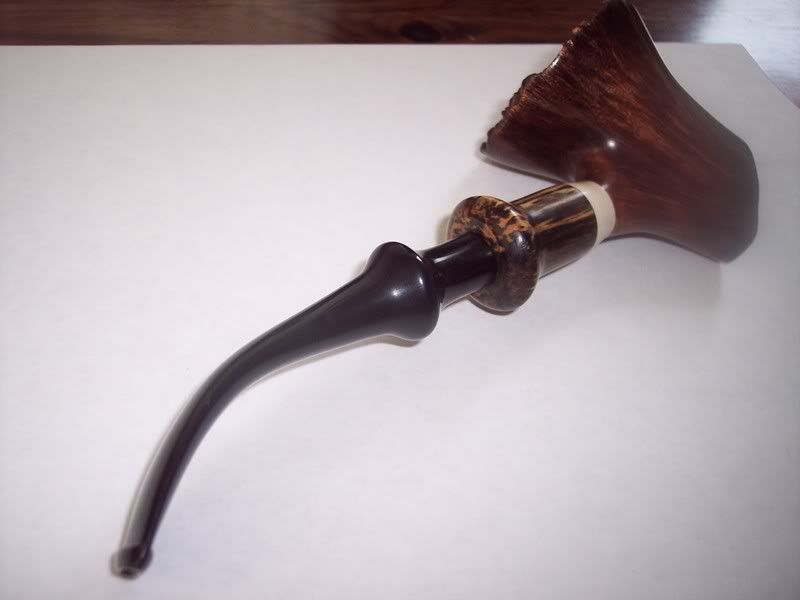
 [/img]
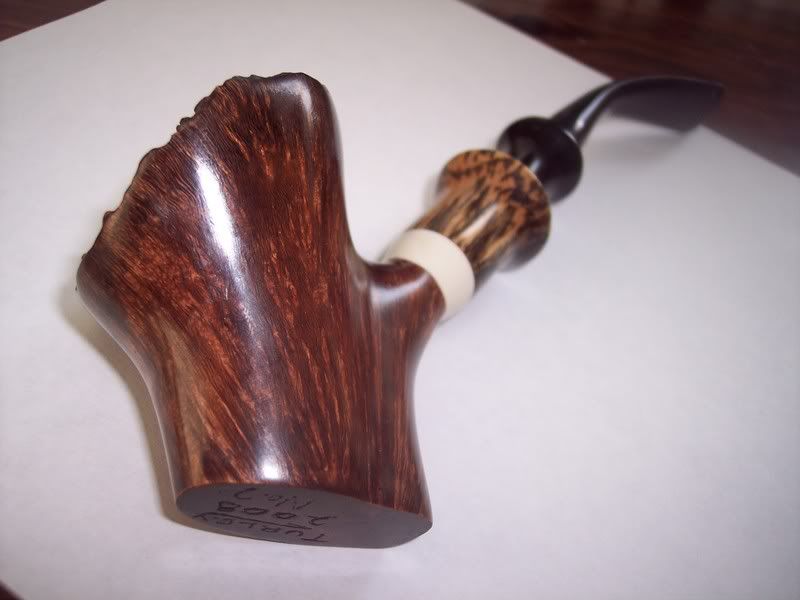
My 2nd pipe was also a bit of a disaster. I suppose it's because with the first one you try and be extra carefull and then with your second you start to think that this pipemaking thing is really not that difficult. Whereupon it duly turns around and you get all sorts of problems! Anyways, I learned a lot from making my second pipe.
I'm not a great fan of these old Danish freeform type pipes and also still (very much!) a beginner myself, so please take my response with a pinch of salt.
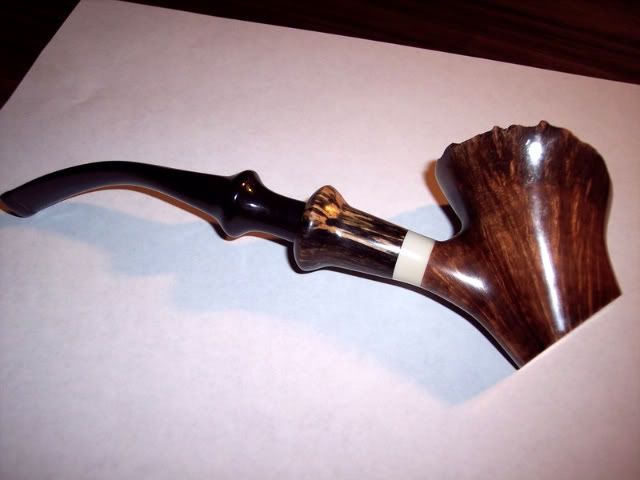
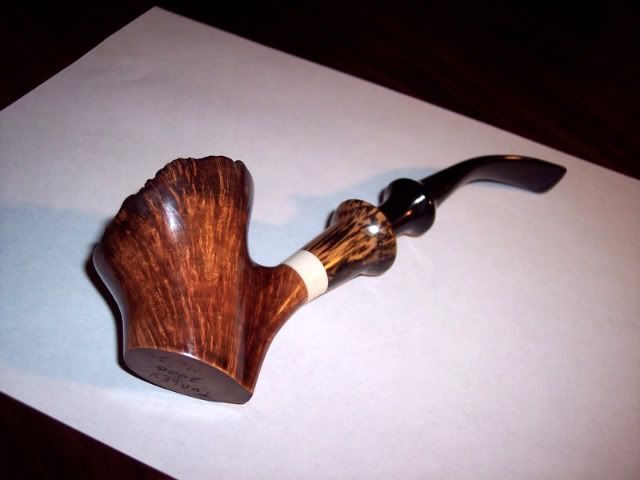
To me the insert/extension and stem is way too "heavy" for the bowl. Maybe if the shank was a bit thicker closer to the bowl, the flow would be better. The bulge where the insert and wood extension join, is very distracting. I really like the shape of the bowl, though.
I'm not a great fan of these old Danish freeform type pipes and also still (very much!) a beginner myself, so please take my response with a pinch of salt.
To me the insert/extension and stem is way too "heavy" for the bowl. Maybe if the shank was a bit thicker closer to the bowl, the flow would be better. The bulge where the insert and wood extension join, is very distracting. I really like the shape of the bowl, though.

It's not as bad as you might think, IMO. I would agree with Charl that the shank extension should be turned down to the same diameter as the briar shank. If you need the extra material for your tenon then it would flow better if it had a more gradual flare instead of a bulge. Does that make sense? I really like the idea and bowl shape. The only other thing that I noticed is the bowl under the shank doesn't flow with the bowl above the shank and throws that line off. If you removed some briar under the shank to match I think it would flow better. Then again, I'm just a newbie myself. All in all, it's nice work, especially for only your second pipe.

-
pennsyscot
- Posts: 223
- Joined: Thu Jun 26, 2008 5:03 pm
- Location: pennsylvania USA
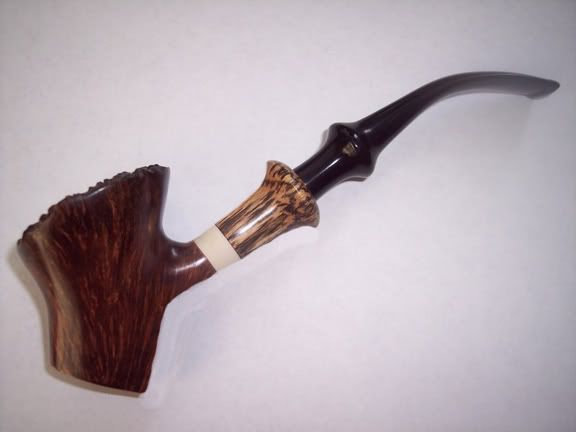
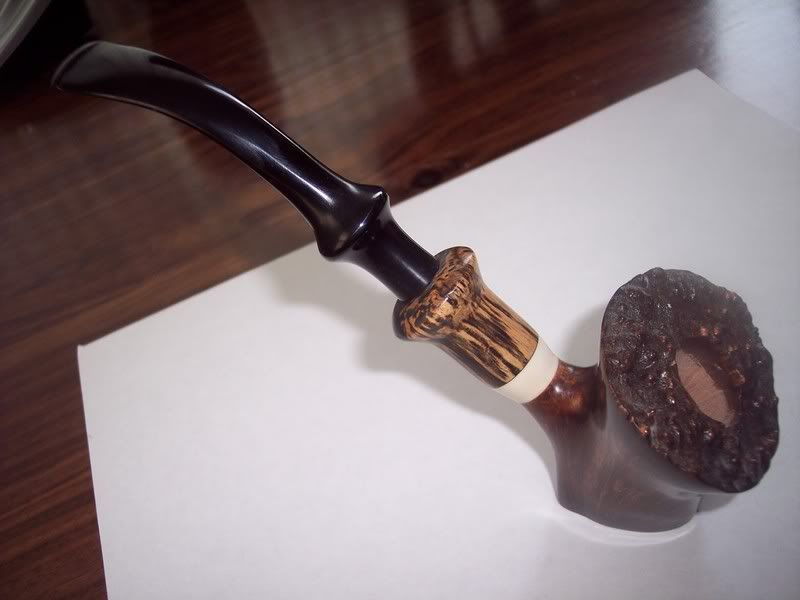
Thanks all for the great advise. I agree 100% about the shank extension bulge. The reason I left the pipe like this is because I was getting nervous with my gouge so close to the spinning bowl. I'm in the process of reshaping now, using sandpaper and file. I will try to remove some material from the back of the bowl to create greater continuity between top and bottom. I think I will be limited in how much I can remove from the back without upsetting the balance. I would like the pipe to sit nicely. Since I will be refinishing, any advise on how I can achieve better contrast and brighter color would be great. I will add pics of the revised pipe to the post. Thanks, Scot
-
pennsyscot
- Posts: 223
- Joined: Thu Jun 26, 2008 5:03 pm
- Location: pennsylvania USA
revised second
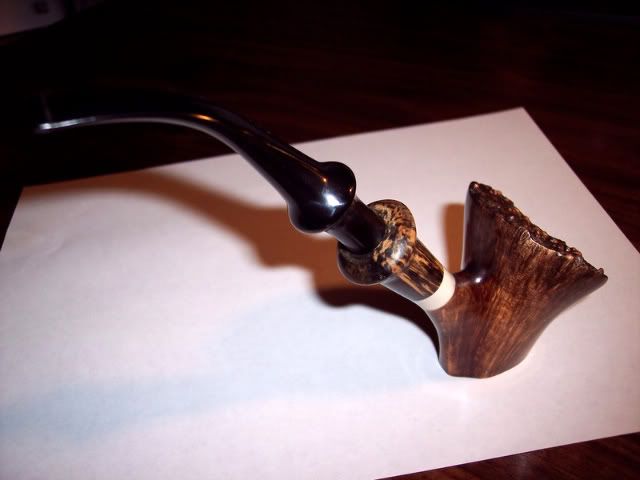
I reduced the bulge on the shank extension. I was able to remove only a
small amount of material from the back. I wasn't able to create a
continuous line from top to bottom and still have the pipe stand. So, I
sanded around the shank to create a continuos contour on the back. I
wasn't able to put the pipe back in the lathe so I did my best with files
and sandpaper. I also reduced the height and gave it a lighter finish.
I also added a nice dent when it was ripped from my hand during
buffing. The dent is near the top, so it sorta blends with the rough edge of the plateau. The pipe still does not look quite right, but I'll try to do
better on the third. I welcome criticism. thanks, Scot