This is my first posting here, and I want to say that I truly appreciate all the knowledge I have found on this site. I have been making pipe for about eight months, and I have made about 20 pipes. Some are definate frankenstein experiments. I have realized that I am just scratching the surface in my pipe making.
Now to my question: I just bought a Ser Jacopo chimney (I will try and attach a pic), and they call the rustication a Rowlette Finish. Just wondered if anyone knows how they do this? Personally, I think the finish is outstanding. Thank again for all the information and expertise, and thanks for any ideas pertaining to my question.
I guess I don't know how to attach a picture. [/img]
ser jacopop rowlette finish?
-
monkeybong

- Posts: 2
- Joined: Thu Nov 23, 2006 8:00 pm
- Location: Kansas

Re: ser jacopop rowlette finish?
monkeybong wrote:This is my first posting here, and I want to say that I truly appreciate all the knowledge I have found on this site. I have been making pipe for about eight months, and I have made about 20 pipes. Some are definate frankenstein experiments. I have realized that I am just scratching the surface in my pipe making.
Now to my question: I just bought a Ser Jacopo chimney (I will try and attach a pic), and they call the rustication a Rowlette Finish. Just wondered if anyone knows how they do this? Personally, I think the finish is outstanding. Thank again for all the information and expertise, and thanks for any ideas pertaining to my question.
I guess I don't know how to attach a picture. [/img]
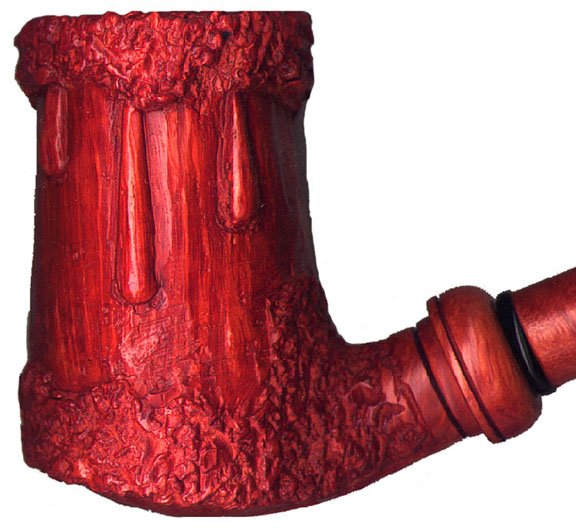
Hmm... to me, the rustication in question looks like it's done with something similar to a nail tool for the real rough part. For the "drips" I imagine that it can be done with a detail tool like a dremel or even files and then the remaining "drip" rounded with some sand paper. If you haven't seen the nail tool you should check out the "How Tos" section. I think it's in there...

Never having done this particular type of finish before, here is my guess on how it is done.
Leave the circumfrence larger than you normally would, and draw your drips on with a sharpie or something that will stay on the wood. It looks like the Ser Jac was reduced with a carving tool, although a dremel would work. However, if you use a dremel, when you get near the bottom of the depth, I think a carving tool or chisel would be needed to smooth out the bottom somewhat and make it reasonably uniform. It does not look like they sanded the bottom of the reduction, so the carving tool or chisel was probably very sharp.
As Ben said, round over the drips with sandpaper, or files then sandpaper. Also, the carved section at the top and bottom was probably done with a nail tool to finish up.
It doesn't look that hard to do, just a little time consuming. You can always practice on a wooden dowel or something prior to tackling briar. The materials will react differently to the carving tools, but you will get the idea, and dowels are much cheaper than briar to practice with.
-
monkeybong
- Posts: 2
- Joined: Thu Nov 23, 2006 8:00 pm
- Location: Kansas