Page 1 of 1
Need Help - Close Up's Of Shank/Stem Interface - Pic Heavy
Posted: Mon Aug 07, 2017 2:27 pm
by shikano53
Re: Need Help - Close Up's Of Shank/Stem Interface - Pic Hea
Posted: Mon Aug 07, 2017 2:31 pm
by sandahlpipe
It's not to late to fix with the right tools. If you have access to a metal lathe, stick a pin gage in the tenon of the stem and face off the shoulder. You'll likely also need to remove a bit of material off the tenon it appears. You could do the same thing with a wood lathe and careful attention.
Re: Need Help - Close Up's Of Shank/Stem Interface - Pic Hea
Posted: Mon Aug 07, 2017 3:43 pm
by shikano53
Thanks Jeremiah, I only have a wood lathe but I will try. I don't have any pin gauges either. My understanding of your comment is to stick a pin gauge into the tenon and chuck up the stem using the pin gauge to hold it in place, and then try and turn the shoulder of the stem? Likewise do the same with the stummel by using the same method?
Re: Need Help - Close Up's Of Shank/Stem Interface - Pic Hea
Posted: Mon Aug 07, 2017 4:16 pm
by shikano53
I get confused real easy. Here are a couple of pictures of what I think you mean. Trim accordingly. I have a 1/2" scraper. Would that be best?


Re: Need Help - Close Up's Of Shank/Stem Interface - Pic Hea
Posted: Mon Aug 07, 2017 4:50 pm
by sandahlpipe
Yep. For the pin gauge in the mortise of the shank, use the mortise, not the airway to face. Make sure your tool is nice and sharp and take light passes to creep up on a smooth surface. If square nose scraper is all you've got, use that. Otherwise, I'd use a V-shaped tool with an angle less than 90 degrees to get into the shoulder without touching the tenon.
Re: Need Help - Close Up's Of Shank/Stem Interface - Pic Hea
Posted: Mon Aug 07, 2017 5:24 pm
by shikano53
Thank you, I'll give that a try. My scraper is a round nose 1/2" but I also have a 1/2" spindle gouge that I really swept back the wings on. I'm fearful of trying, but if I don't try I don't learn.
Re: Need Help - Close Up's Of Shank/Stem Interface - Pic Hea
Posted: Mon Aug 07, 2017 5:35 pm
by sandahlpipe
I'd try it on scraps first if you're unsure of yourself.
Re: Need Help - Close Up's Of Shank/Stem Interface - Pic Hea
Posted: Mon Aug 07, 2017 8:30 pm
by Sasquatch
How are you tooling the stem to get the tenon sized in the first place? Ideally this is when you cut the shoulder as well (it being perfectly axial to the tenon at that point).
Re: Need Help - Close Up's Of Shank/Stem Interface - Pic Hea
Posted: Mon Aug 07, 2017 9:40 pm
by shikano53
Sasquatch wrote:How are you tooling the stem to get the tenon sized in the first place? Ideally this is when you cut the shoulder as well (it being perfectly axial to the tenon at that point).
I am using pre-formed vulcanite stems and I cut off the tenon piece on the pre-formed because I want to use a piece of delrin for the tenon. I then chuck the stem in a set of pen jaws on my Nova chuck. Next I face the stem with a Forstner bit and a four flute endmill. I check it to see that I've removed all the 'round' and touch it up with some 320grit sandpaper. If the face is satisfactory to my eye I then drill my airhole. After I have done that I drill the mortise. I then check it once again to make sure it is faced and tweak it with the endmill and sandpaper. I use delrin to make the tenon. I face the piece of delrin using a 3/8" endmill. I then use a starter bit to start the airway hole through the delrin. Next is a 5/32" bit to drill through the delrin. I then re-face the delrin with the endmill. I flip the piece of delrin in my chuck to face the other end of the delrin tenon. Once I'm satisfied with that I scuff up the end of the delrin I want glued in the stem and scuff up the inside of the mortise hole as well. Then I glue it in place using 5 minute epoxy. I let that set for a few hours before proceeding. Once that is complete and I have chucked up the piece of briar I then face the shank using the procedure above. I drill my airhole first and then drill the mortise hole in the stummel. The crazy part is that I then fit the stem to the stummel and check to see that it is totally flush and axial and most times it is fine. It's not until I start sanding after staining that it seems to go south on me. Maybe it's just my eyes, I don't know. I don't unchuck until I have turned the shank and made sure by visual inspection that the shank/stem is nice and flush.
Re: Need Help - Close Up's Of Shank/Stem Interface - Pic Hea
Posted: Tue Aug 08, 2017 8:29 am
by sandahlpipe
I would use the scraper instead of an end mill or forstner bit to face the shank and stem. It will get a cleaner cut since it's not removing as much material at once. Always check the fit before moving to the next step. If your tenon touches at the bottom of the mortise and the wood moves, you can get a gap. Make your tenon just a hair shorter than the mortise to account for changes in moisture.
Re: Need Help - Close Up's Of Shank/Stem Interface - Pic Hea
Posted: Tue Aug 08, 2017 11:20 am
by shikano53
sandahlpipe wrote:I would use the scraper instead of an end mill or forstner bit to face the shank and stem. It will get a cleaner cut since it's not removing as much material at once. Always check the fit before moving to the next step. If your tenon touches at the bottom of the mortise and the wood moves, you can get a gap. Make your tenon just a hair shorter than the mortise to account for changes in moisture.
I will check that out. Never thought of that particular fit being a potential issue.
Thanks everyone for all the great advice and comments.
I did worry away at it yesterday afternoon and found that I couldn't get in close enough with the scraper. I did manage to fix it a bit better using the 'Kentucky windage method' AKA my eyes and 320 grit paper.
Now I have a better understanding of the use of pin gauges. Another one for the shop drawer.
Re: Need Help - Close Up's Of Shank/Stem Interface - Pic Hea
Posted: Tue Aug 08, 2017 9:47 pm
by DocAitch
I use this device for pre molded stems for turning the tenon and facing the shoulder:
https://pipesmokersforum.com/community/ ... st-1530179
The tenon is held in a live center. You can do this with your Delrin tenon, but the axes may not be exactly concentric.
Additionally, for tweaking the shank face, I use a cylinder of aluminum or hardwood with a piece of Delrin as a pilot and glue a piece of sand paper to the face of the cylinder. Push the pilot into your mortise, and sand the face of the shank until you get a flush fit. You can use paper ranging from rough to fine (100 up to 400 or so).
PM me if you want photos.
DocAitch
Also it is not clear to me how your stem shoulder is so rough with the method that you are using.
Re: Need Help - Close Up's Of Shank/Stem Interface - Pic Hea
Posted: Tue Aug 08, 2017 9:53 pm
by DocAitch
shikano53 wrote:sandahlpipe wrote:I would use the scraper instead of an end mill or forstner bit to face the shank and stem. It will get a cleaner cut since it's not removing as much material at once. Always check the fit before moving to the next step. If your tenon touches at the bottom of the mortise and the wood moves, you can get a gap. Make your tenon just a hair shorter than the mortise to account for changes in moisture.
I will check that out. Never thought of that particular fit being a potential issue.
Thanks everyone for all the great advice and comments.
I did worry away at it yesterday afternoon and found that I couldn't get in close enough with the scraper. I did manage to fix it a bit better using the 'Kentucky windage method' AKA my eyes and 320 grit paper.
Now I have a better understanding of the use of pin gauges. Another one for the shop drawer.
That may solve the problem of the gap. The first thing I would do is take off a millimeter or so from the tenon.
DocAitch
Re: Need Help - Close Up's Of Shank/Stem Interface - Pic Hea
Posted: Sat Dec 14, 2019 12:48 pm
by Liberthorn
sandahlpipe wrote: ↑Tue Aug 08, 2017 8:29 am
I would use the scraper instead of an end mill or forstner bit to face the shank and stem. It will get a cleaner cut since it's not removing as much material at once. Always check the fit before moving to the next step. If your tenon touches at the bottom of the mortise and the wood moves, you can get a gap. Make your tenon just a hair shorter than the mortise to account for changes in moisture.
Sometimes the simplest way to do things is the best way, huh? The scraper method of squaring the was scaring the heck out of me, I was avoiding it relentlessly. I've been banging my head on this for the past few days. The forstner bit just is not cutting it

, and your simple suggestion of using a scraper is just what I needed to hear. Thank you.
I also attempted to make a pin gauge, which didn't turn out too well. Do you have any suggestions on where to get singles or a set? I've been looking at McMaster-Carr for singles and I've used Shars in the past for tooling. I do not know if it is foolish to just buy a .3125 single because I really do not know the actual size of the 5/16 drill bit. The digital caliper I have is cheap and usually gives me a slightly different readings each time. The reason I am telling you all this is because I would like to get a 4" pin, and save money getting the correct diameter size for my drill bit. Not sure if I should buy a whole set, then the 4" OR just buy a few 2" pins in the general range, test them, then get the 4". Just want to be a cheapo boy, but I am betting I will be using the pin set later in life...
Anyway, if you have a suggestion or insight it would be appreciated.
Re: Need Help - Close Up's Of Shank/Stem Interface - Pic Heavy
Posted: Sat Dec 14, 2019 3:53 pm
by sandahlpipe
I recommend a pin gage set, not just single pins. There may be variations enough in the wobble to account for a thousandth or two of fit, so while you’ll use one size more often, a range is better. It’s not too expensive to get a whole set from Shars or eBay. .251-.500 is what I use. The larger pieces are nice for facing inlay stock.
Sent from my iPhone using Tapatalk
Re: Need Help - Close Up's Of Shank/Stem Interface - Pic Heavy
Posted: Sat Dec 14, 2019 10:40 pm
by Sasquatch
Yeah the point of pin gauges is literally, exactly, that you have a set.
Re: Need Help - Close Up's Of Shank/Stem Interface - Pic Heavy
Posted: Sun Dec 15, 2019 3:45 am
by caskwith
If you can afford a set get one, I can't so I have to improvise and sometimes it's a big pain in the arse.
Re: Need Help - Close Up's Of Shank/Stem Interface - Pic Hea
Posted: Mon May 18, 2020 9:15 pm
by ReverendThom
DocAitch wrote:I use this device for pre molded stems for turning the tenon and facing the shoulder:
https://pipesmokersforum.com/community/ ... st-1530179
The tenon is held in a live center. You can do this with your Delrin tenon, but the axes may not be exactly concentric.
Additionally, for tweaking the shank face, I use a cylinder of aluminum or hardwood with a piece of Delrin as a pilot and glue a piece of sand paper to the face of the cylinder. Push the pilot into your mortise, and sand the face of the shank until you get a flush fit. You can use paper ranging from rough to fine (100 up to 400 or so).
PM me if you want photos.
DocAitch
Also it is not clear to me how your stem shoulder is so rough with the method that you are using.
Hi Doc, wondering if you can share a picture of the device you use? The link is now dead
Sent from my SM-G965W using Tapatalk
Re: Need Help - Close Up's Of Shank/Stem Interface - Pic Heavy
Posted: Mon May 18, 2020 9:49 pm
by DocAitch
This is a piece of aluminum with a ~5/16-1/2” center hole and a hand cut “V” intersecting. the corners of the intersection are slightly. rounded to reduce cutting the button.
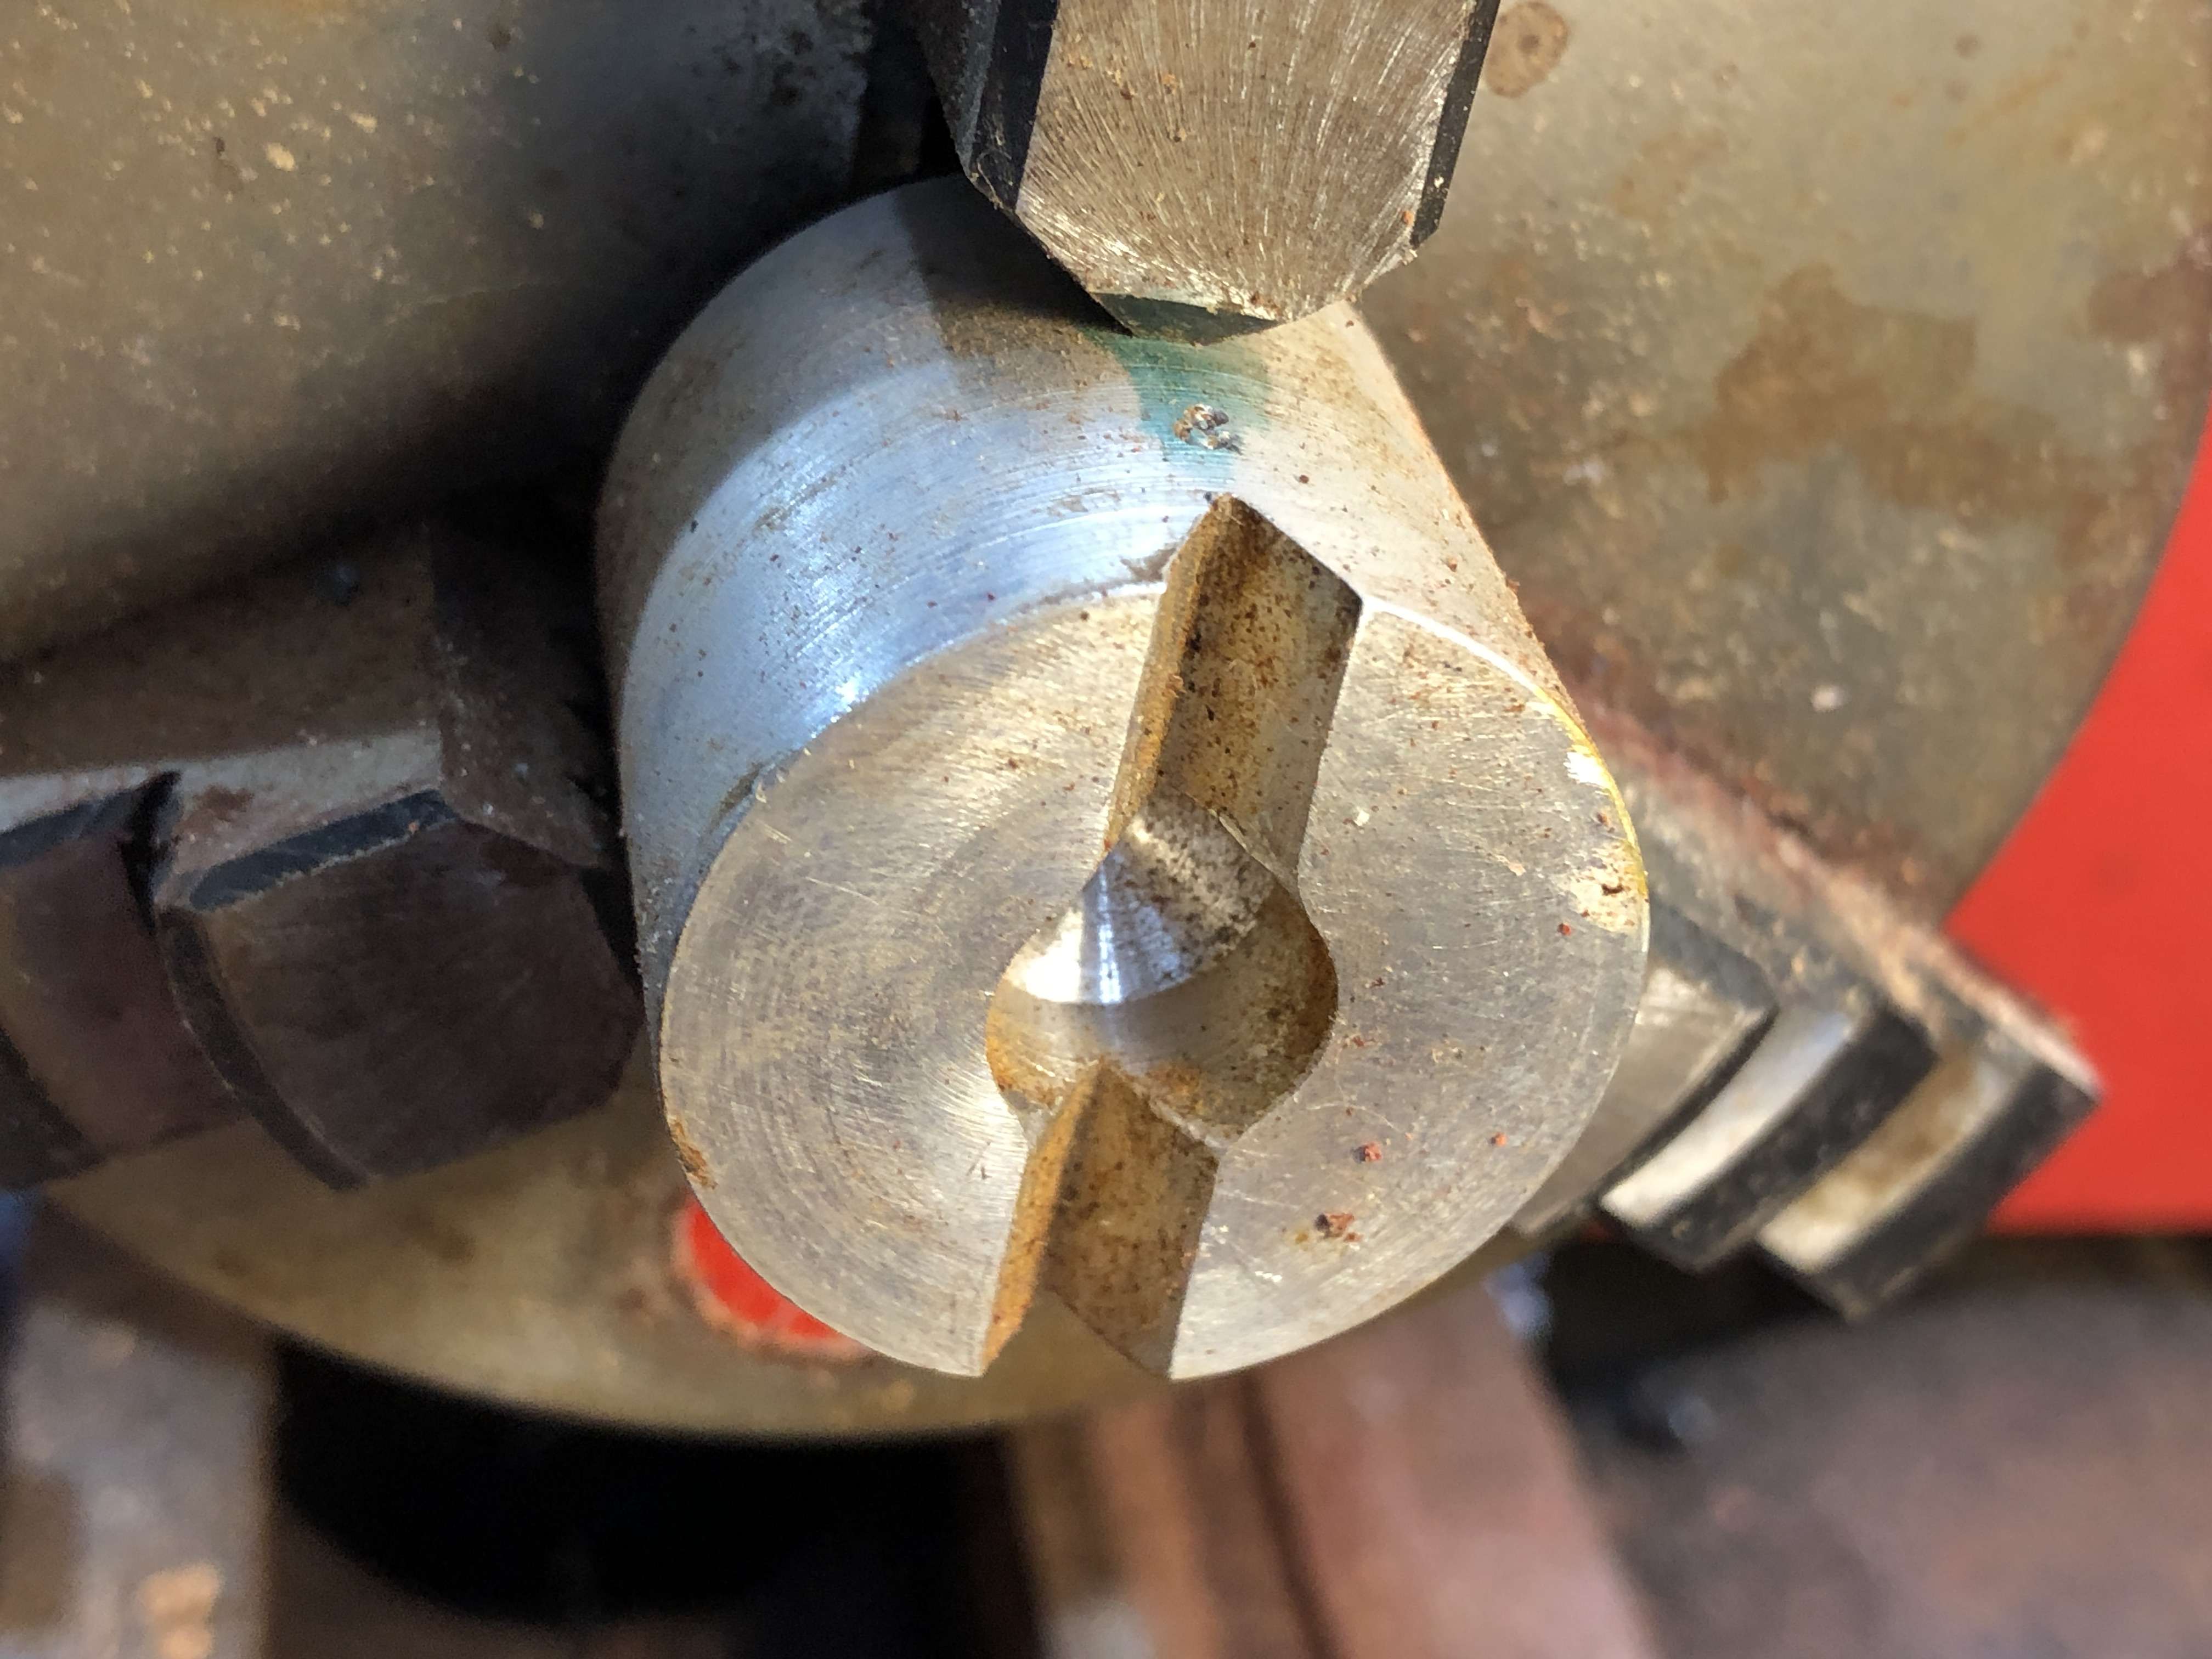
The button of the pre mold centers on the intersection of the “V” groove and the hole. The tenon end is held by a live center. Because this is hand cut, the stem must be indexed so that it can be returned to the same orientation after each test fit.
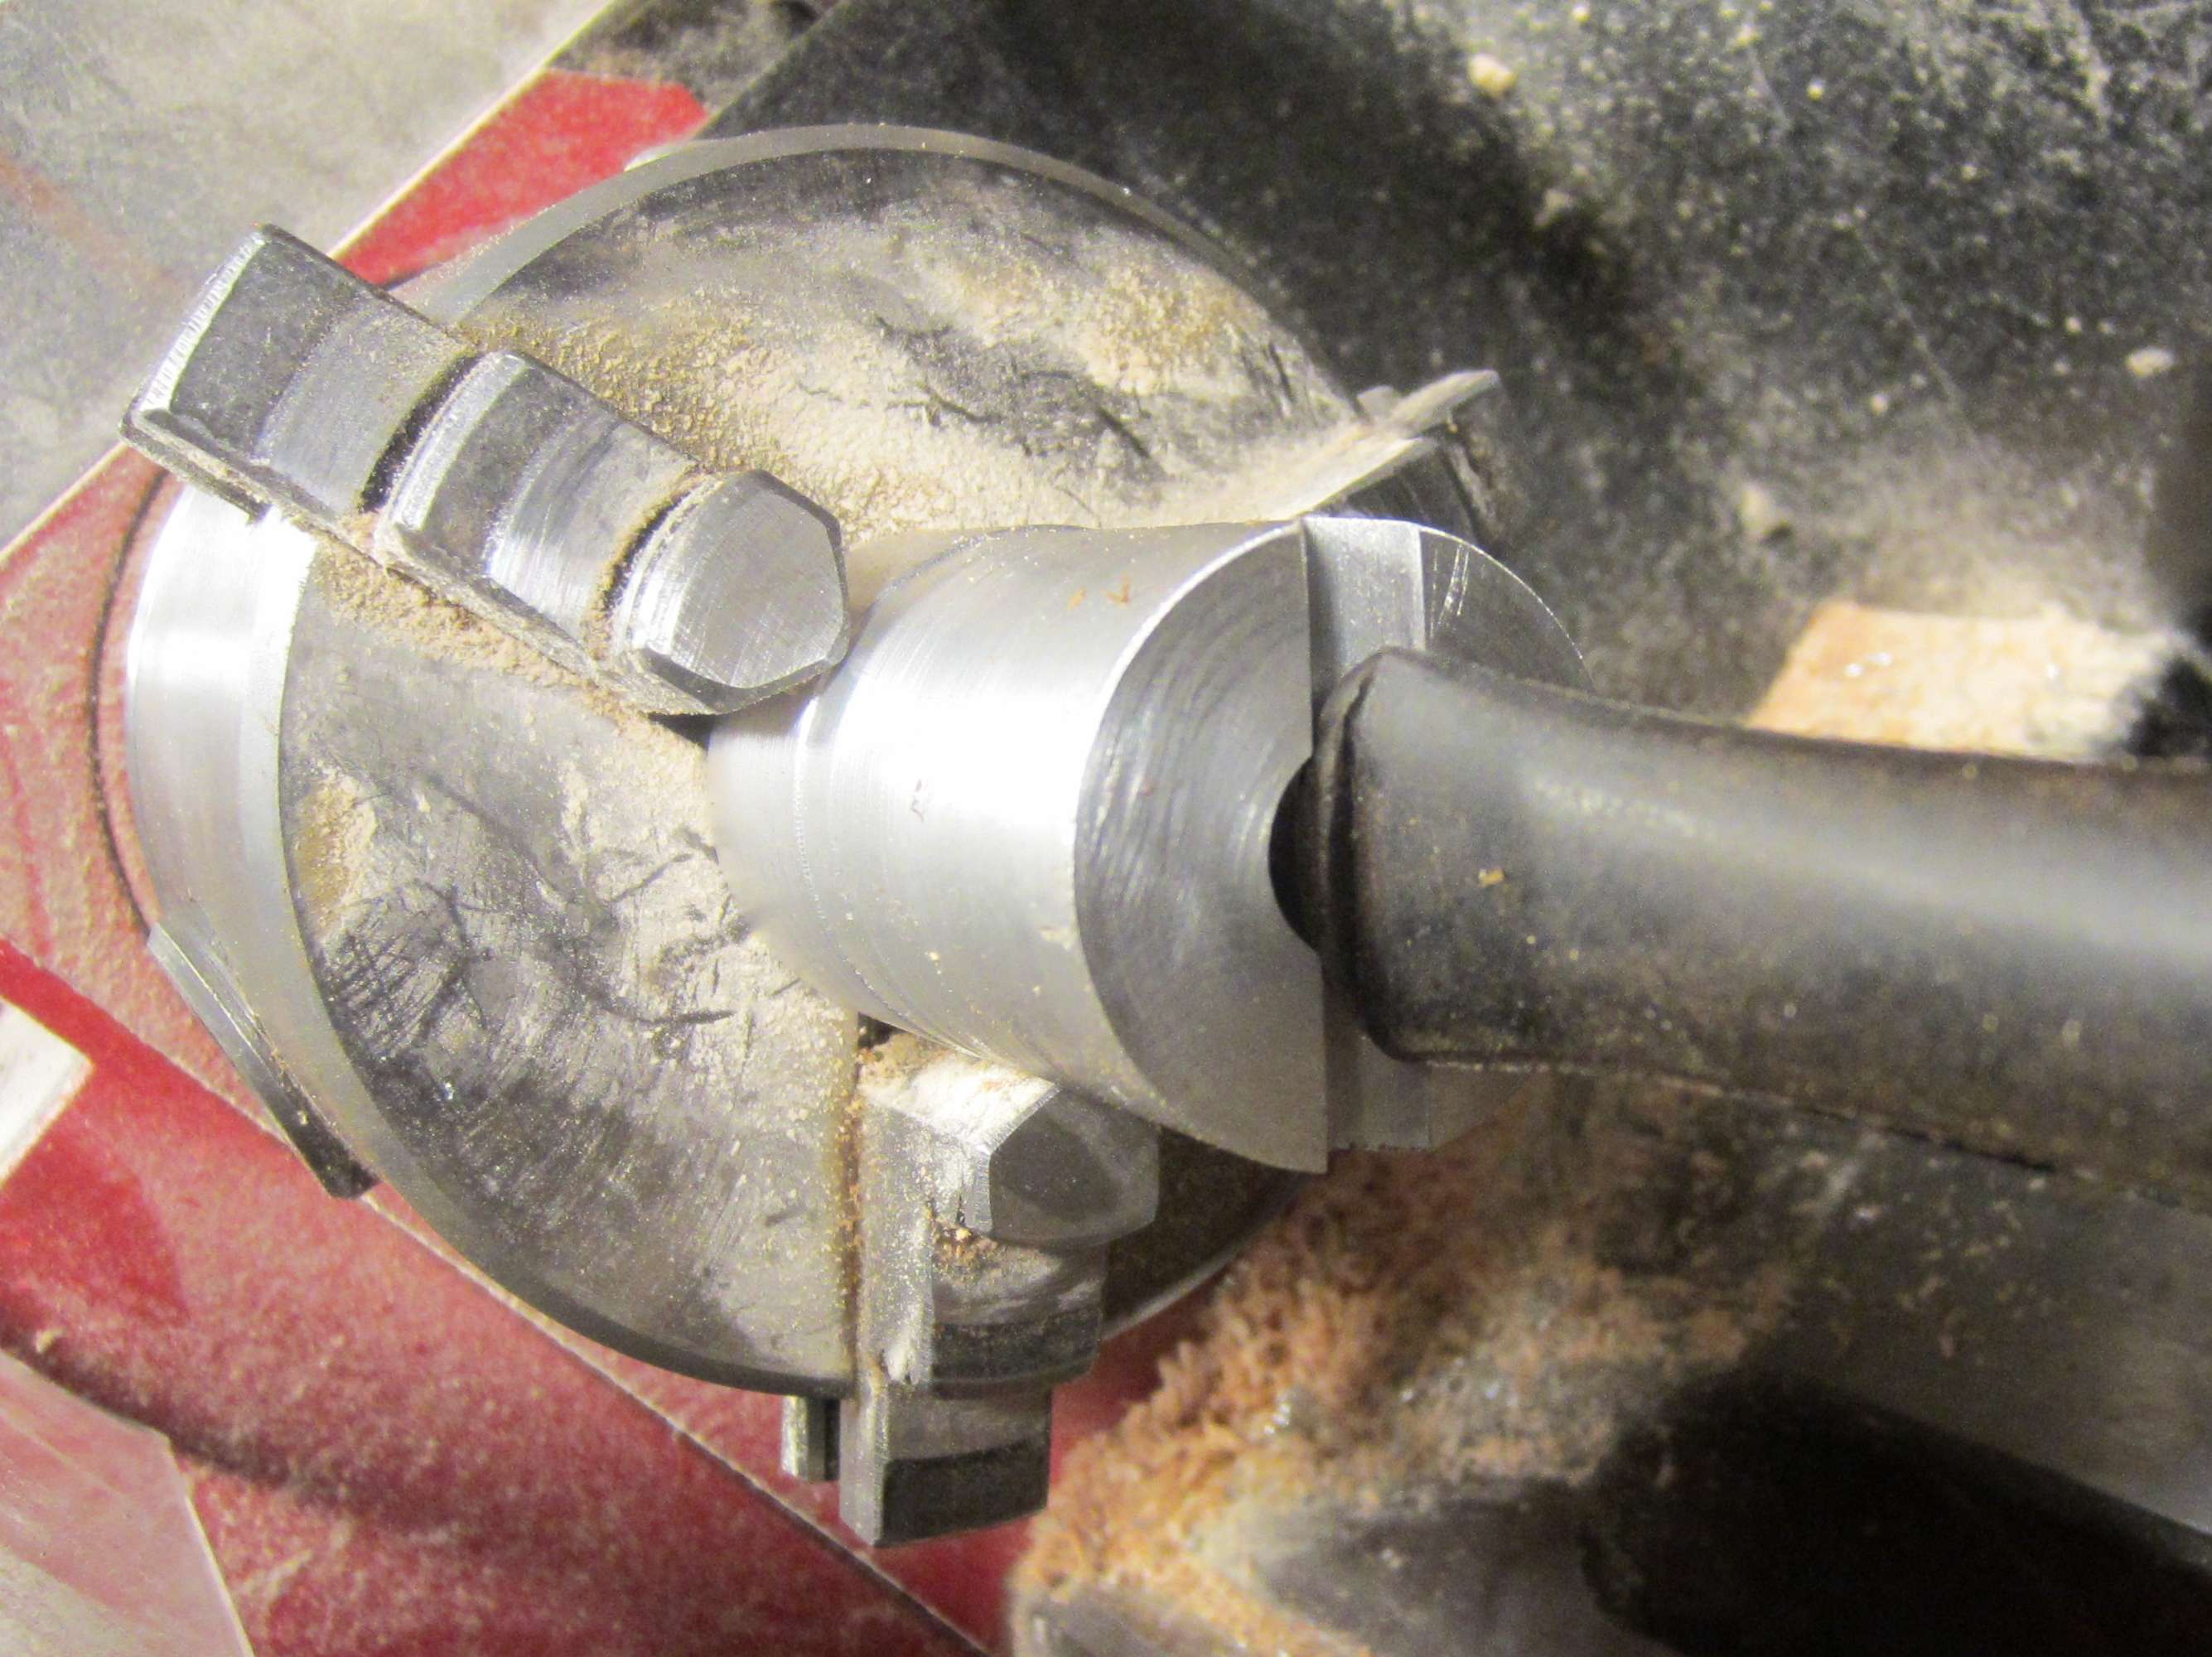
Make small cuts ot the stem will shatter easily.
DocAitch
Re: Need Help - Close Up's Of Shank/Stem Interface - Pic Heavy
Posted: Tue May 19, 2020 6:17 am
by ReverendThom
Thanks so much!
Sent from my SM-G965W using Tapatalk