Page 1 of 1
Second try
Posted: Wed Jan 20, 2016 3:10 pm
by agnoeo
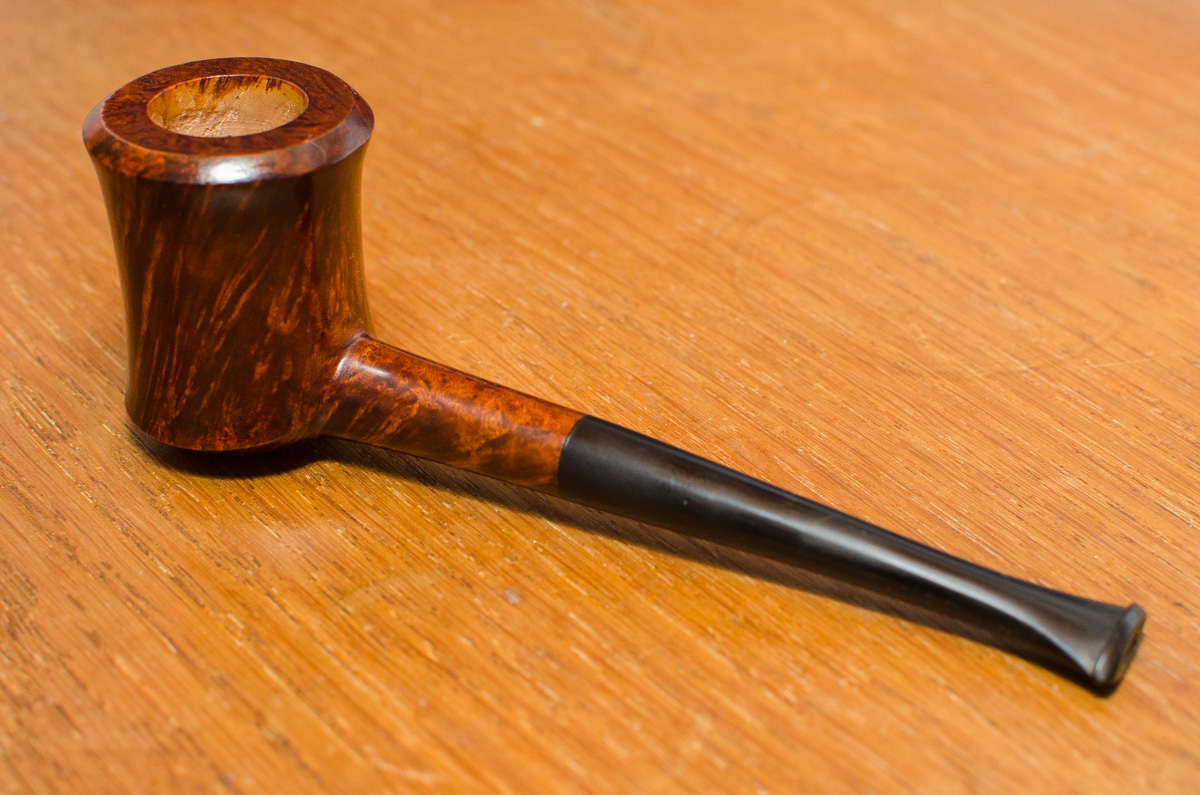
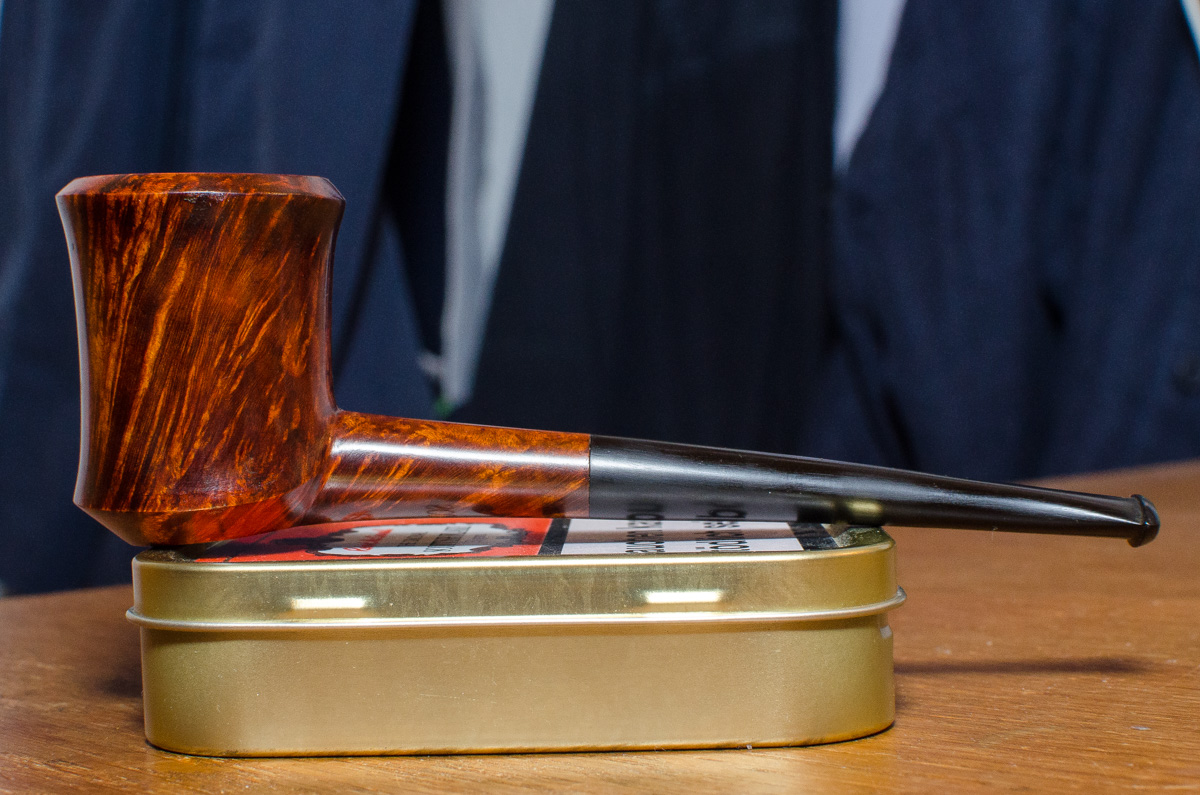
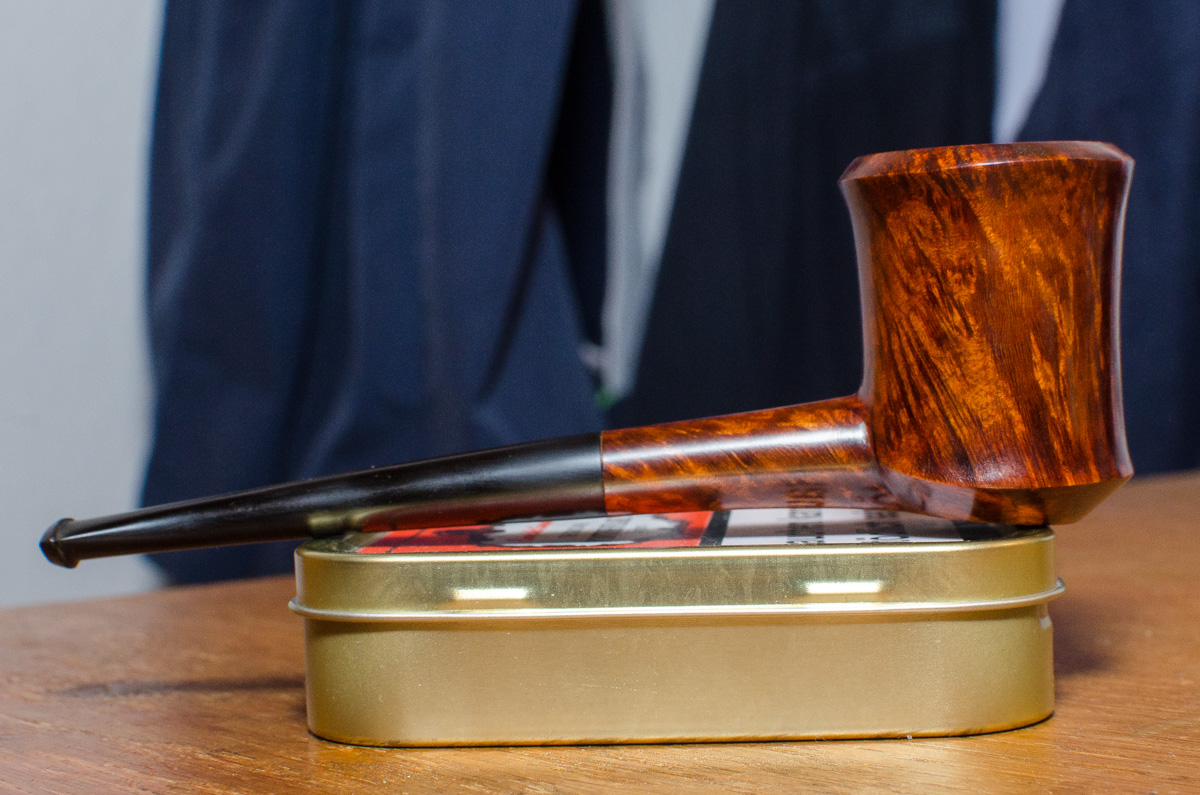
So this is my second go at making a pipe only with hand tools (no electrons were hurt in the making of this pipe

). This is from a smallish plateau block. The stem is made from an 18mm ebonite rod.
Measurements
length: 135mm (5 5/16")
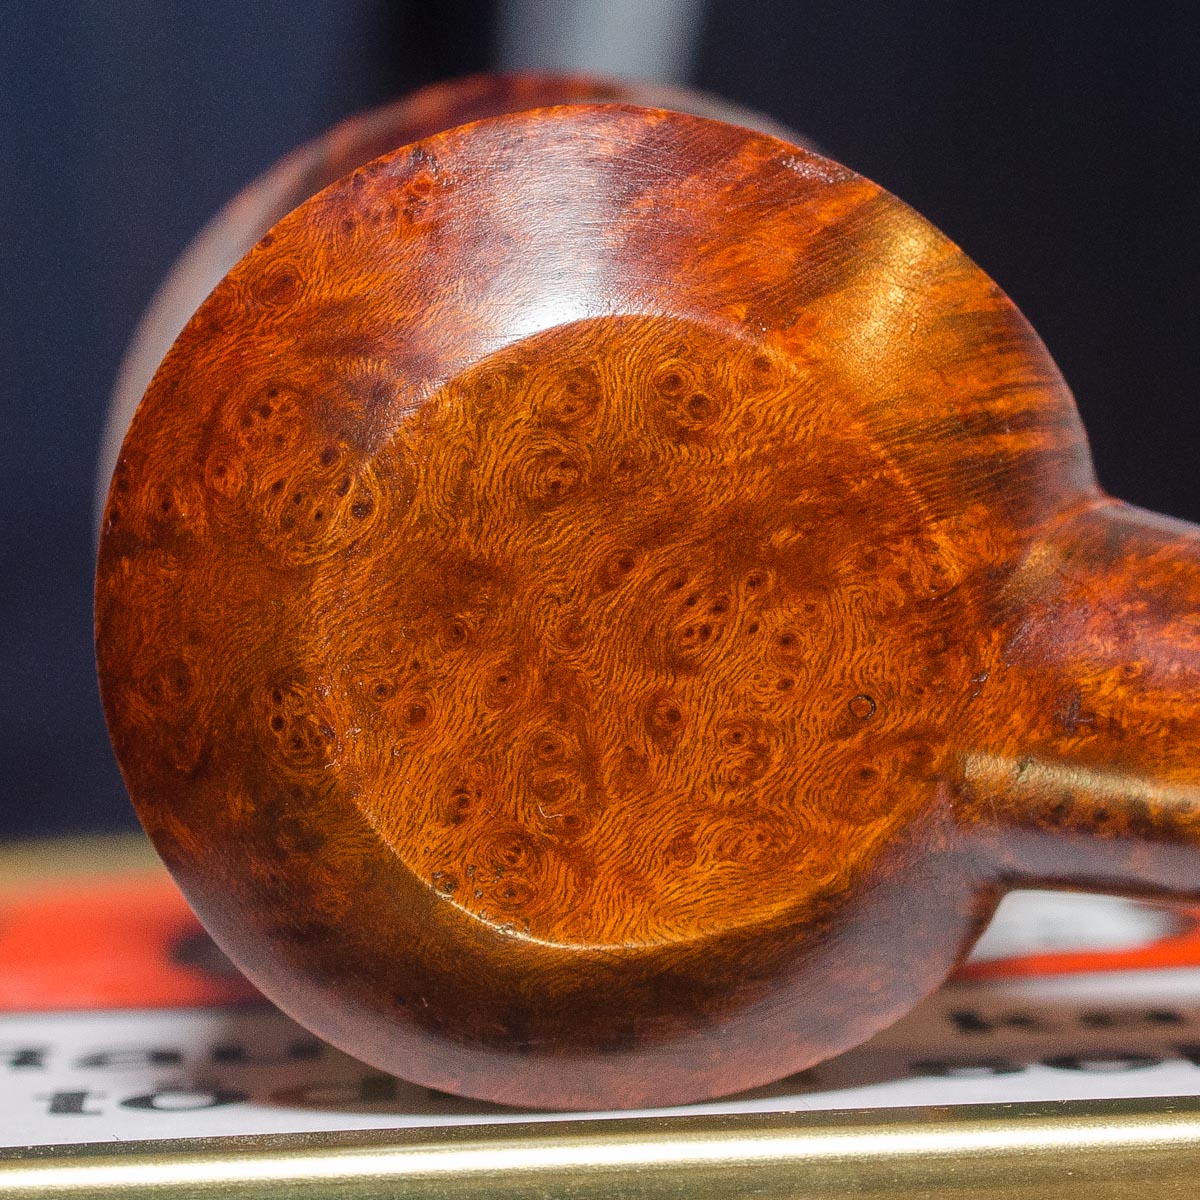
height: 45mm (1 3/4")
head width: 36mm (1 7/16")
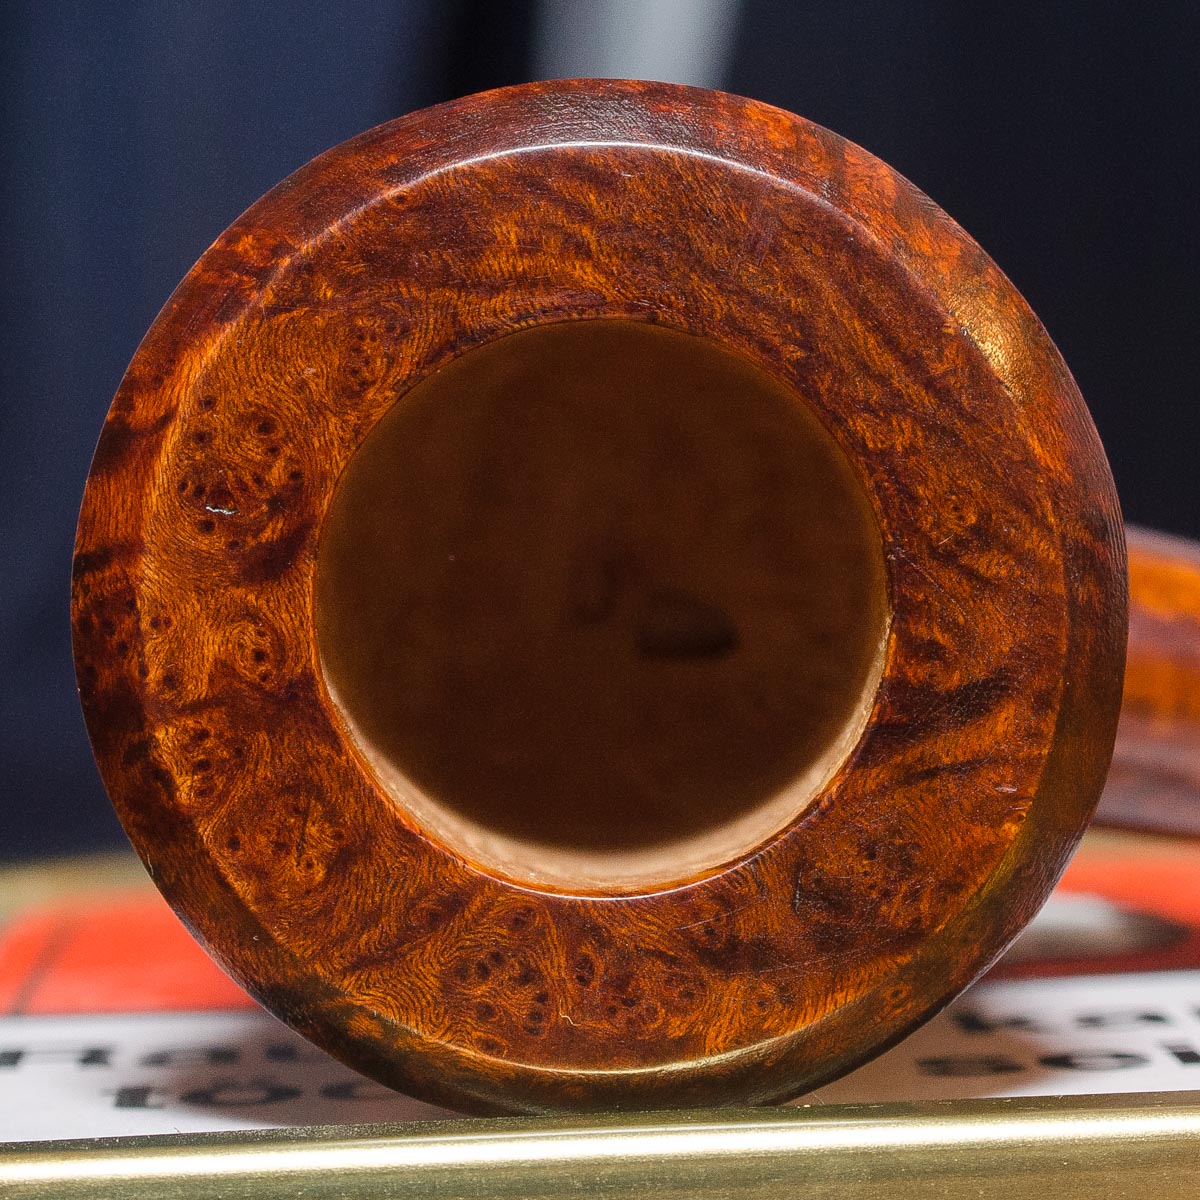
chamber depth: 34mm (1 3/8")
chamber width: 20mm (13/16")
shank diameter (where it meets the mouthpiece): 11mm (7/16")
tenon diameter: 6mm (1/4")
drought hole diameter: 3mm (1/8")
weight: 26g (0,9 oz)
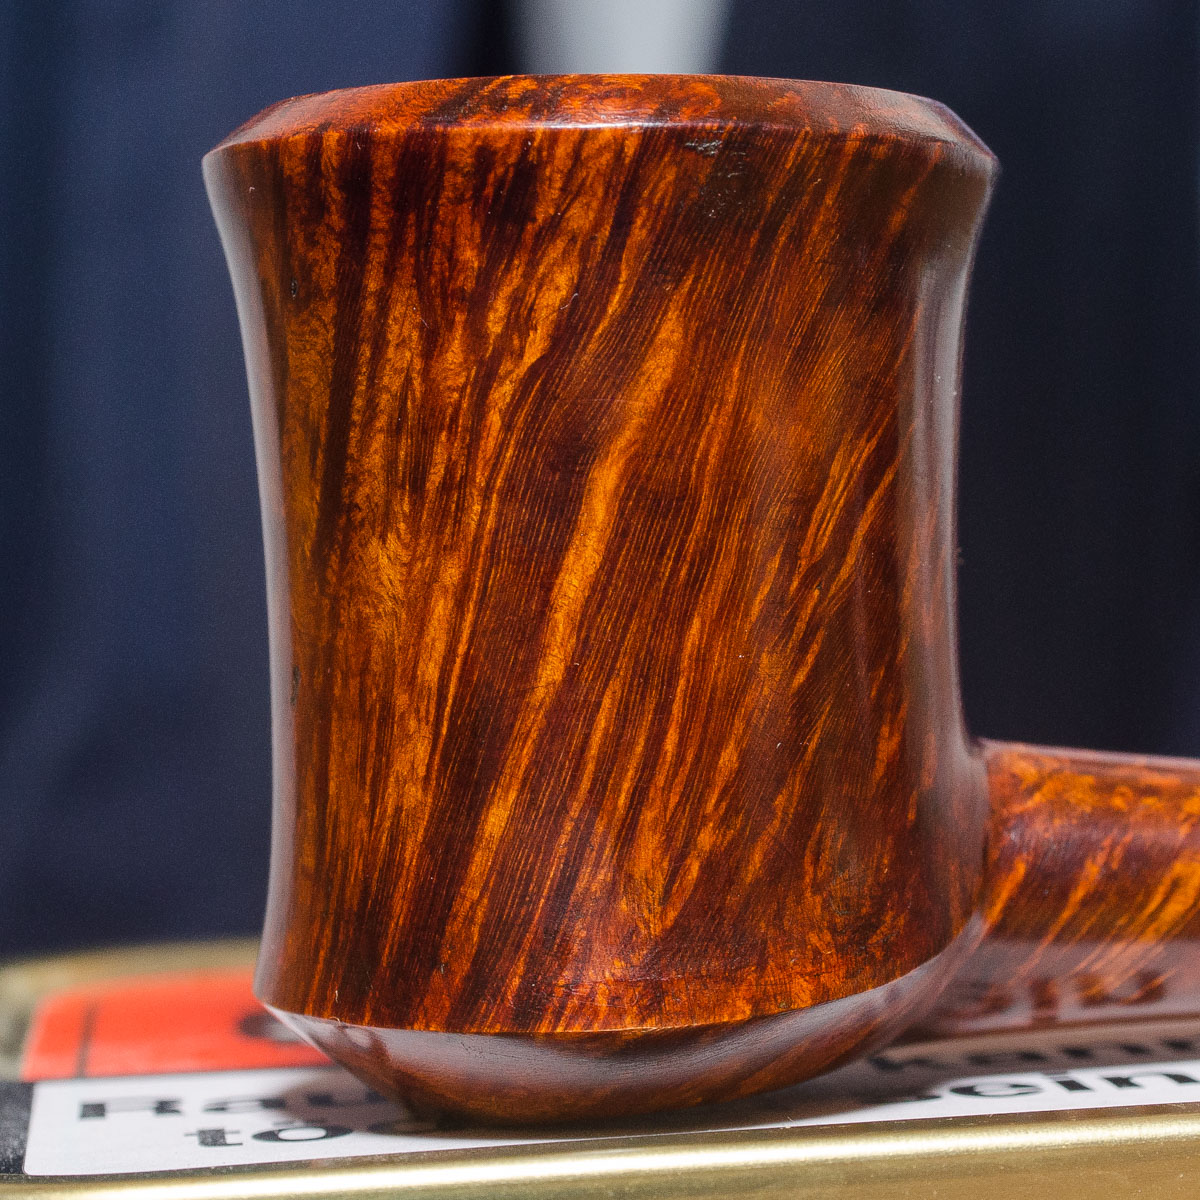
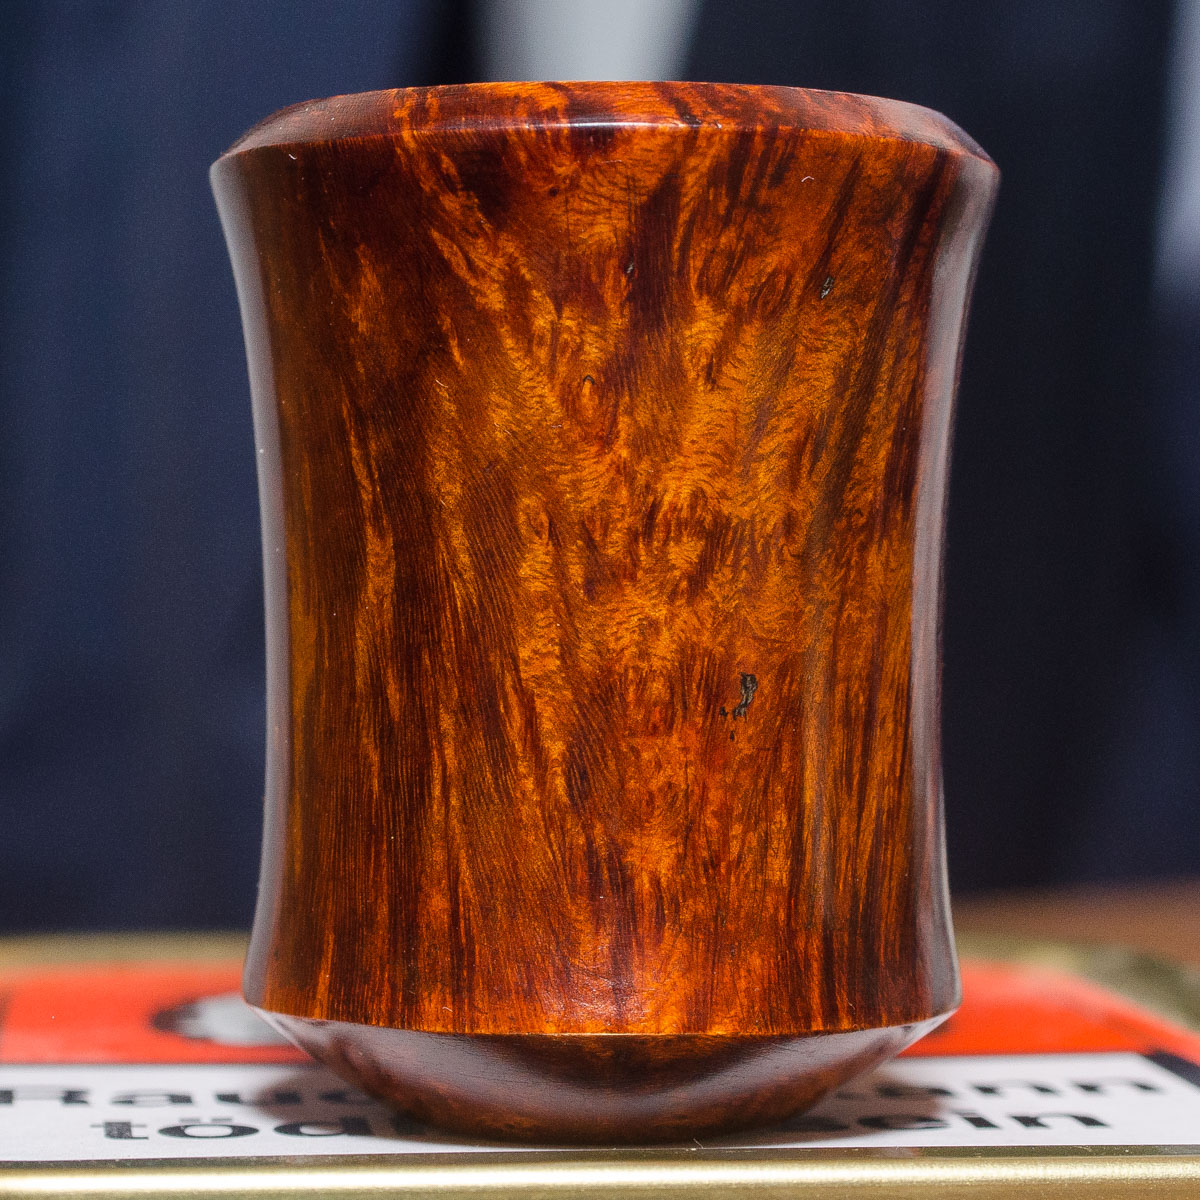
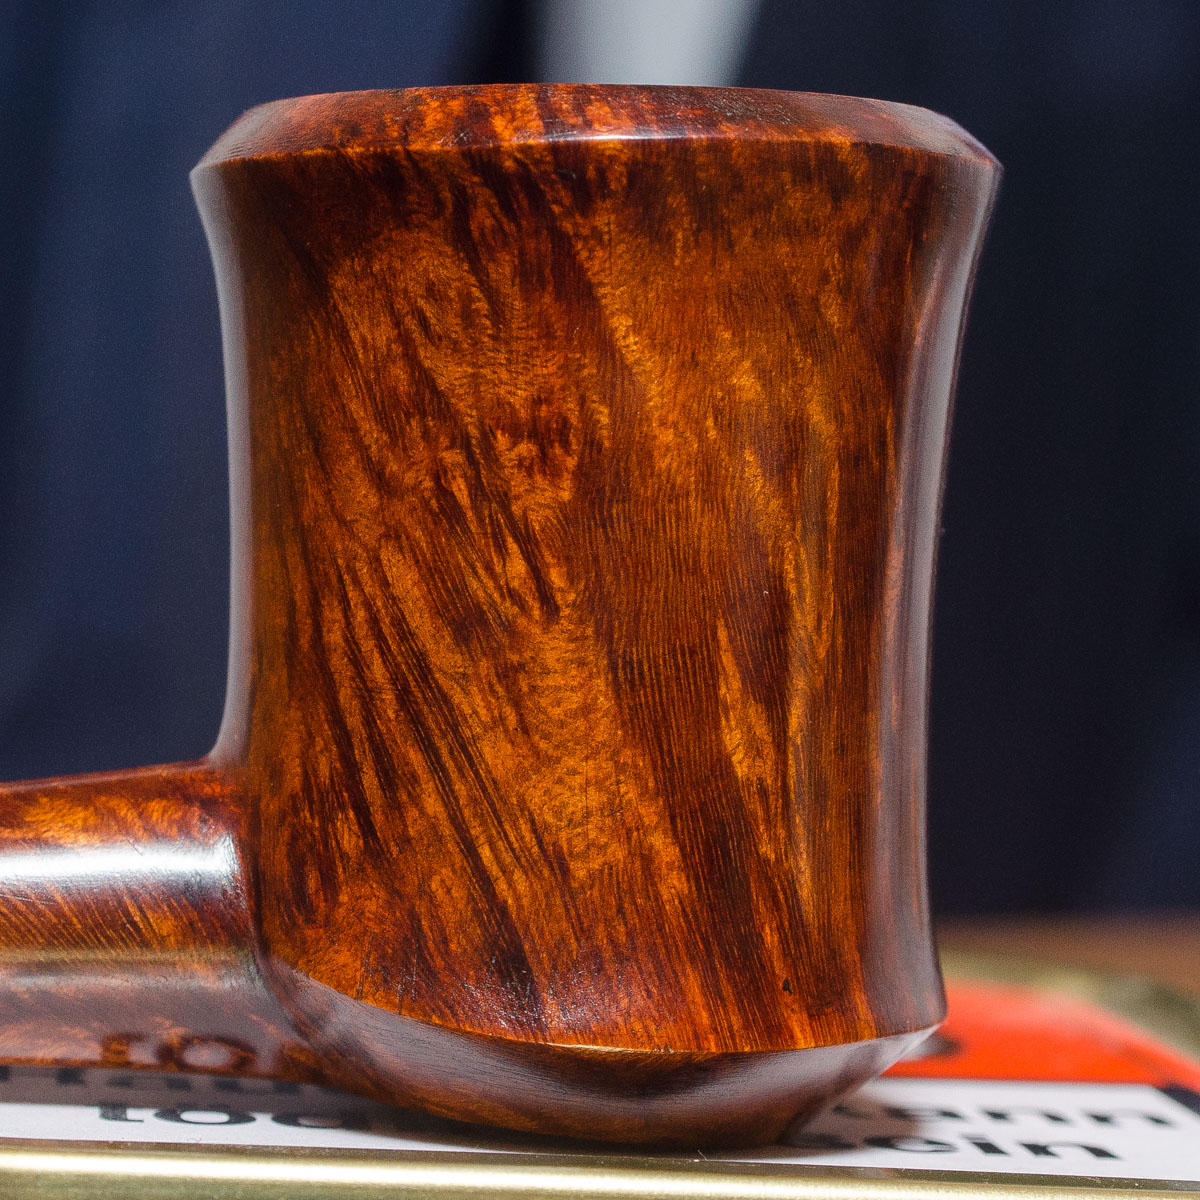
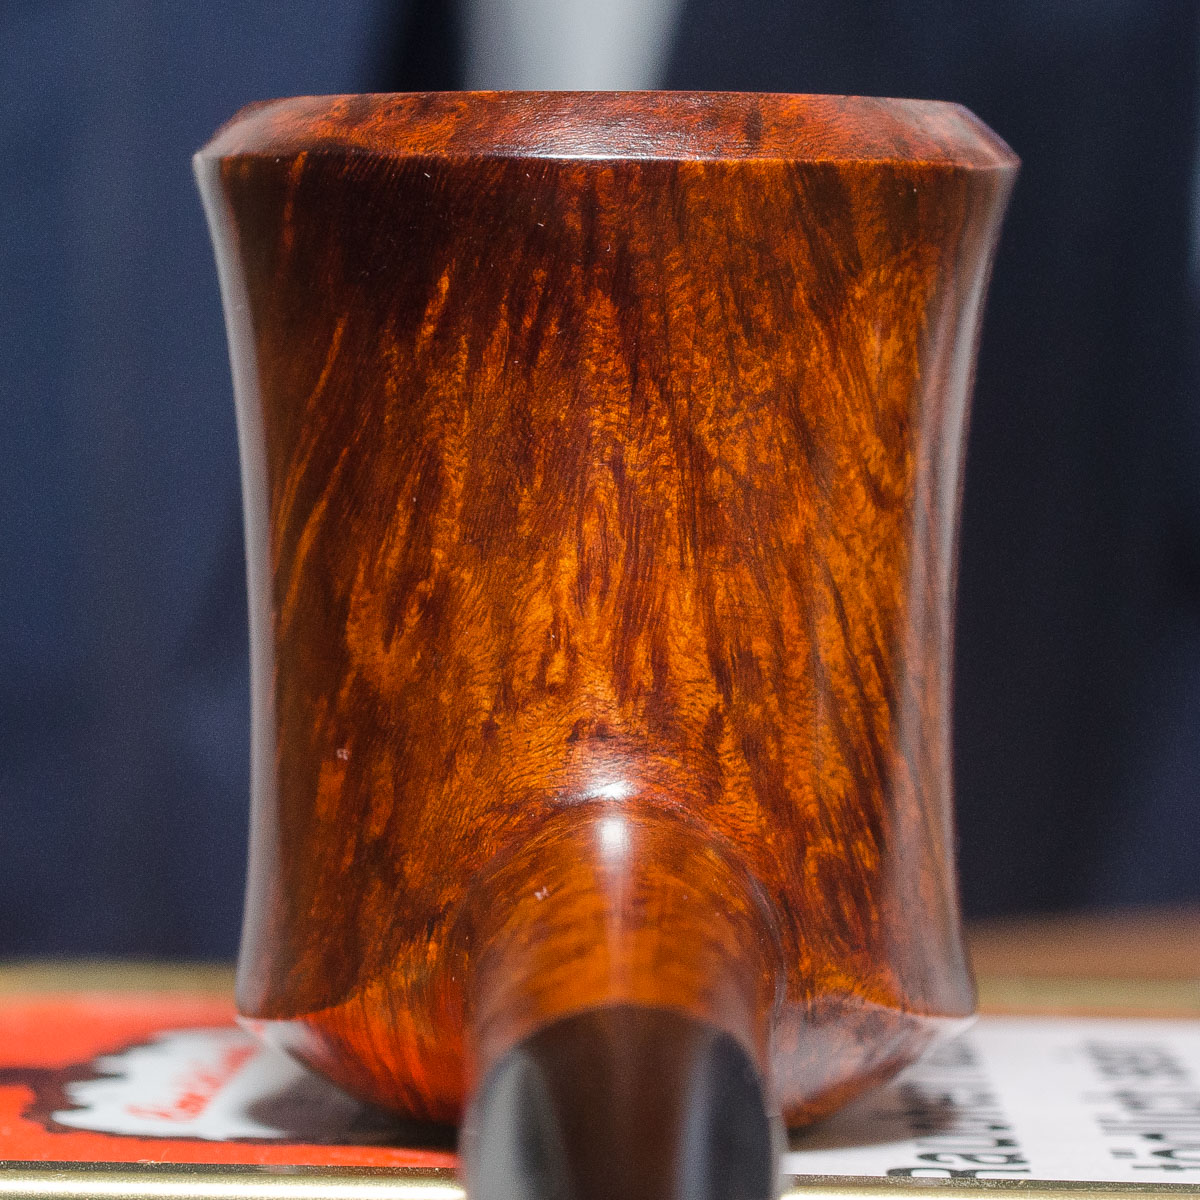
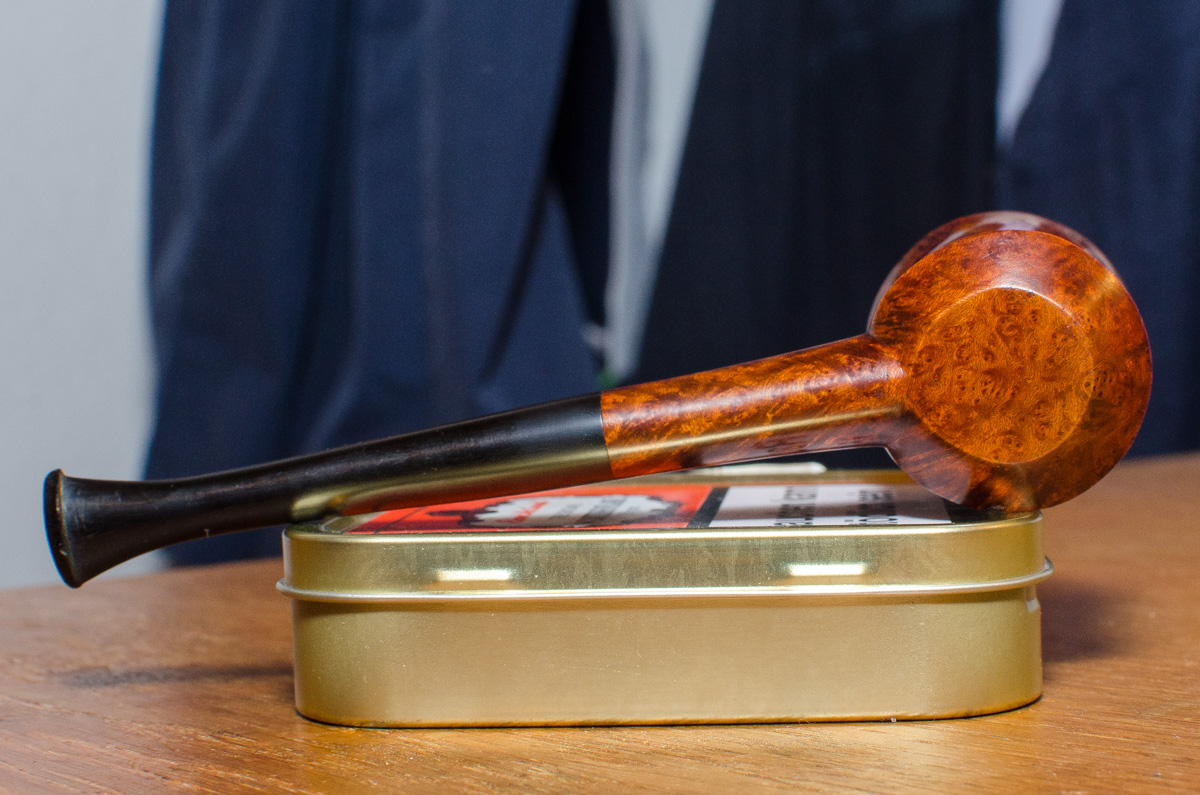
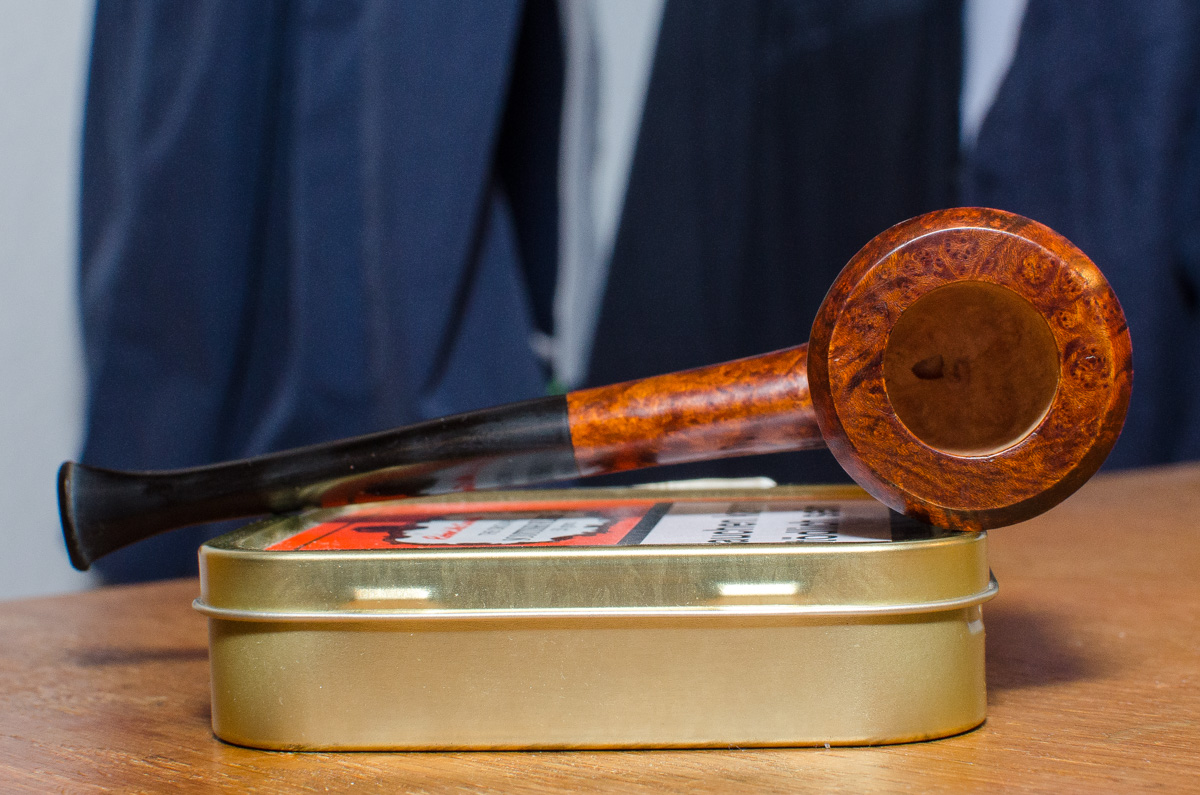
Before you point out all the finishing flaws, I'm very aware that there are a lot of scratches from the various stages of finishing and some residue of a coat of shellac. I regret to tell you I'm not yet patient enough to work on all aspects fully until I call it finished. I thought it might be worthwhile to concentrate on shape and boring, secretly hoping that I can always go back to the sandpaper if I eventually find I want a nicer finish.
The dye is fiebing's dark brown and tan. For polishing I used leather strips loaded with abrasive compound.
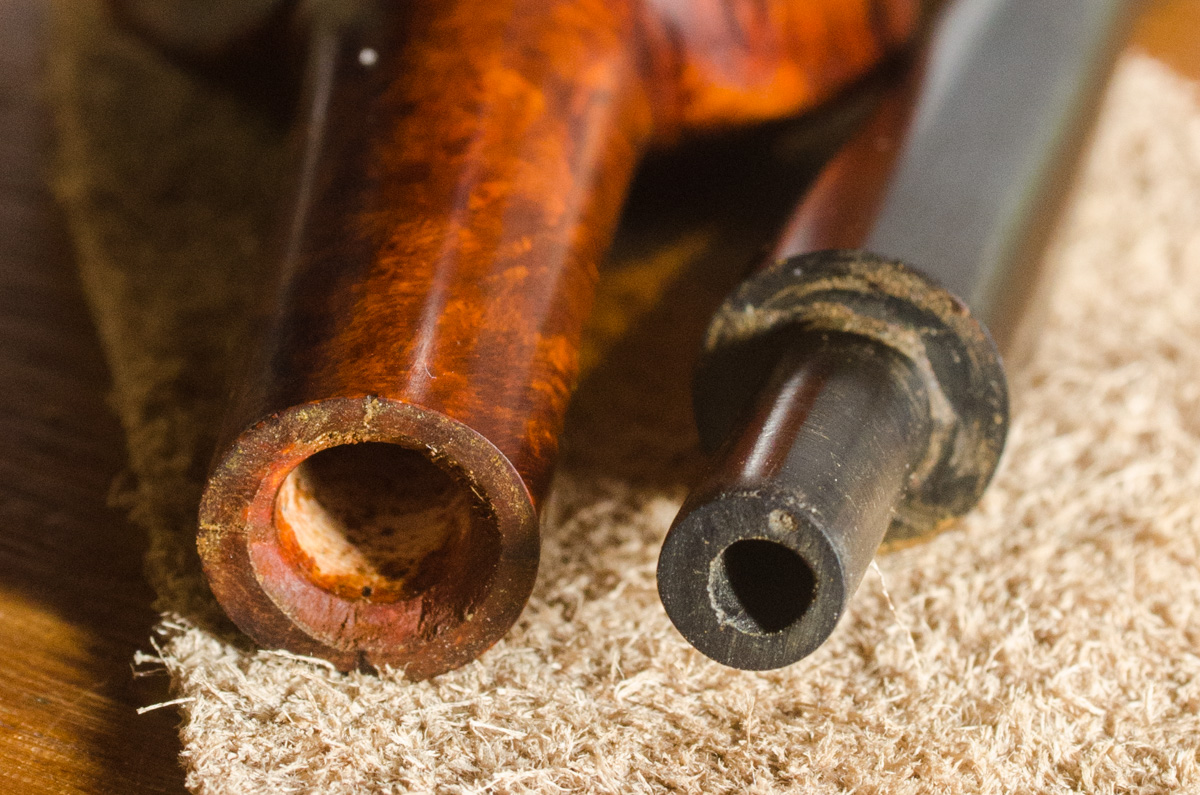
I'm not too happy with the stem: the bore came out at the very lower side of the other end, which forced me to turn into a curved stem. Also the stem/shank section could have been done much better.
I made numerous mistakes, obviously, but I hope to have learned from them. It was still fun to make it. Looking forward to using it for the first time.
Questions and comments are welcome. Thanks.
David
Re: Second try
Posted: Wed Jan 20, 2016 3:47 pm
by sandahlpipe
David,
Since you've mentioned the finishing flaws, I'll refrain from comment other than to say that you shouldn't really consider a pipe finished until you've removed the scratches.
However, a tip on drilling is in order. I'm seeing a lot of tearout both in the stem and shank and the chamfer of the shank. Make sure your drill bits are sharp and your piece firmly clamped if possible, then make sure you're drilling slowly and clearing chips. This will prevent tearout and keep your bits on-center as well as improve the fit between stem and shank.
The other thing, since you say you're working on shaping, is to focus on symmetry. There are a few lines which appear to be slightly off-kilter on the bowl. If you're going to make a symmetrical shape, it needs to be all the way symmetrical.
Still, you've done a lot better than my first pipes.
Re: Second try
Posted: Tue Feb 09, 2016 1:31 am
by DocAitch
Much better than the first. The lines of the stem and shank are nice and continuous. The general,shape is pleasing, I didn't pick up on the asymmetry.that sandhalpipes did.
Your bowl bottom treatment, although better than the first pipe , is unsatifying. To me, it should mirror the top in terms of continuing all the way around. Having it slant upward, and end abruptly on the shank bowl junction stops the flow of the shape/eye. I would have continued that rim all the way around the periphery of the bottom and let the shank meet the bowl symmetrically top and bottom.
Also the continuity of the curves just below the upper rim is better than your first but still is not smooth in a couple of areas.
I know it is difficult when you think that you are approaching the finish line to stop and back up a few steps, but those areas won't get better unless you go back to the shaping steps, take care of the curves, then sand up through the grades.
Keep at it, it's looking pretty good.
DocAitch
Re: Second try
Posted: Tue Feb 09, 2016 10:50 am
by Sasquatch
Put the bit in your mouth, roll your tongue around the hangy-offy parts, and if you aren't bleeding when you are done that, sand them off anyhow. The button shouldn't exceed the sides of the stem, there's no reason for it to do, and lots of reasons for it not to.