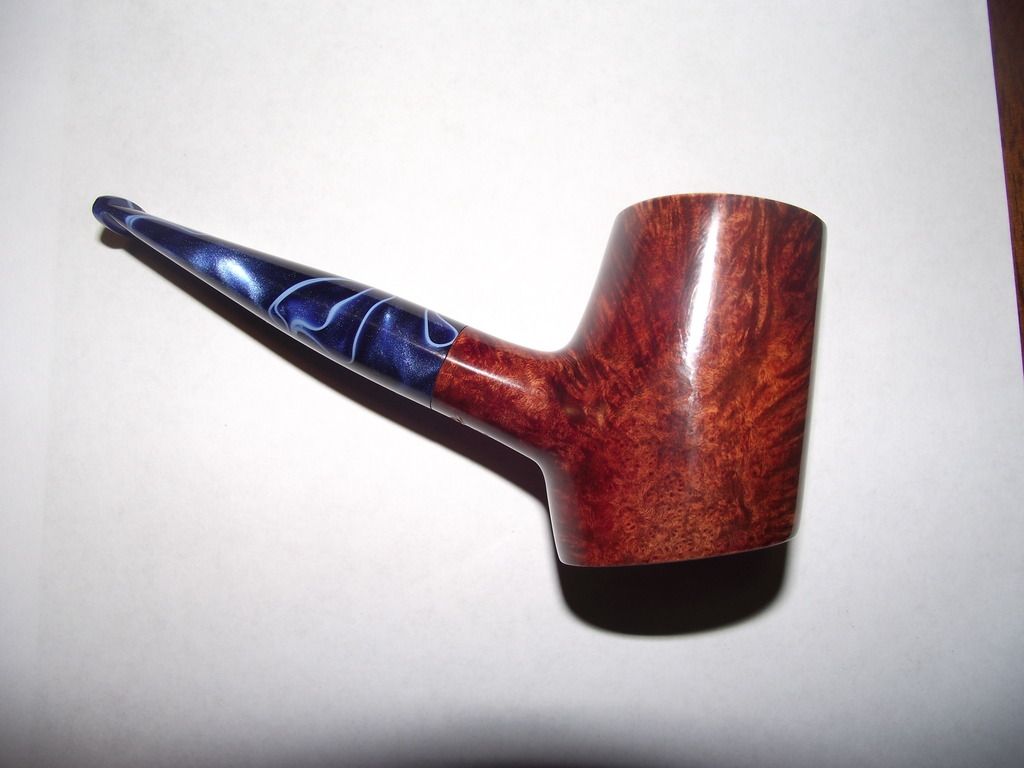
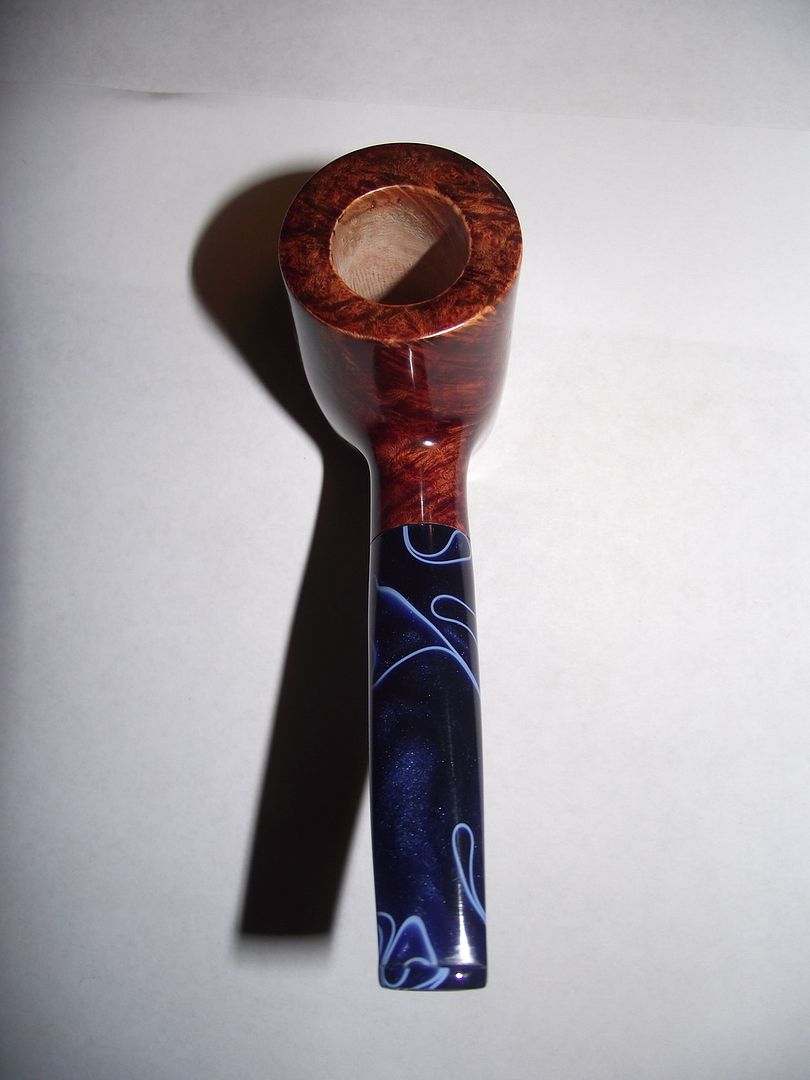
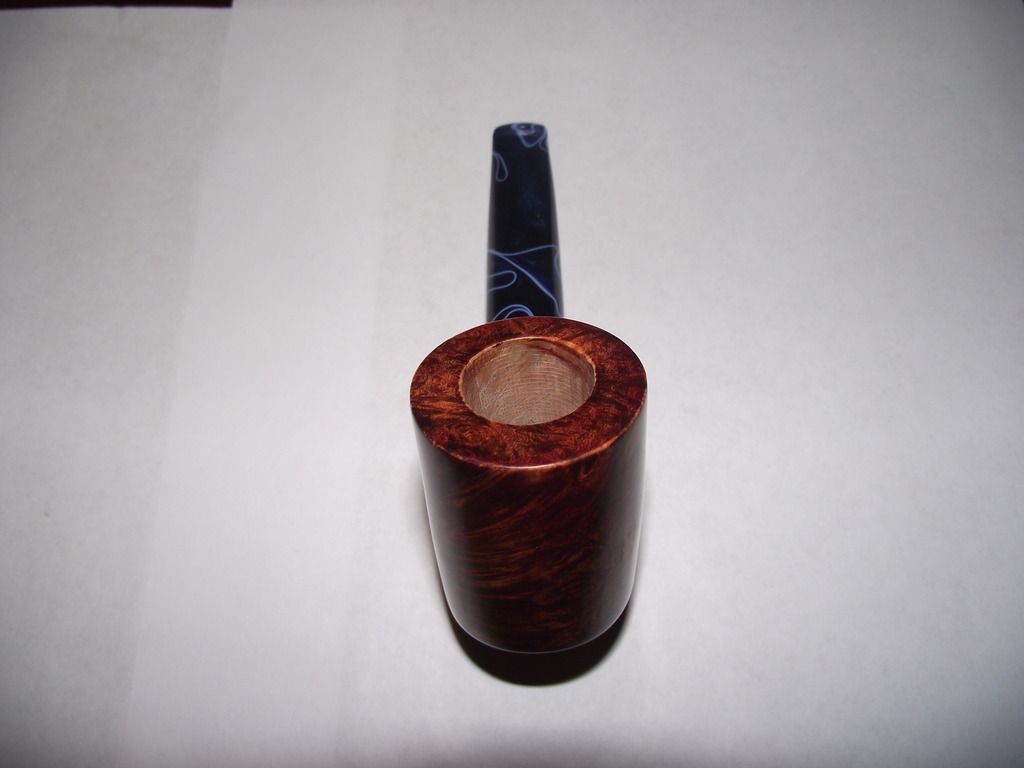
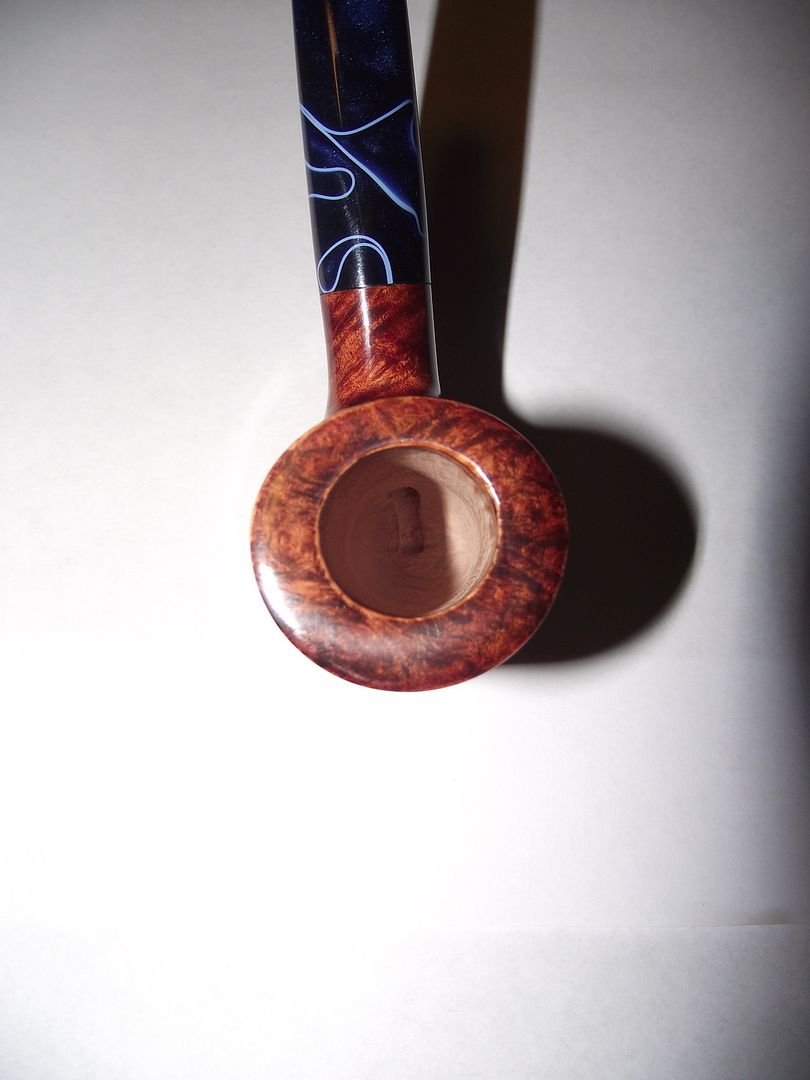
Pipe #2, a poker

Want to show you work to the world? Want a place to post photos of your work and solicit the opinions of those that have gone before you? Post your work here.
Post Reply
clickklick
Posts: 177
Joined: Fri Apr 24, 2015 2:34 pm

Pipe #2, a poker

Post by clickklick »

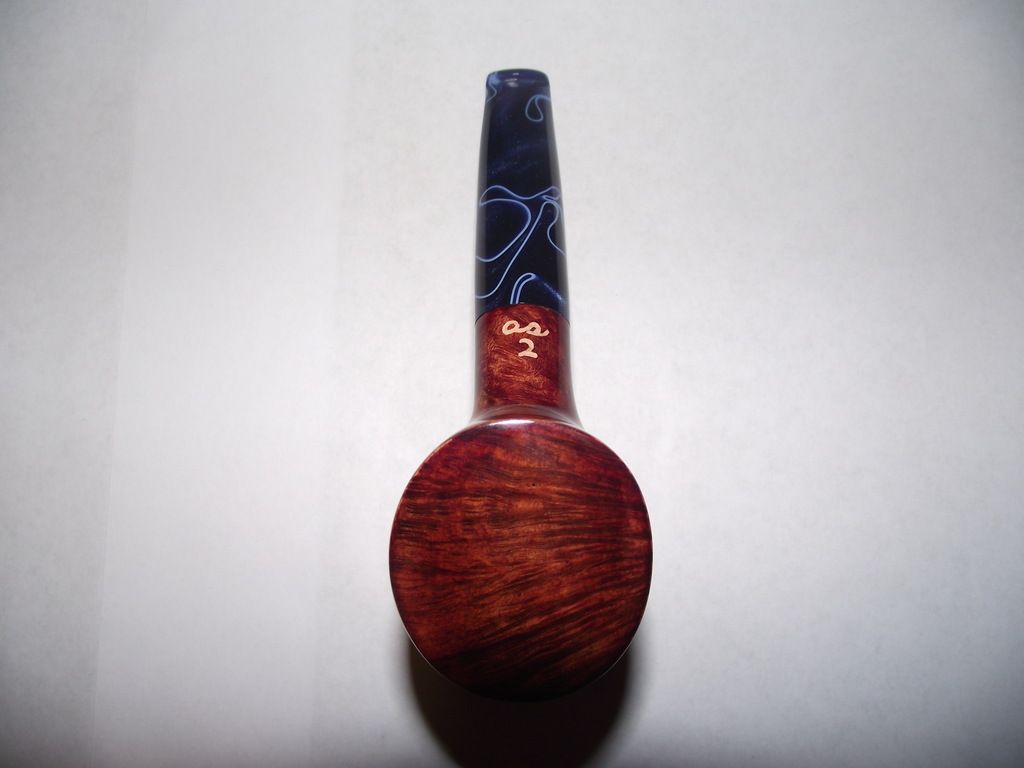
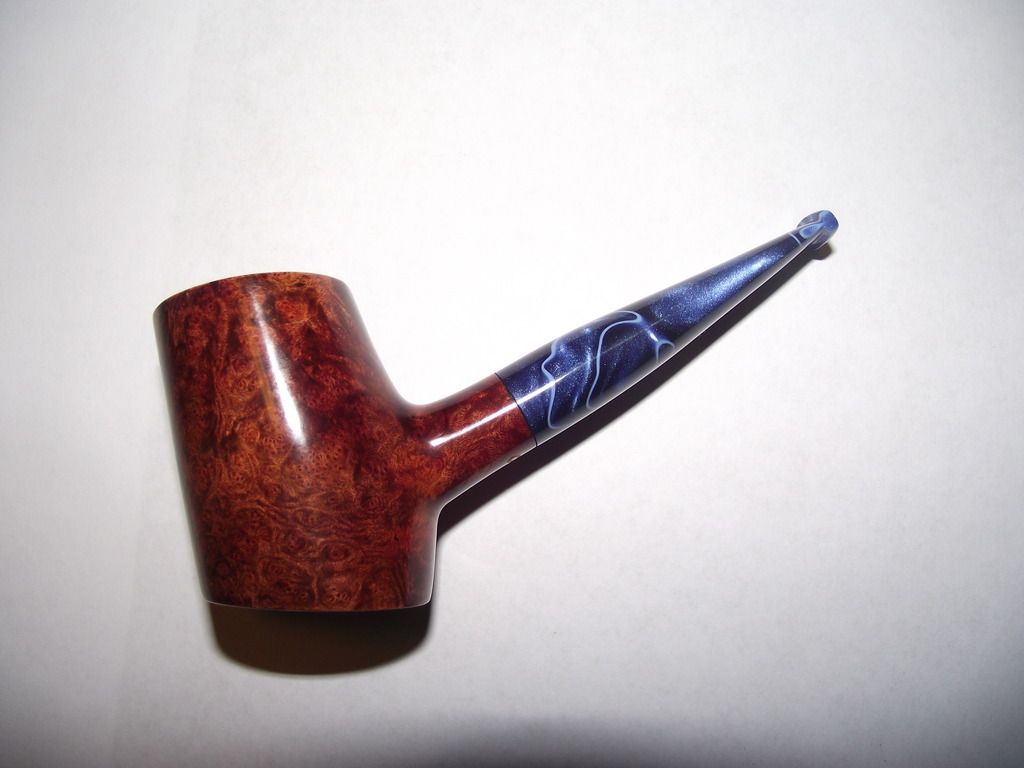
I am really ecstatic about this one. Compared to the freehand I made for my dad this is a huge leap in the right direction. I learned quite a bit from making that freehand. This poker is for a friend who asked for a bent (cherrywood) style sitter. He wanted a blue swirl stem and after setting the shape, we decided it would be better not to bend the stem.

I'm having issues keeping everything square. I am also having some problems keeping things round on my sanding wheel. There is a tiny gap on one side where the tenon meets the shank as my drill press must have tilted a bit when I was facing them. The shank flares out slightly, as it is narrower closer to the bowl, the stem then follows the flare out of the shank. I was really struggling with the stain on this as the wood did not seem to want to take it and even the slightest buffing would remove A LOT!

Overall I'm extremely happy for this being my 2nd pipe. I am open to pointers and suggestions. I am using a washer motor for a wheel to sand and buff, I have a drill press from the 80s and a drill powered bandsaw with a warped blade, hand files, and sand paper. So if there is anything glaringly problematic in this pipe, please let me know so I can keep it in mind for my next one. I think I will be making my 3rd one for myself this time :)
Image

Image

Image

Image

Image

Image

Image

Image
Acting like a loon in the front yard, close to the road.
wooda2008
Posts: 24
Joined: Wed Mar 12, 2014 11:37 am

Re: Pipe #2, a poker

Post by wooda2008 »

Bend your stem. You don't want to have a hot bowl of tobacco that close to your eye when you clench
User avatar
sandahlpipe
Posts: 2106
Joined: Mon Feb 04, 2013 8:49 pm
Location: Zimmerman, MN
Contact:

Re: Pipe #2, a poker

Post by sandahlpipe »

The first thing to fix is the drilling. Having a bit of ridge at the bottom of the tobacco chamber from the airway will allow cake to build up and restrict the air flow. Make sure your you eliminate that ridge completely on the bottom of the chamber. (Also, don't drill your airway past the center of the chamber.)

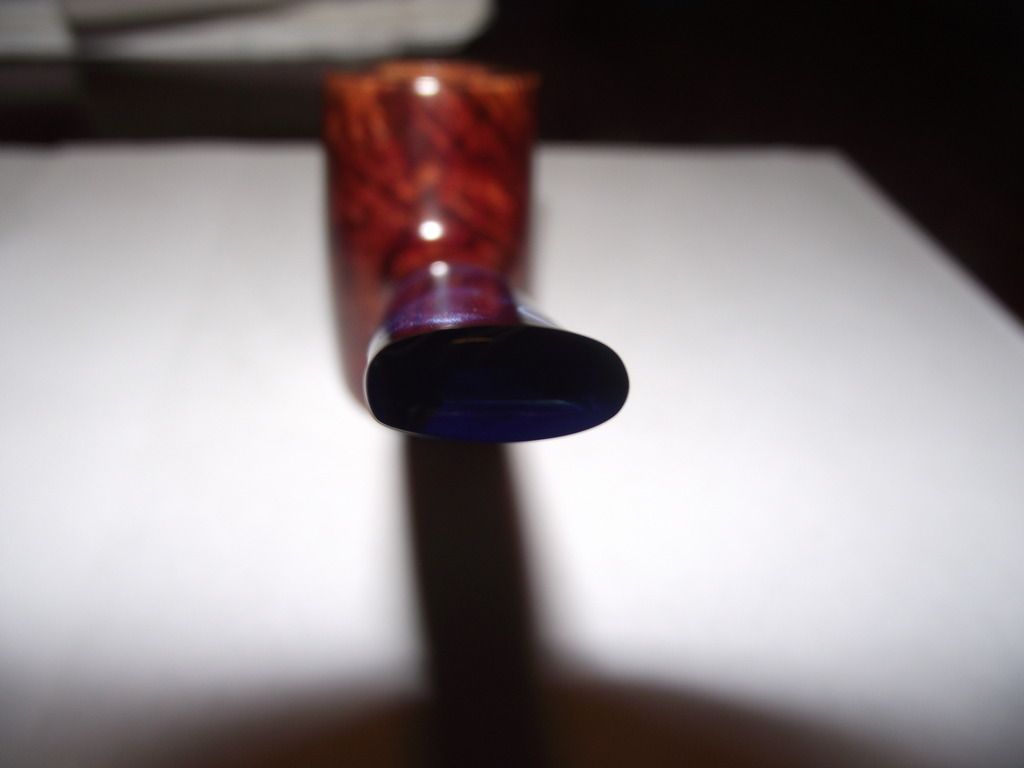
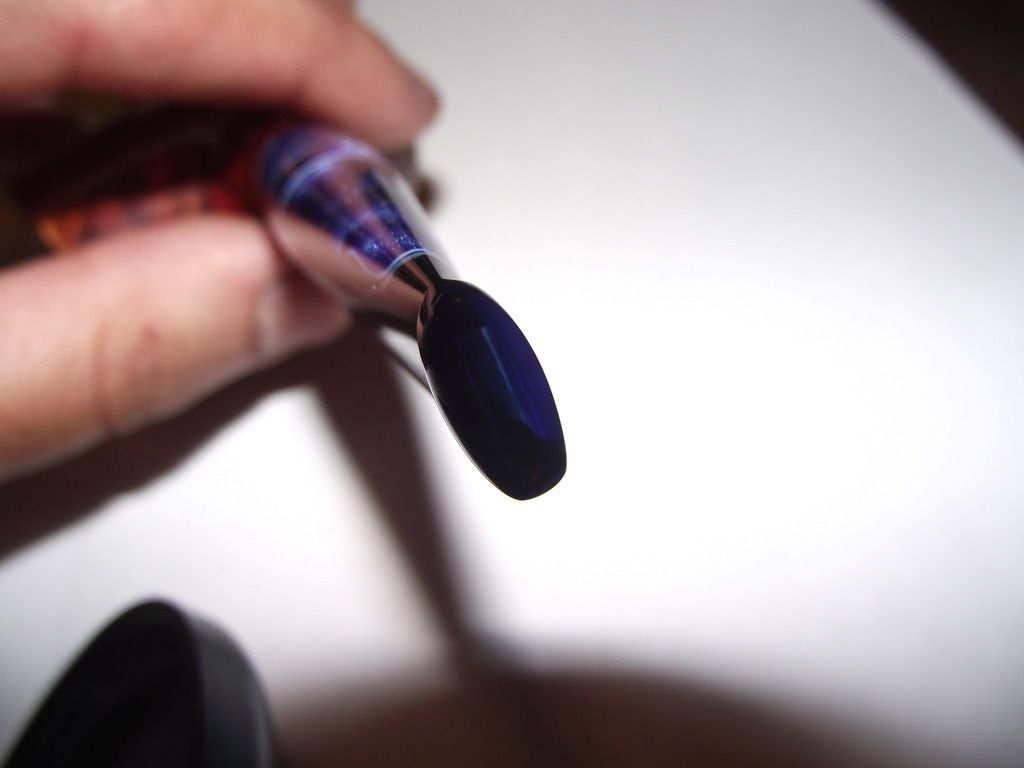
You've got the light in the wrong spot for me to see your slot or button very well. It doesn't look bad for a second pipe, but it can use some help in terms of symmetry. Your chamber isn't quite centered on the top of your bowl and the width of the rim varies from front to back of the bowl. If you're going to make it round, make it perfectly round. If you're going for asymmetry, make it obvious that it was intended.

Finally, your stem has a bulge in it. You want your stem to be a straight line from button to saddle, or if the button needs to be wider than the shank diameter, tapered outwards. Bulges in the stem make it uncomfortable to smoke.

For a second pipe, though, it's really not bad at all. Looking forward to seeing your work progress!
---
Fail early, fail often. Your success depends on it.

Jeremiah Sandahl
http://sandahlpipe.com
wdteipen
Posts: 2817
Joined: Sat Mar 29, 2008 1:05 pm

Re: Pipe #2, a poker

Post by wdteipen »

The line on the face of your bowl should be perpendicular to the line on the back of the bowl. I also think the stem needs to be bent. Not bad for number two.
Wayne Teipen
Teipen Handmade Briar Pipes
http://www.teipenpipes.com
clickklick
Posts: 177
Joined: Fri Apr 24, 2015 2:34 pm

Re: Pipe #2, a poker

Post by clickklick »

Thanks for the input! I'll talk to my friend and see if he wants the stem bent per your suggestions.

I understand the shape would be more pleasing if things were symmetrical. My hands and eye don't quite allow that yet. I see the bulge/flare out on the stem and am sure I was trying to keep from taking too much off and in turn, left too much on. I will have to get a better inspection light as the only one I have in the shop is a single fluorescent 13W A19 bulb mounted to the rafter. I apologize for the pictures of the button, I tried many angles but those two were the only ones that you could make out any shape at all.

In the case of the airway ridge, would you try to sand this out or just drill more out with a spade bit?
Acting like a loon in the front yard, close to the road.
finster
Posts: 57
Joined: Fri Mar 20, 2015 11:27 am
Location: NY

Re: Pipe #2, a poker

Post by finster »

Invest in a stamp. Or if you want carve your maker's mark, do it before staining, buffing and waxing.
clickklick
Posts: 177
Joined: Fri Apr 24, 2015 2:34 pm

Re: Pipe #2, a poker

Post by clickklick »

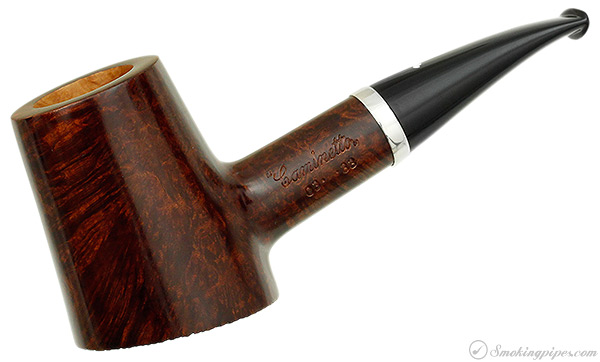
I was using this shape as reference, so I think that is where the bulk of my shaping came from.

Image

After pointing it out though, it is glaringly obvious that a perpendicular line on the back side of the bowl would have been more ideal.
Acting like a loon in the front yard, close to the road.
clickklick
Posts: 177
Joined: Fri Apr 24, 2015 2:34 pm

Re: Pipe #2, a poker

Post by clickklick »

finster,

I got you! My intent was to carve my mark in the pipe before staining, but then I forgot. So I came back and did it after polishing and everything, as is obvious. I don't like how bright and obnoxious it looks so mental note has been taken again and hopefully I remember.

Any tips on keeping the buffing compounds from building up in the mark indentations when polishing?
Acting like a loon in the front yard, close to the road.
finster
Posts: 57
Joined: Fri Mar 20, 2015 11:27 am
Location: NY

Re: Pipe #2, a poker

Post by finster »

You could try q-tips or a soft bristle toothbrush. Others may have better suggestions.
User avatar
sandahlpipe
Posts: 2106
Joined: Mon Feb 04, 2013 8:49 pm
Location: Zimmerman, MN
Contact:

Re: Pipe #2, a poker

Post by sandahlpipe »

clickklick wrote:Thanks for the input! I'll talk to my friend and see if he wants the stem bent per your suggestions.

I understand the shape would be more pleasing if things were symmetrical. My hands and eye don't quite allow that yet. I see the bulge/flare out on the stem and am sure I was trying to keep from taking too much off and in turn, left too much on. I will have to get a better inspection light as the only one I have in the shop is a single fluorescent 13W A19 bulb mounted to the rafter. I apologize for the pictures of the button, I tried many angles but those two were the only ones that you could make out any shape at all.

In the case of the airway ridge, would you try to sand this out or just drill more out with a spade bit?
The answer is to drill more better.

Sanding, if you're not careful, can change the geometry of the chamber. As you learn, develop a process where you make sure things like drilling, facing and fit are all right before you move on to the next step. It's much easier to fix the drilling when your piece is still in the lathe or vise.
---
Fail early, fail often. Your success depends on it.

Jeremiah Sandahl
http://sandahlpipe.com
clickklick
Posts: 177
Joined: Fri Apr 24, 2015 2:34 pm

Re: Pipe #2, a poker

Post by clickklick »

Got I'll try to drill more better :)

So my friend has decided to go with your consensus and allow me to bend the stem. Any suggestions on the bend profile, and a quick question, when I bent my first stem it didn't go so well.

What do you guys normally use to shape the bend and hold it in place while the stem is still pliable? To you make a template out of wood?
Acting like a loon in the front yard, close to the road.
User avatar
sandahlpipe
Posts: 2106
Joined: Mon Feb 04, 2013 8:49 pm
Location: Zimmerman, MN
Contact:

Re: Pipe #2, a poker

Post by sandahlpipe »

clickklick wrote:What do you guys normally use to shape the bend and hold it in place while the stem is still pliable? To you make a template out of wood?
Use fingers to hold it in place as it cools. I also use a little bit of water to help it cool down faster.
---
Fail early, fail often. Your success depends on it.

Jeremiah Sandahl
http://sandahlpipe.com
clickklick
Posts: 177
Joined: Fri Apr 24, 2015 2:34 pm

Re: Pipe #2, a poker

Post by clickklick »

I guess my fingers dont tolerate that much heat lol
Acting like a loon in the front yard, close to the road.
NathanA
Site Supporter
Posts: 364
Joined: Sat Jan 16, 2010 1:52 pm
Location: Lancaster, CA

Re: Pipe #2, a poker

Post by NathanA »

Gloves.
Without Wax (Sincerely),
Nathan
www.armentroutpipes.com
clickklick
Posts: 177
Joined: Fri Apr 24, 2015 2:34 pm

Re: Pipe #2, a poker

Post by clickklick »

The obvious solution
Acting like a loon in the front yard, close to the road.
User avatar
andrew
Posts: 1407
Joined: Sun Jun 26, 2011 11:40 am
Location: North Idaho

Re: Pipe #2, a poker

Post by andrew »

Smooth gloves... leather.
clickklick
Posts: 177
Joined: Fri Apr 24, 2015 2:34 pm

Re: Pipe #2, a poker

Post by clickklick »

I'll have to invest in a pair. Thanks!

I think my next pipe I'm going to try a squashed tomato shape for myself. Should be fun!
Acting like a loon in the front yard, close to the road.
wdteipen
Posts: 2817
Joined: Sat Mar 29, 2008 1:05 pm

Re: Pipe #2, a poker

Post by wdteipen »

Ah, I see the shape you were going for. If you left the base under the shank wider you would have been closer. They don't necessarily have to be perpendicular but the arcing line you have doesn't really work visually.
Wayne Teipen
Teipen Handmade Briar Pipes
http://www.teipenpipes.com
Post Reply