Want to show you work to the world? Want a place to post photos of your work and solicit the opinions of those that have gone before you? Post your work here.
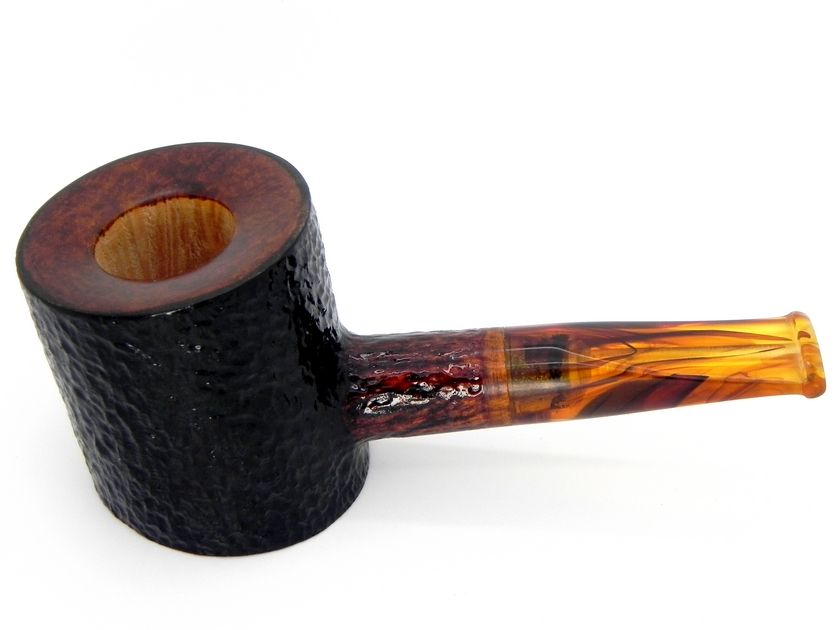
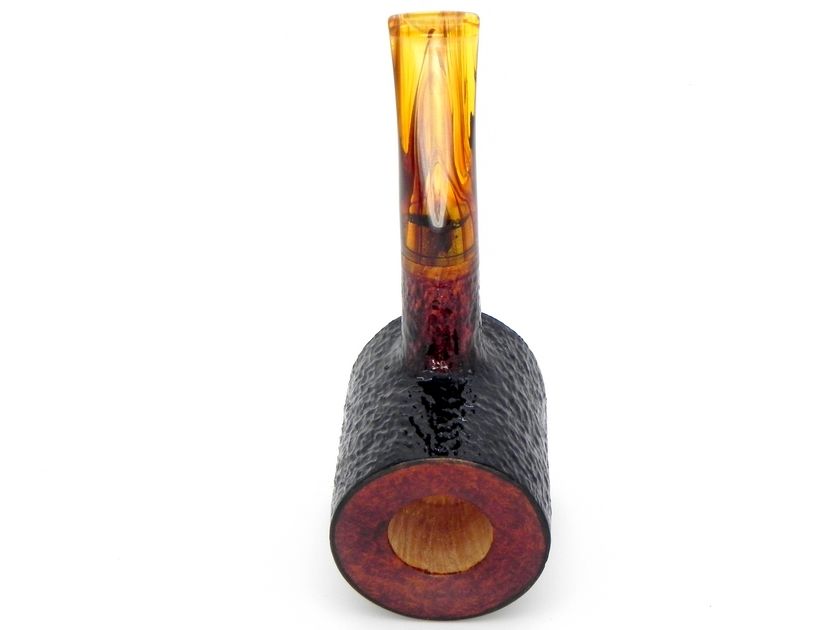
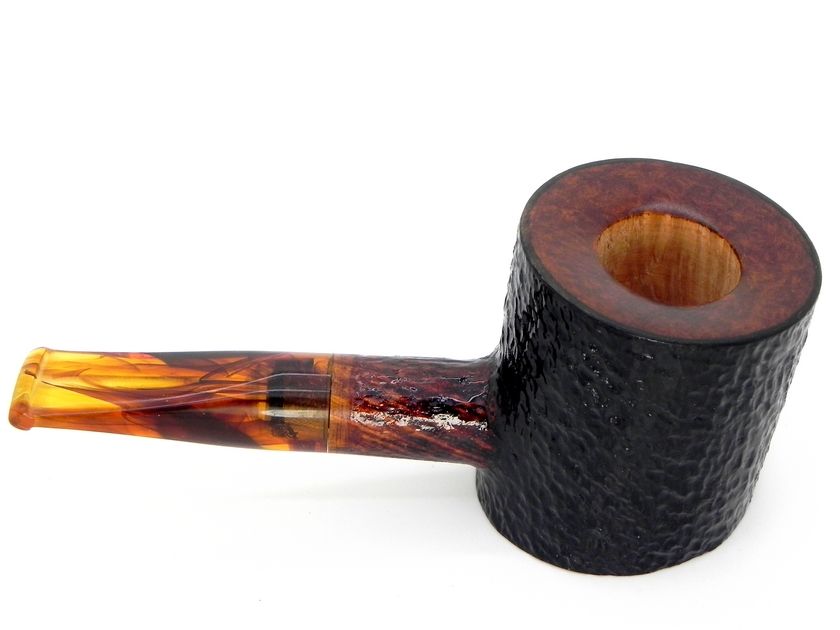
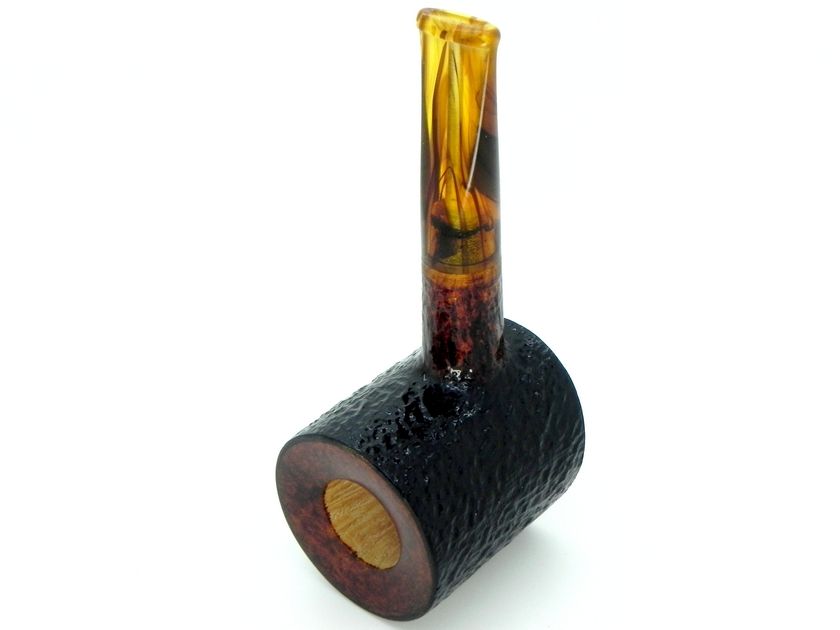
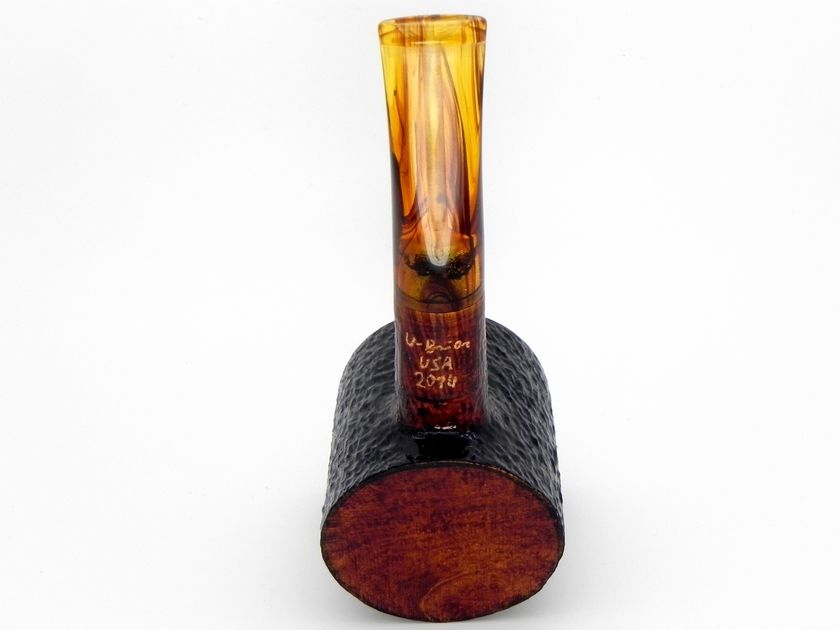
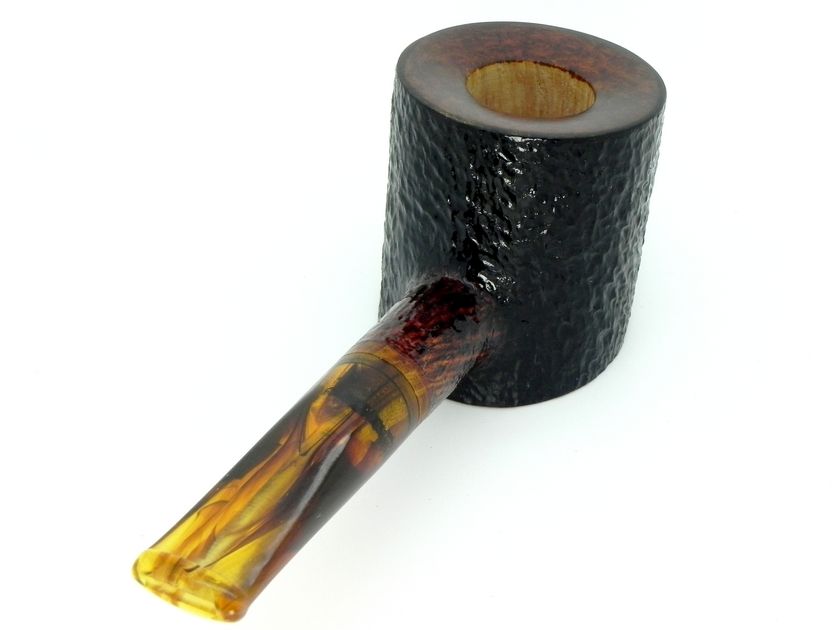
Here is a cherry poker pipe and this time i must say that the stem is pre-molded and i don't not have the equipment to make my own stems yet but i did order some needle files to get me started and learn how to make a funnel on these stems i have at my possession. Again any critique would be welcomed but this time i wont take it hard and personal so hit me hard if you can my pipe fellows.
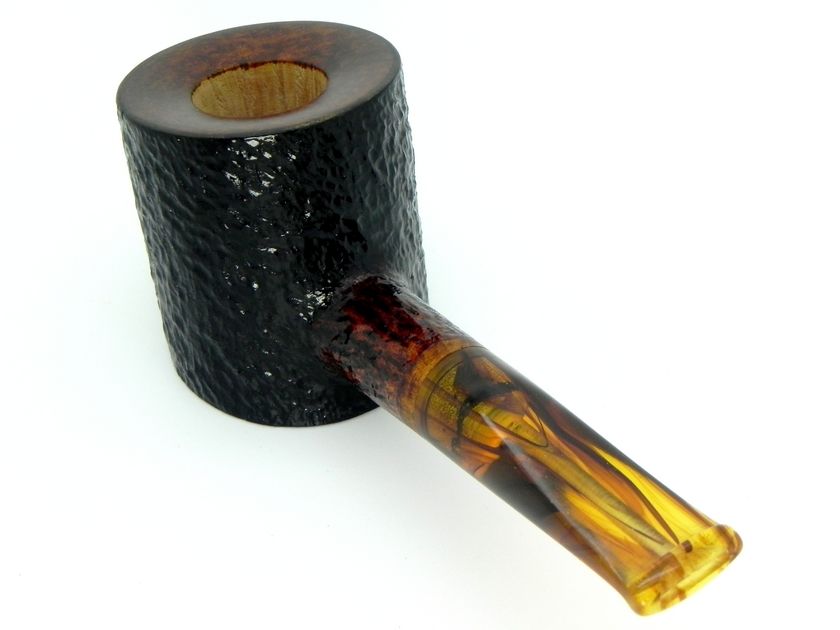
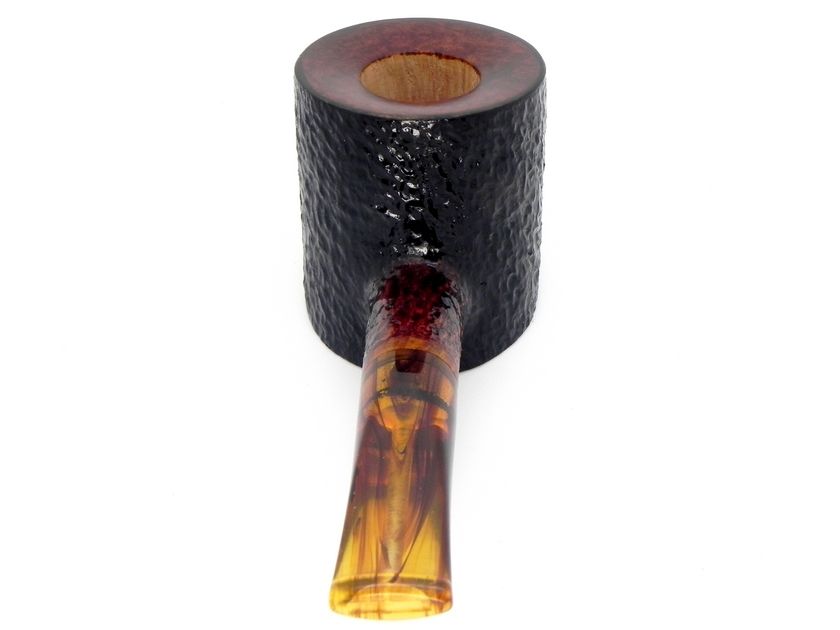
The junction doesn't look as pinched on this one, so that's a good thing. One comment about the stain. The beveled rim is nice, especially with the two tone colour, but that black ring around the edge looks like you stained the plateau black after the rim was finished and you left a ring of stain. To me that ruins the nice bevel and colour of the rim. Try either masking the rim off, or staining the sides before you stain the rim. I guess you could go back and sand down the entire rim and re-stain it though.
What Jesse said is spot on. I would add a couple things to think about.
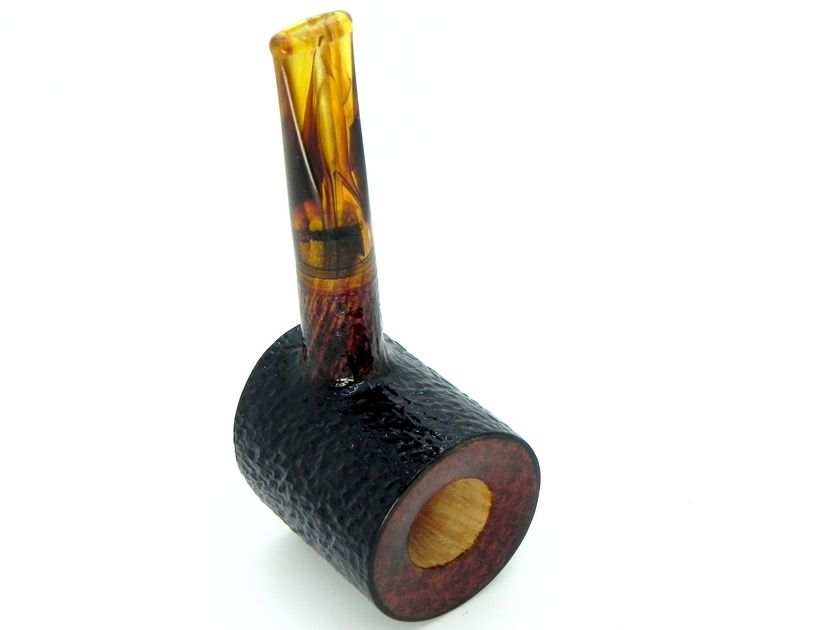
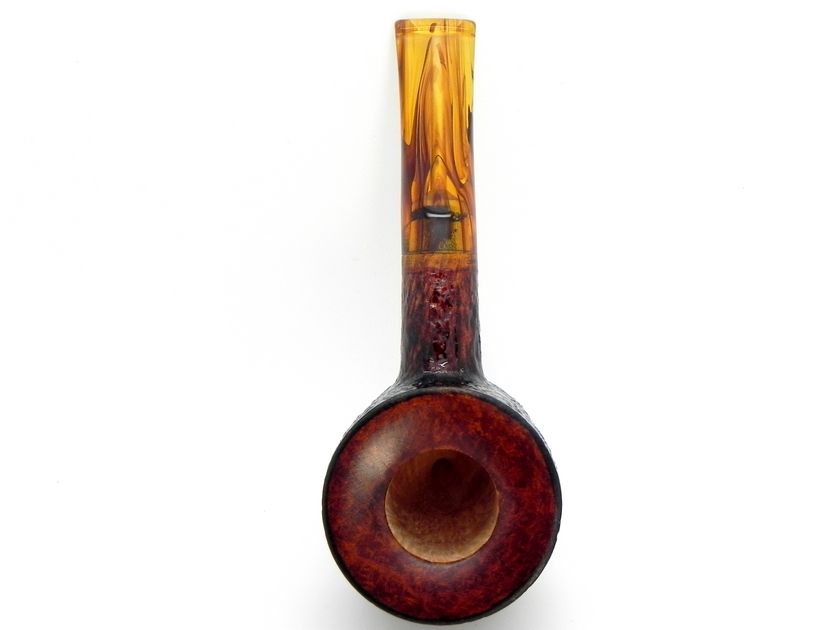
-You have some scratches on the shank at the transition from stummel to stem. Getting those out by sanding more carefully is always a good focus.
-Using a Delrin Tenon on a translucent stem material doesn't look good. Getting some opaque pre-fabs would help. Or you could not worry about it and just change that when you start cutting your own stems. An integral tenon is a must when using a translucent material.
-You shouldn't be afraid to modify the shape on a pre-fab stem. What I have in mind for this one is the taper. In a good taper stem, the taper should begin right at the transition from shank to stem. The stem manufacturers wait about .25" before beginning the taper on the stem. Coming back and adjusting that will help loads with the overall look and feel of the pipe.
-The overall shape of the bowl still feels visually heavy. If you are dead set on keeping the big rim of this pipe, you can try tapering towards the base of the bowl a little bit to alleviate some of the excess material. Alternatively just turn the bowl smaller.
Overall, you're showing some improvements on this pipe- as Jesse said, the shank transition looks much cleaner, which helps a ton with the overall feel of the pipe. Getting slot cutting tools will help the smoking properties on your pipes a ton.
As far as shaping goes, I'm guessing you do most of it on a lathe. While this makes symmetry much easier, it also seems to be limiting to your overall aesthetic. You may find it helpful to branch out and try some new designs- bent pipes, brandies, billiards, etc. try doing some things you haven't done before or are scared to try- bent pipes can make symmetry a lot harder for sure. You have to rely on your eye, not a lathe. Your initial attempts may not look very good- honestly neither did every other pipemakers early work. The lessons you learn from pushing yourself will help you a ton though. There's nothing to lose!
You're already taking good photos of your pipes. However, there are only a few specific photos needed to analyze a pipe. Check out this thread for a really great tutorial: viewtopic.php?f=18&t=8876
Your photos are good as product photos but could be whittled down with profile shots added to receive productive critique.
The junction doesn't look as pinched on this one, so that's a good thing. One comment about the stain. The beveled rim is nice, especially with the two tone colour, but that black ring around the edge looks like you stained the plateau black after the rim was finished and you left a ring of stain. To me that ruins the nice bevel and colour of the rim. Try either masking the rim off, or staining the sides before you stain the rim. I guess you could go back and sand down the entire rim and re-stain it though.
Yes the black line around the rim was intentional i did not realize that would make a whole lot of a difference. I was tring to dress up the pipe sort of like making a collar on the rim. I was just trying something new.
The Smoking Yeti wrote:What Jesse said is spot on. I would add a couple things to think about.
-You have some scratches on the shank at the transition from stummel to stem. Getting those out by sanding more carefully is always a good focus.
-Using a Delrin Tenon on a translucent stem material doesn't look good. Getting some opaque pre-fabs would help. Or you could not worry about it and just change that when you start cutting your own stems. An integral tenon is a must when using a translucent material.
-You shouldn't be afraid to modify the shape on a pre-fab stem. What I have in mind for this one is the taper. In a good taper stem, the taper should begin right at the transition from shank to stem. The stem manufacturers wait about .25" before beginning the taper on the stem. Coming back and adjusting that will help loads with the overall look and feel of the pipe.
-The overall shape of the bowl still feels visually heavy. If you are dead set on keeping the big rim of this pipe, you can try tapering towards the base of the bowl a little bit to alleviate some of the excess material. Alternatively just turn the bowl smaller.
Overall, you're showing some improvements on this pipe- as Jesse said, the shank transition looks much cleaner, which helps a ton with the overall feel of the pipe. Getting slot cutting tools will help the smoking properties on your pipes a ton.
As far as shaping goes, I'm guessing you do most of it on a lathe. While this makes symmetry much easier, it also seems to be limiting to your overall aesthetic. You may find it helpful to branch out and try some new designs- bent pipes, brandies, billiards, etc. try doing some things you haven't done before or are scared to try- bent pipes can make symmetry a lot harder for sure. You have to rely on your eye, not a lathe. Your initial attempts may not look very good- honestly neither did every other pipemakers early work. The lessons you learn from pushing yourself will help you a ton though. There's nothing to lose!
Keep it up!
Yeti
Edit: Spelling check
Thanks Yeti for jumping in and giving me more useful critique on this pipe. as for me its harder for me to make new designs especial on bent pipes which i try to do and ended up with the drill bit under the pipe. Since i do not have that special chuck with pins but i will try something new in a different way.
d.huber wrote:You're already taking good photos of your pipes. However, there are only a few specific photos needed to analyze a pipe. Check out this thread for a really great tutorial: viewtopic.php?f=18&t=8876
Your photos are good as product photos but could be whittled down with profile shots added to receive productive critique.
I did try that before and tonight i will re look at the link and try to mimic it as much as possible thanks Huber for the info.
The Smoking Yeti wrote:What Jesse said is spot on. I would add a couple things to think about.
-You have some scratches on the shank at the transition from stummel to stem. Getting those out by sanding more carefully is always a good focus.
-Using a Delrin Tenon on a translucent stem material doesn't look good. Getting some opaque pre-fabs would help. Or you could not worry about it and just change that when you start cutting your own stems. An integral tenon is a must when using a translucent material.
-You shouldn't be afraid to modify the shape on a pre-fab stem. What I have in mind for this one is the taper. In a good taper stem, the taper should begin right at the transition from shank to stem. The stem manufacturers wait about .25" before beginning the taper on the stem. Coming back and adjusting that will help loads with the overall look and feel of the pipe.
-The overall shape of the bowl still feels visually heavy. If you are dead set on keeping the big rim of this pipe, you can try tapering towards the base of the bowl a little bit to alleviate some of the excess material. Alternatively just turn the bowl smaller.
Overall, you're showing some improvements on this pipe- as Jesse said, the shank transition looks much cleaner, which helps a ton with the overall feel of the pipe. Getting slot cutting tools will help the smoking properties on your pipes a ton.
As far as shaping goes, I'm guessing you do most of it on a lathe. While this makes symmetry much easier, it also seems to be limiting to your overall aesthetic. You may find it helpful to branch out and try some new designs- bent pipes, brandies, billiards, etc. try doing some things you haven't done before or are scared to try- bent pipes can make symmetry a lot harder for sure. You have to rely on your eye, not a lathe. Your initial attempts may not look very good- honestly neither did every other pipemakers early work. The lessons you learn from pushing yourself will help you a ton though. There's nothing to lose!
Keep it up!
Yeti
Edit: Spelling check
Thanks Yeti for jumping in and giving me more useful critique on this pipe. as for me its harder for me to make new designs especial on bent pipes which i try to do and ended up with the drill bit under the pipe. Since i do not have that special chuck with pins but i will try something new in a different way.
Do some digging on how to drill a pipe with a drill press and vice- it works really well, and a drill press is a super versatile piece of equipment. If you don't have a drill press, you can always use modified tower jaws for drilling pipes- do a forum search for those as well.
I'll echo the fact that your pipes seem to be super bowl-heavy. I add my opinion here only because I found your pipes while looking for an affordable hand-made piece, but can't spend my precious, scarce pipe-money on something with those proportions.
On land, at sea, at home, abroad,
I smoke my pipe and worship God.