working in meerschaum...

working in meerschaum...
does anyone has any experience in working with meerschaum??... can i work with it the same as wioth briar... drilling, sanding and so on?? can i use a french wheel and a dremel tool to sand it???

Re: working in meerschaum...
Hey Daniel, finally something I can help with !
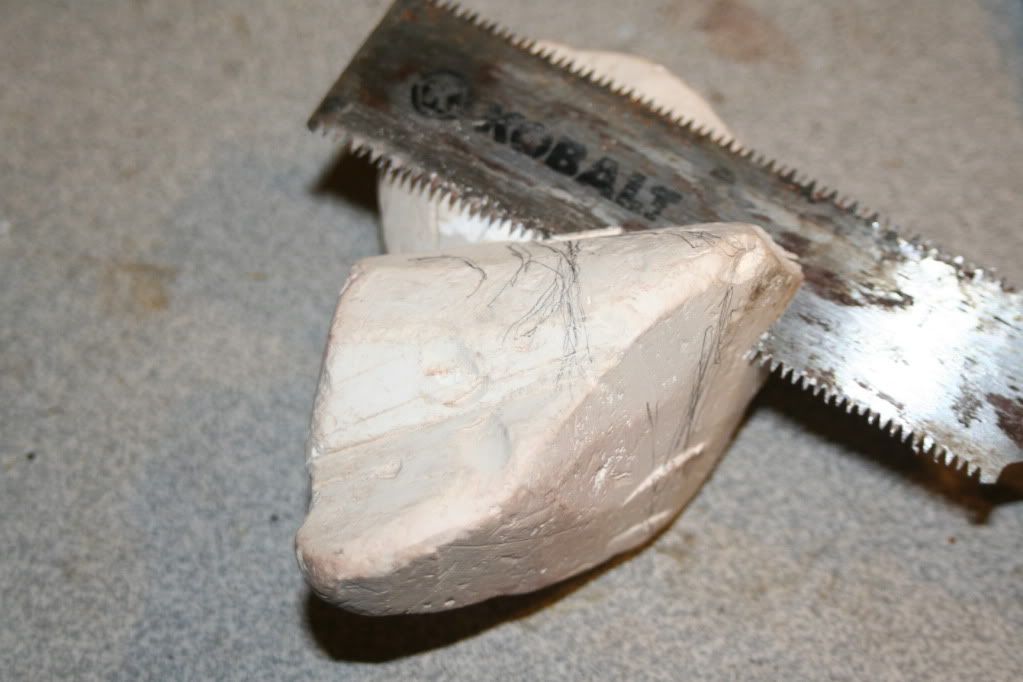
I found three blocks of rough Turkish meerschaum for sale awhile back, and spent a day carving one of them.
The trick is (if its block meerschaum) to soak it in distilled water for about 10 minutes. It goes from being a hard rock to being just like wet clay. It is like carving a bar of soap, its that soft.
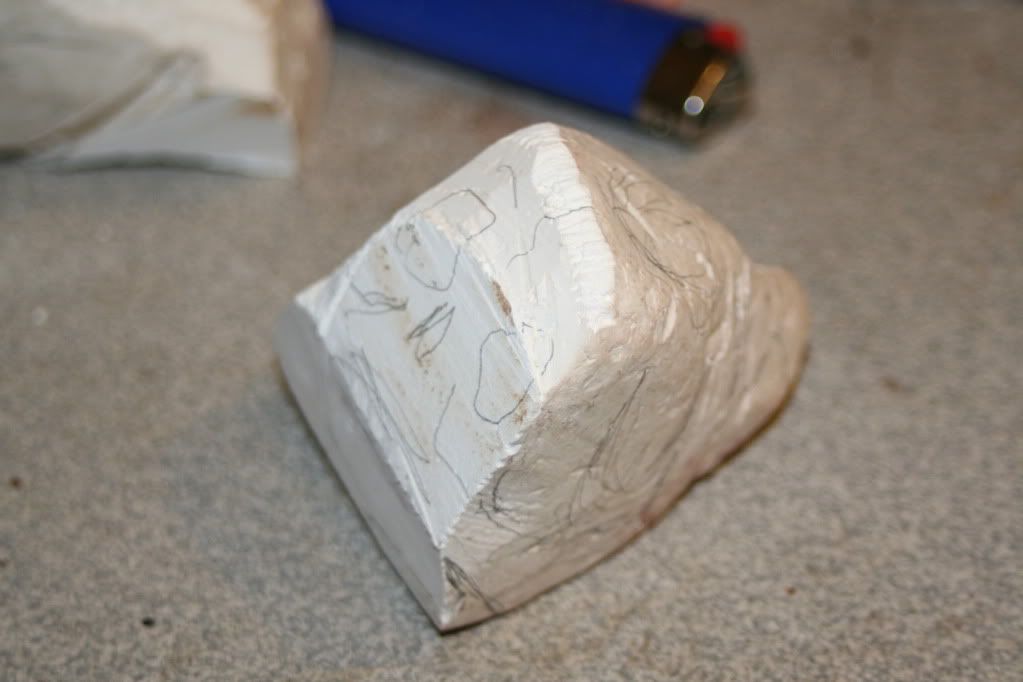
You can carve it when its soft, or carve it when it has dried and hardened for different results.
The tools I used were mainly just wood carving knives. When it is soaked, you can easily shape it into any form with just a sharp knife. When you let it dry, then you can finish shaping with files and sandpaper. No need for a french wheel or a dremel if you soak it first.
I did use a dremel for carving some detail into the piece, I just used the tip of a plain drill bit and it easily eats away the meerschaum. Experiment with many types of knives, tools and bits for different effects.
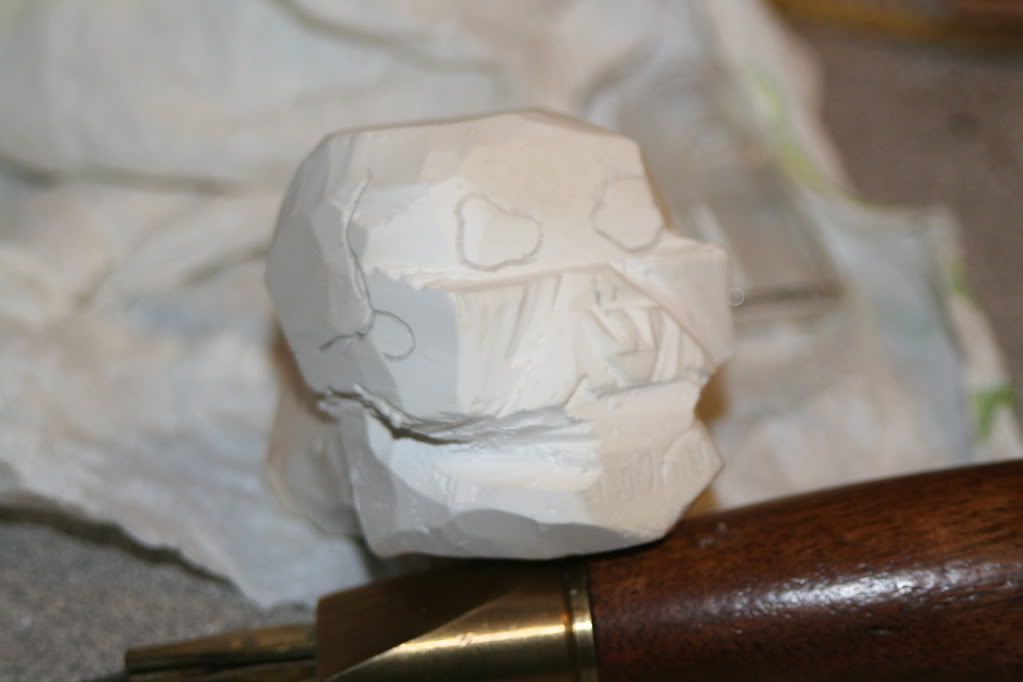
I still havent finished the pipe, but really had a lot of fun carving it. If you have any access to some raw meer, Please PM me right away ! Would love to get my hands on a few more pieces.
I found three blocks of rough Turkish meerschaum for sale awhile back, and spent a day carving one of them.
The trick is (if its block meerschaum) to soak it in distilled water for about 10 minutes. It goes from being a hard rock to being just like wet clay. It is like carving a bar of soap, its that soft.
You can carve it when its soft, or carve it when it has dried and hardened for different results.
The tools I used were mainly just wood carving knives. When it is soaked, you can easily shape it into any form with just a sharp knife. When you let it dry, then you can finish shaping with files and sandpaper. No need for a french wheel or a dremel if you soak it first.
I did use a dremel for carving some detail into the piece, I just used the tip of a plain drill bit and it easily eats away the meerschaum. Experiment with many types of knives, tools and bits for different effects.
I still havent finished the pipe, but really had a lot of fun carving it. If you have any access to some raw meer, Please PM me right away ! Would love to get my hands on a few more pieces.
Ryan Alden
http://www.aldenpipes.com
http://www.aldenpipes.com

Re: working in meerschaum...
That's pretty cool! I'd love to see the pipe when it's finished.
Rad
Rad
Re: working in meerschaum...
Edward... my friend... i would like to make a classical pipe out of it... just like the ones i am making from briar... i don't like carved pipes... that is why i was asking about the french wheel and sandpaper - can i use them to shape the block when it is dry or is it to hard to shape with a wheel????Edward wrote:Hey Daniel, finally something I can help with !
I found three blocks of rough Turkish meerschaum for sale awhile back, and spent a day carving one of them.
The trick is (if its block meerschaum) to soak it in distilled water for about 10 minutes. It goes from being a hard rock to being just like wet clay. It is like carving a bar of soap, its that soft.
You can carve it when its soft, or carve it when it has dried and hardened for different results.
The tools I used were mainly just wood carving knives. When it is soaked, you can easily shape it into any form with just a sharp knife. When you let it dry, then you can finish shaping with files and sandpaper. No need for a french wheel or a dremel if you soak it first.
I did use a dremel for carving some detail into the piece, I just used the tip of a plain drill bit and it easily eats away the meerschaum. Experiment with many types of knives, tools and bits for different effects.
I still havent finished the pipe, but really had a lot of fun carving it. If you have any access to some raw meer, Please PM me right away ! Would love to get my hands on a few more pieces.
how is it related drilling....? can i chuck it into a cross vice without braking it???
Re: working in meerschaum...
btw. cool looking pipe ... like to see it finished...
Re: working in meerschaum...
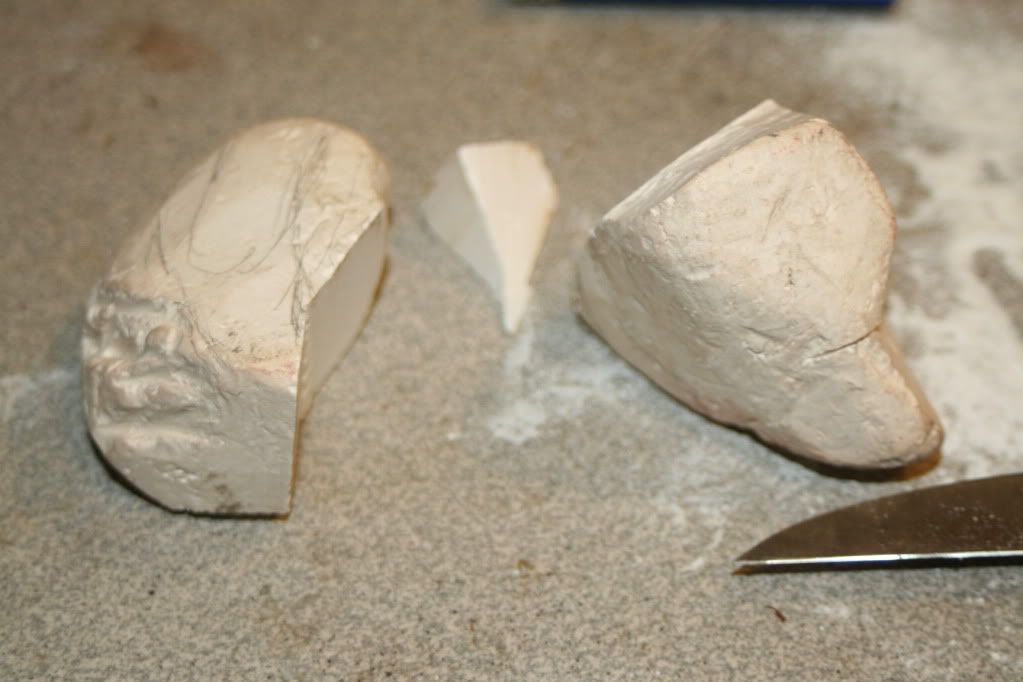
If it were me I would probably use the methods I use for briar as that is what I am used to and comfortable with. That being said however I think I would soak it first and remove as much material as possible with a knife and saw to make it easier, then let it harden up a bit to finish with sandpaper and wheel.
Trevor Talbery recently made a Meer Calabash, maybe you should talk to him about it.
Trevor Talbery recently made a Meer Calabash, maybe you should talk to him about it.

Re: working in meerschaum...
Holy cow, for some reason I always though Meer was clay and that it was sculpted and baked. That's pretty cool that you whittle it like basswood (I whittle... more in the past than I do right now, but that's still cool to me). Are there different qualities of Meer like there is briar? I might want to try that.
Hello, I'm #1312.
That's a really big number.
That's a really big number.
Re: working in meerschaum...
Daniel, meerschaum is actually pretty strong. I think the biggest problem would be natural fractures in the stone that might break with too much pressure from a vise or power tools.
I would only put it in a vise when it is a solid square block. Any small details or curved shapes would end up breaking off or fracturing.
Drill at really slow speeds, it doesnt take very much at all to drill it.
I would not turn it on a lathe, you probably could, but you would probably break some of it too.
When its dry, a french wheel would probably be just fine but it will eat quickly through the material.
Probably the best directions I could give would be;
Square the piece with a sander
Drill while it is dry
Soak for 15 minutes (depending on how large it is, takes some time to soak to the middle)
Roughly carve the shape with any sharp knife (Use a blade to shape while wet)
Let the piece dry for a day or two
Use files, sandpaper, dremel to shape while its dry
Soak again for 10 minutes and wet sand
Let dry, then fine sandpaper until its smooth.
Finish with a couple coats of pure Beeswax
Ryan Alden
http://www.aldenpipes.com
http://www.aldenpipes.com
Re: working in meerschaum...
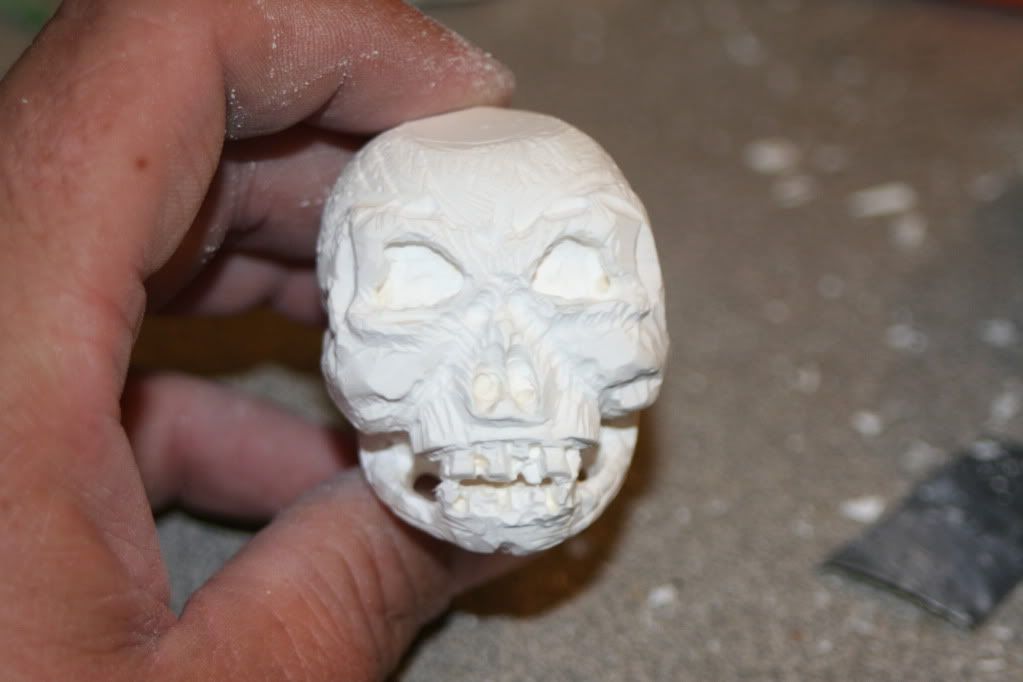
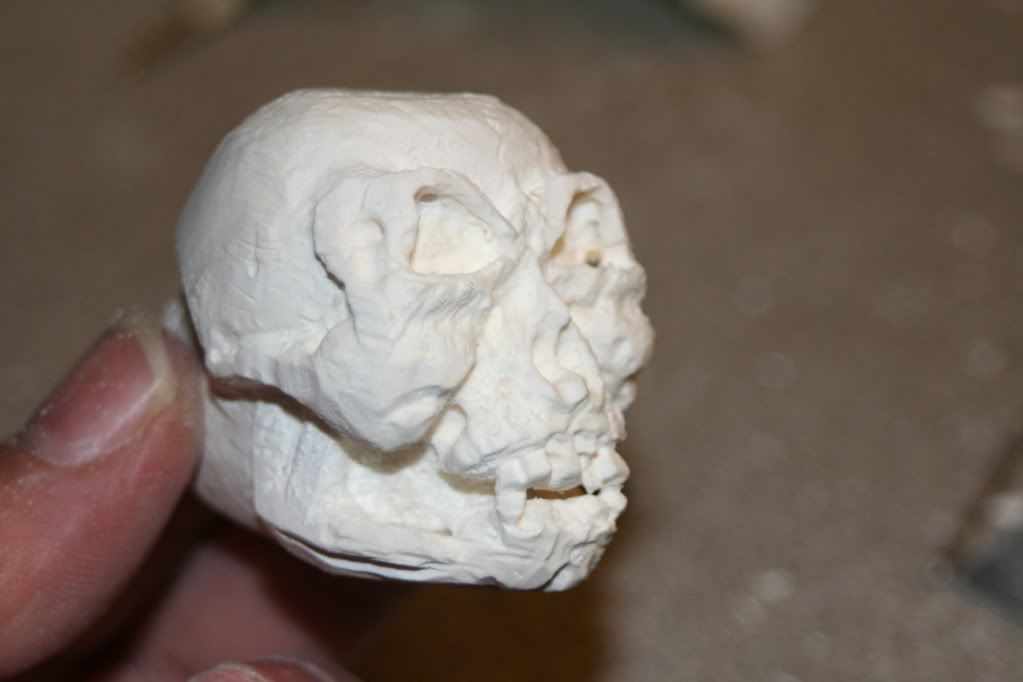
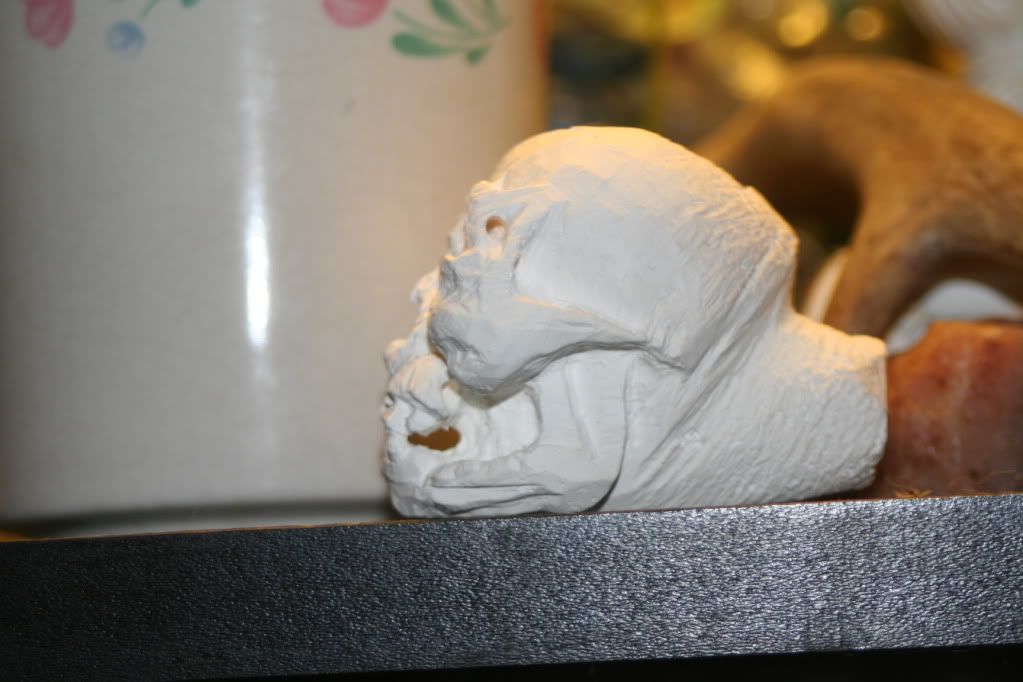
Thanks for the compliments on my little pipe too. Personally I'm not that happy with it but theres a learning curve to it. If I was doing the same pipe again I would have changed the placement just a bit to change some proportions on the skull. I just wanted to make something ugly and horrifying to smoke around Halloween, and I think I accomplished that.
Next up I will do a horn or a cutty with the other half of that block.
Next up I will do a horn or a cutty with the other half of that block.
Ryan Alden
http://www.aldenpipes.com
http://www.aldenpipes.com
Re: working in meerschaum...
Edward - thank you... i will keep everybody posted about the result...
regards
daniel
regards
daniel

Re: working in meerschaum...
Be very careful when sanding Meerschaum, this stuff is almost as soft as plaster-of-paris. Start with a finer grit than you think you need.
When you have sanded it to its final shape, hand sand it through a series of Micro-Mesh sanding sheets, all the way from 1800 to 12000 (approx. 600 to 4000 standard sanding grits). By the time you get to the finest grit, you are actually burnishing it. Do NOT try to get a final finish on a buffing wheel, since that will actually reduce the shine from the 12000(4000) Micro-Mesh. (OK, you won't believe me, so take it to the buffer. Now, go back and burnish it like I told you to do in the first place ).
).
At this stage, melt enough beeswax in a container (tin can works OK) to completely immerse the meerschaum. Tie a piece of string to the shaped bowl (or figure something out) and dip it in the liquid wax for a few seconds. Remove from wax and see what happens. If the meerschaum absorbs all the surface wax, dip it again until the meerschaum stops absorbing wax. Wipe off excess wax from surface with a paper towel.
The finish will have dulled down a bit, so go back to the last 3 or 4 grits of Micro-Mesh and burnish it again. You will have a beautiful glass-like finish.
PS: All the above is done when the meerschaum is completely dry and at room temperature (except when you'r wax dipping it, of course).
When you have sanded it to its final shape, hand sand it through a series of Micro-Mesh sanding sheets, all the way from 1800 to 12000 (approx. 600 to 4000 standard sanding grits). By the time you get to the finest grit, you are actually burnishing it. Do NOT try to get a final finish on a buffing wheel, since that will actually reduce the shine from the 12000(4000) Micro-Mesh. (OK, you won't believe me, so take it to the buffer. Now, go back and burnish it like I told you to do in the first place
At this stage, melt enough beeswax in a container (tin can works OK) to completely immerse the meerschaum. Tie a piece of string to the shaped bowl (or figure something out) and dip it in the liquid wax for a few seconds. Remove from wax and see what happens. If the meerschaum absorbs all the surface wax, dip it again until the meerschaum stops absorbing wax. Wipe off excess wax from surface with a paper towel.
The finish will have dulled down a bit, so go back to the last 3 or 4 grits of Micro-Mesh and burnish it again. You will have a beautiful glass-like finish.
PS: All the above is done when the meerschaum is completely dry and at room temperature (except when you'r wax dipping it, of course).
Regards,
Frank.
------------------
Grouch Happens!
People usually get the gods they deserve - Terry Pratchett
Frank.
------------------
Grouch Happens!
People usually get the gods they deserve - Terry Pratchett